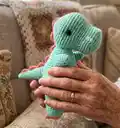
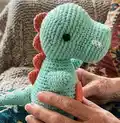
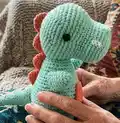
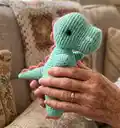
About This Tommy the T-Rex Amigurumi Pattern
This pattern guides you to crochet Tommy the T-Rex — a mischievous, cuddly dinosaur amigurumi with a chunky head, chubby torso and embroidered details. It includes step-by-step rounds for each piece and clear assembly instructions. Designed for intermediate crocheters using US terminology, it uses tightly worked stitches to create a neat finish.
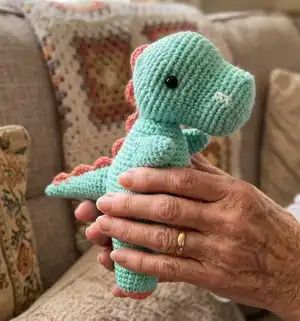
You will make two legs, arms, a head, tail and an appliqued stomach before sewing everything together. The pattern also shows where to place safety eyes and how to embroider stripes and teeth.
Why You'll Love This Tommy the T-Rex Amigurumi Pattern
I absolutely love this pattern because Tommy has a playful personality and simple shapes that come together beautifully. I enjoy how the shaping of the head and torso creates a charming silhouette that is both cute and expressive. The pattern allows for fun finishing touches like embroidered stripes and teeth which really bring Tommy to life. Working this pattern is satisfying because the rounds are logical and the assembly is straightforward, so you see your dinosaur take shape quickly.
Switch Things Up
I love customizing this pattern by changing colour palettes; try pastel tones for a gentle nursery toy or bold neons for a playful twist.
To make Tommy larger or smaller, change your yarn weight and hook size — bulky yarn with a larger hook gives a chunkier toy, while finer yarn creates a mini version.
I often swap the safety eyes for embroidered eyes when making toys for very young children for added safety and a softer look.
Try different stitch textures like alternating BLO rounds to create subtle ridges or use a half double crochet round for a slightly different density.
Add wire inside the tail or limbs if you want a posable figure; wrap wire in yarn to prevent poking through stuffing.
Experiment with additional appliques like small stars or hearts instead of the stomach patch to personalize each dinosaur.
Vary the spacing and colour of the embroidered stripes on the back and tail to create unique patterns and characters.
Use felt or small sewn-on accessories such as a tiny scarf, bow or hat to give Tommy extra personality.
For a rustic look, use natural-colour cotton or linen-blend yarn and slightly looser tension for a soft, vintage feel.
I also recommend trying different bobble stitch placements on the head or back for playful bumps and texture that change the overall character.
Common Mistakes & How to Fix Them
✗ Skipping stitch markers during rounds can lead to lost count and uneven shaping; place a marker at the start of each round and move it as you go to stay accurate.
✗ Overstuffing the head or torso will distort the shape and make seams difficult to close; stuff gradually, checking shape often and adding small amounts of fiberfill.
✗ Changing colour incorrectly can leave loose ends or gaps; always pull through the new colour on the last stitch of the previous round and weave in ends securely.
✗ Not checking safety eye placement may result in misaligned features; place eyes between the specified rounds and count stitches to ensure they are 25 stitches apart as instructed.