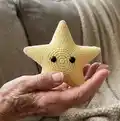
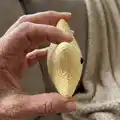
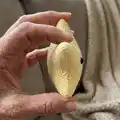
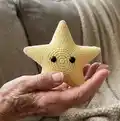
About This Sterling the Star Amigurumi Pattern
This pattern teaches you how to crochet Sterling the Star, a soft stuffed star that measures about 10" point-to-point. It uses worsted weight yarn worked through the back loops in a continuous spiral to create five defined points and a plush center. The pattern includes detailed round-by-round instructions and an optional felt-eye tutorial so you can finish the face exactly how you like it.
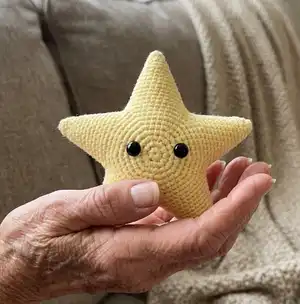
You'll learn to join points into a smooth body, stuff each point for crisp shaping, and attach either safety eyes or hand-sewn felt eyes. Perfect for gifting, mobiles, or as a cute nursery accent.
Why You'll Love This Sterling the Star Amigurumi Pattern
I absolutely love this pattern because it turns simple stitches into a playful three-dimensional star with lots of personality. I enjoy the clean, crisp points that form when you stuff each tip carefully — it feels almost sculptural. The felt-eye tutorial lets me add subtle highlights that make each star unique and expressive. I also appreciate that the pattern is compact enough for a weekend project but still rewarding in the finished result.
Switch Things Up
I love customizing this pattern by changing the yarn color to create seasonal or themed stars; try pale pinks for baby decor or metallic yarn for a holiday ornament.
I sometimes make a mini version by using fingering-weight yarn and a smaller hook to create tiny keychain stars.
For an ultra-plush star, I use a bulkier yarn and a larger hook to make a chunky, squishy version great for toddlers.
I like adding tiny embroidered mouths or blush with pastel embroidery floss to give each star a unique expression and personality.
Swap the 15mm safety eyes for smaller or larger sizes to change the character; remember to adjust placement slightly for proportion.
Try sewing on felt eyes in different shapes—ovals or heart-shaped highlights can make whimsical expressions.
I often thread a loop through one point before finishing to turn the star into a hanging ornament or mobile piece.
For a sparkling finish, add a few sequins or beads around the center using fine thread to catch the light without weighing the star down.
If you want a reversible two-tone star, crochet each set of five points in a contrasting color and join them, flipping the star as desired to show a different side.
I sometimes stuff the points more firmly than the body for sharper tips, which creates a more pronounced star silhouette when displayed.
Want to make a set? I create matching small, medium, and large stars in a single color palette for nursery mobiles or garlands.
Finally, experiment with embroidered freckles or stitched constellations across the body to personalize each star and tell a story with your stitches.
Common Mistakes & How to Fix Them
✗ Not marking the start of the round when working in a continuous spiral causes you to lose track of rounds; use a stitch marker at the first stitch and move it each round.
✗ Working through both loops instead of the back loop only will change the texture and point definition; be sure to crochet through the back loops only as instructed for consistent shaping.
✗ Skipping the instruction to fasten off all but the fifth point can leave you with loose tails when joining; leave the long tail on the fifth point and follow the join instructions carefully.
✗ Stuffing too much too early will stretch and distort the points; stuff gradually, beginning with a little filler in each point, and add more stuffing every few rounds for best shaping.
✗ Placing safety eyes too high or unevenly will unbalance the face; attach safety eyes at round 7 and measure spacing carefully before securing to ensure symmetry.