About This Starfish Amigurumi Pattern
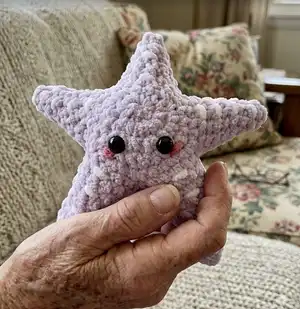
This pattern creates a soft, five-armed starfish amigurumi using super bulky yarn for a plush, squishy finish. You will crochet two main pieces (belly and back), join them, shape the arms and stuff to get the iconic star shape. Simple increases and decreases form the arms and body for a satisfying, quick project.
Ideal for beginners and quick makes, the pattern uses basic single crochet stitches and clear row counts. Decorative steps include attaching safety eyes and embroidery for cheeks and small spikes to add personality.
Why You'll Love This Starfish Amigurumi Pattern
I absolutely love this pattern because it transforms simple rounds into a charming sea creature with very little effort. I enjoy how quickly the super bulky yarn builds up texture and shape, making the project feel rewarding in just a few hours. The design is playful and customizable so I can change colors or add little embroidered details to make each starfish unique. Sharing this pattern feels like passing on a small handmade hug to friends and family.
Switch Things Up
I love changing up the colors to create different moods for the starfish; I often try pastel palettes for a soft nursery look.
I sometimes use variegated or textured super bulky yarn to add instant interest without extra stitches.
If I want a tiny keychain version I use a lighter weight yarn and a smaller hook to scale the pattern down.
I like to add embroidered freckles or tiny spots on one arm to give the starfish personality and character.
For a more realistic look I use different shades of purple or pink and blend them with a few surface crochet stitches as spikes.
I also experiment with eye placement to change expression; moving them slightly closer creates a cuter face.
To make the toy more durable for kids I secure safety eyes with washers and a dab of hot glue behind each eye.
I occasionally add a small loop at the top with chain stitches to hang the starfish as an ornament or decoration.
For gifting I stuff a little sachet of lavender inside before closing so the starfish doubles as a scented decoration.
When making a set I mix colors and embroider matching details so each starfish looks like part of a coordinated ocean family.
Common Mistakes & How to Fix Them
✗ Skipping stitch markers when joining the belly and back can cause uneven joins; place markers to align pieces before crocheting them together.
✗ Not stuffing the arms as you shape them leads to floppy tips and uneven arms; add small amounts of fiberfill gradually while shaping each arm.
✗ Using inconsistent tension makes the starfish look lumpy or misshapen; practice consistent, relaxed tension and count stitches after each row.
✗ Placing safety eyes too near the edge can cause instability or distort the shape; measure and place eyes between rows 3 and 4 with four stitches between them before fastening.
✗ Cutting yarn too short at the end of a section makes sewing pieces together difficult; leave a long tail for sewing and weaving in ends securely.