About This Spiral Hat Amigurumi Pattern
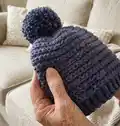
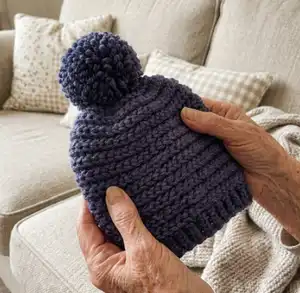
This Spiral Hat pattern makes a cozy chunky beanie worked in a spiral using half double crochet into the horizontal bar for a distinctive ribbed spiral texture. You can make sizes for children (2/4, 6/8, 10/12) and average adult using Bernat Softee Chunky solids or Ombres. The hat finishes with a playful pompom and is worked from the top down in rounds without joining.
The instructions include size-specific rounds and clear notes about working into the horizontal bar and spiral rounds. A simple finishing section explains how to make and attach a pompom to complete the hat.
Why You'll Love This Spiral Hat Amigurumi Pattern
I absolutely love this pattern because it creates such a bold, textured spiral with a simple stitch technique. I enjoy how quickly the hat grows using bulky yarn, making it a satisfying project for a single afternoon. The horizontal-bar hdc gives a professional, hand-knit look without complicated stitches. I also love that the pattern includes sizes from child to adult, so it is versatile for gifting and family matching.
Switch Things Up
I love experimenting with color for this Spiral Hat; try alternating two colours every two or three rounds for a striped spiral effect.
I sometimes use Ombres yarn to create a variegated fade without having to change skeins, which looks fantastic with the spiral texture.
I recommend trying thicker or thinner yarns to change the finished size; use a larger hook for a slouchy adult beanie or a smaller hook for a snug children's fit.
I also enjoy swapping the pompom for a crocheted flower or button for a different finish that suits a child's or adult's style.
I will occasionally embroider a small initial near the brim for personalization — use a contrasting yarn and stitch it on after finishing.
I like to add a simple folded brim by working ribbing for a few more rows before finishing if I want a turned brim look.
I sometimes add faux fur pompoms for a luxe look — attach them with a removable loop so they can be swapped or washed easily.
I advise trying safety stitch markers or locking markers in bright colors to help track rounds when you change yarns frequently.
I will experiment with carrying a second colour up the inside for subtle edge details, making sure floats are neat and not too tight.
I also enjoy making matching sets by using the same yarn for a hat and a quick scarf or cowl, keeping the same spiral texture theme across accessories.
Common Mistakes & How to Fix Them
✗ Not placing a stitch marker at the beginning of each round causes losing the start point; place a marker on the first stitch and move it each round to avoid counting errors.
✗ Joining at the end of rounds when the pattern says not to will break the spiral texture; work in a continuous spiral and do not join at the end of rounds.
✗ Working into the usual top loops instead of the horizontal bar will ruin the spiral effect; follow the diagram and insert your hook into the horizontal bar shown on the wrong side.
✗ Using the wrong hook size for the yarn weight changes the hat size and drape; check gauge (8 sc and 9 rows = 4" [10 cm]) and use U.S. L/11 (8 mm) or adjust hook to obtain gauge.