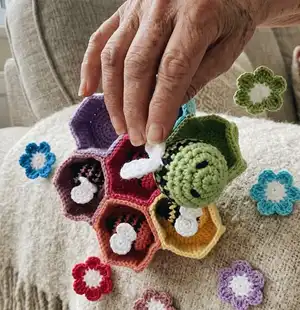
Make a delightful magnetic sorting toy set with seven colorful bowls, matching bees and flowers. This pattern guides you through crocheting bowls, tiny bees with magnet pockets, and cute flowers to match — perfect for playful learning and hands-on fun. Follow step-by-step rounds, helpful tips and photo guidance to create a charming, tactile toy for kids or gifts.
Progress Tracker
0% Complete
— Bowls :
Round 1 :
MR + sc X 6 => 6
Info :
Tip! Before pulling the tail to close the ring, insert the hook in the first stitch; in this way you will keep it loose enough for the hook to be inserted in the next row.
Info :
From this row down you should make "special increases - splnc" instead of normal ones. A special increase is a [sc + ch + sc] in the same stitch. You should add the extra chain in the increase to make your bowl more like a polygon. Do not count or work in the extra chain when working the next rows – it just helps with the shape so just ignore it.
Round 3 :
(1 sc + 1 splnc) X 6 => 18
Round 4 :
(2 sc + 1 splnc) X 6 => 24
Round 5 :
(3 sc + 1 splnc) X 6 => 30
Round 6 :
(4 sc + 1 splnc) X 6 => 36
Round 7 :
(5 sc + 1 splnc) X 6 => 42
Info :
The next row is a back loop only, with no increases. In this row we will also consider the extra chain from the special increase. So instead of 42 single chains we will have 48 sc as we go round.
Round 8 :
BLO sc X 48 => 48
Round 9-16 :
sc X 48 => 48
Info :
Now we are going to do the 6 edges on the sides of the bowls.
Item Name (Edge) :
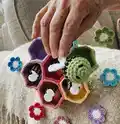
Repeat X 6: Sl X 8. Like in the 3rd picture below go down with 9 X sc (you will be working over rows 16-8) (make sure your last sc is in the front loop of row 8). Go back up with 10 X Sl – the slip stitches should be on the back of the single chains you just made (the last one should be at the top).
Info :
Optionally you can sew the bowls together like I did. There is no technique for this, but you will need a lot of patience.
— Bee :
Info :
Make 7, one for every color.
Section :
a. Make the magnet support:
Round 1 :
MR + sc X 6 => 6, slip stitch in the first sc, leave a tail for sewing
Info :
(the magnet should be small enough to fit in this pocket; however if yours is bigger just make an extra row to cover it ➔ R2: inc X 6 => 12)
Section :
b. Make 2 wings – with white:
Round 1 :
MR + sc X 6 => 6
Round 2 :
inc X 6 => 12 , slip stitch in the first sc, leave a tail for sewing; sew the two wings together and leave the tail for sewing into the bee
Section :
c. Make the bee:
Round 1 :
With main color: MR + sc X 6 => 6
Round 3 :
(1 sc + 1 inc) X 6 => 18
Info :
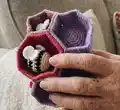
Stop and sew the magnet socket (with the magnet inside) around rows 1/2. Make sure all your magnets are inserted in the same direction. To test this, use another magnet that should connect with all the bees on the same side.
Info :
Sew also the eyes in increases 1 and 3 of row 2, using black needle. If you choose safety eyes go for the smallest you can find (5 mm or smaller).
Round 6 :
With black: sc X 18 => 18
Info :
When changing the color: at row 6, in the last single crochet, make half of the stitch with your main color but then finish with the other color (black in this case) like in the pictures below.
Round 7 :
With main color: sc X 18 => 18
Round 8 :
With black: sc X 18 => 18
Round 9 :
With main color: sc X 18 => 18
Round 10 :
With black: (4 sc + 1 dec) X 3 => 15
Info :
Sew the wings between rows 7 and 9. Make sure they are centered between the eyes. Start stuffing the bee, stuff as you go.
Round 11 :
With main color: (3 sc + 1 dec) X 3 => 12
Round 12 :
With black: (2 sc + 1 dec) X 3 => 9
Round 13 :
(1 sc + 1 dec) X 3 => 6
Round 14 :
close the bee with a needle: insert a needle in the front loop of every stitch from the exterior to the middle of the stitch; after covering all 6 stitches pull firmly to close the ring. Insert the needle a couple of extra times under the stitches to make sure it's well secured. Hide the yarn.
— Flower :
Info :
Make 7, one for every color.
Section :
a. Make the magnet support:
Round 1 :
MR + sc X 6 => 6, slip stitch in the first sc, leave a tail for sewing
Info :
(the magnet should be small enough to fit in this pocket; however if yours is bigger just make an extra row to cover it ➔ R2: inc X 6 => 12)
Section :
b. Make the flower – with white:
Round 1 :
MR + DC X 13 => 13, sl stitch in the second DC
Info :
We will not work on the first DC, so we will consider 12 DC, we will use them for 6 petals.
Round :
With the main color (change color at the slip stitch as learned before) REPEAT 6 times: sc X 2 in the current stitch. 3 TREBLE CROCHET in the next stitch, sc X 2 in the current stitch. Slip stitch in the next stitch.
Info :
Sew the magnet cover, containing the magnet in the back of the flower – make sure the magnet is in the correct direction – to test this just place the bee in front of the flower and they should connect like in the picture.
This colorful Sorting Bees set brings hands-on matching and lots of playful learning to little ones. The tiny bees, sunny flowers and hex bowls make a tactile activity that is bright and satisfying to crochet. Make a full rainbow set for a special gift or classroom toy — creative play awaits! 🧶🐝✨