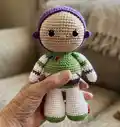
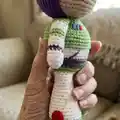
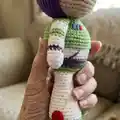
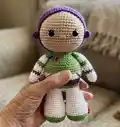
About This Buzz Lightyear Amigurumi Pattern
This pattern creates a detailed Buzz Lightyear amigurumi with a documented head detail, ears, legs, hands and embroidered emblem. You will work in rounds with color changes and small pieces to sew. Photographs accompany many steps to make assembly and shaping clearer.
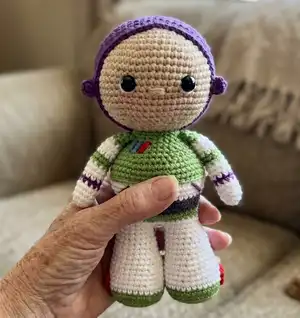
The pattern uses cotton yarns and a small hook for tight stitches and neat shaping. Techniques include magic ring, increases, decreases, BLO rounds, and simple embroidery for details.
Why You'll Love This Buzz Lightyear Amigurumi Pattern
I absolutely love this pattern because it brings a tiny, recognizable Buzz Lightyear to life through simple modular pieces. I enjoy the balance of shaping and small details — the head detail and embroidered emblem are especially satisfying. The instructions and photos make tricky steps like eye shaping and color changes approachable. It is rewarding to finish and see the character personality emerge while sewing and embroidering.
Switch Things Up
I love how easy it is to customize this pattern by changing colors; try pastel greens and lilacs for a soft, whimsical Buzz alternative.
If you want a larger version, use a bulkier yarn and a larger hook to create a gift-sized or cuddle-sized figure.
For a tiny keychain version, use thinner yarn and a smaller hook and reduce rounds proportionally to keep the shape.
Add wire inside the arms for posability if you want your Buzz to hold a tiny accessory or stand with a pose.
Experiment with eye types: plastic safety eyes for shine, embroidered eyes for a softer finish, or felt appliques for a stylized look.
I sometimes add tiny Velcro accessories so outfits or helmets can be removed for play or display.
Try stitching different facial expressions by adjusting eyebrow or mouth placement to change the character's personality.
Use a variegated yarn for part of the suit to create a textured, unique finish without extra color changes.
Embroider additional tiny patches or name tags to personalize each figure as a gift with initials or a date.
I recommend testing small changes on a scrap swatch first so you can see how they affect the stitch count and shape before applying to the full pattern.
Common Mistakes & How to Fix Them
✗ Skipping the instruction to insert safety eyes between rows 15-16 can misplace the eyes; insert eyes at the recommended rows and count stitches between them for consistent placement.
✗ Forgetting to leave long sewing tails on small details makes assembly difficult; always leave a long tail for sewing when instructed so you can attach pieces cleanly.
✗ Not stuffing in stages causes lumps or uneven shapes; stuff gradually and shape as you go, especially before closing rounds where the pattern says 'Stuff'.
✗ Changing yarn color without securing the last stitch can create loose ends; carry the yarn neatly or weave ends in immediately and secure color changes at the start of the next round.