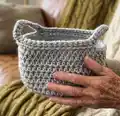
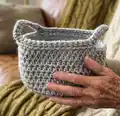
About This Simple Basket Pattern
This pattern creates a simple, round crochet basket approximately 3.5 inches tall by 4 inches wide using medium weight yarn. It is worked in the round with single crochet and half double crochet stitches and includes a built-in handle formed by chains. The design is easily customizable in height and color and is perfect for using leftover yarn.
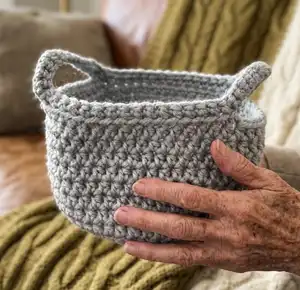
Includes full round-by-round instructions, a gauge swatch, special stitch notes, and an abbreviation guide. Follow the finishing row and row instructions to create clean handles and a neat finish.
Why You'll Love This Simple Basket Pattern
I absolutely love this pattern because it turns small scraps of yarn into a practical, stylish accessory for any room. I enjoy how quickly a basket comes together — it is rewarding to finish one in just a few hours. The pattern is simple but versatile, so I can experiment with color changes and different heights for varied uses. I also appreciate that the handle is integrated, giving a polished look without extra sewing work. Making these baskets always brings a little handmade joy to my home.
Switch Things Up
I love customizing this pattern by changing yarn colors; try stripes or two-tone combinations for a fresh look.
I sometimes make the basket taller by repeating Rnd 11 until I reach the height I want for a deeper storage basket.
To create a smaller or mini version I use a lighter weight yarn and a smaller hook for a scaled-down basket perfect for keys.
I often stitch more single crochets around the chain handles if my chains look loose so the handles sit neatly with the basket body.
I like to experiment with texture by using a boucle or chenille yarn to create a plush, tactile basket handle and exterior.
I also try alternating BLO and FLO rows to create subtle ridges around the basket for decorative interest.
For a sturdier base I sometimes insert a round piece of cardboard or add a fabric circle sewn into the lining to help the basket hold its shape.
I enjoy making matching sets in different sizes by adjusting the number of rounds before Rnd 19 so they nest together beautifully.
Embroider simple initials or motifs on the side after finishing for a personalized touch that makes great gifts.
I often add a fabric lining glued or hand-sewn inside to protect delicate items and give a finished interior look.
Common Mistakes & How to Fix Them
✗ Skipping the stitch marker in round one makes it hard to track the beginning of rounds; place a marker at the start of every round and move it up as you work.
✗ Working the wrong loop on rounds intended for back loop only will change the texture significantly; be sure to insert your hook under the back loop only for Rnd 10 as instructed.
✗ Not counting stitches after increases can lead to too many or too few stitches in subsequent rounds; count stitches at the end of each increase round to maintain correct totals.
✗ Making the chain handles too loose can look uneven with the surrounding single crochets; add more single crochets around the chain or tighten the chain to make them blend neatly.