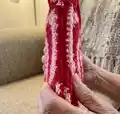
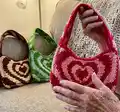
Make a stylish tapestry shoulder bag featuring a heart motif using single crochet colourwork. This pattern walks you through each section step-by-step — main body panels, base, and a long strap — with chart and written instructions. You can adapt yarn weight and colours to create a mini or oversized version. Perfect for making a handmade statement piece or a thoughtful gift.
Progress Tracker
0% Complete
— Part 1: Creating the main body of the bag :
Part 1A: Creating the rectangular portion of the main body (Tapestry chart: P1A) :
Chart legend: black = C1, grey = C2. Begin by chaining 37 in C1, and then follow the chart. Do NOT fasten off once you finish - move onto part 1B (written instructions).
Info :
Begin by chaining 37 in C1.
Row 1 :
[note - place the first sc in the second ch from your hook] 7 scs in C1, change colour, 5 scs in C2, change colour, 4 scs in C1, change colour, 4 scs in C2, change colour, 4 scs in C1, change colour, 5 scs in C2, change colour, 7 scs in C1. Ch1 and turn your work.
Row 2 :
6 scs in C1, change colour, 5 scs in C2, change colour, 4 scs in C1, change colour, 6 scs in C2, change colour, 4 scs in C1, change colour, 5 scs in C2, change colour, 6 scs in C1. Ch1 and turn your work.
Row 3 :
5 scs in C1, change colour, 5 scs in C2, change colour, 4 scs in C1, change colour, 8 scs in C2, change colour, 4 scs in C1, change colour, 5 scs in C2, change colour, 5 scs in C1. Ch1 and turn your work.
Row 4 :
4 scs in C1, change colour, 5 scs in C2, change colour, 4 scs in C1, change colour, 4 scs in C2, change colour, 2 scs in C1, change colour, 4 scs in C2, change colour, 4 scs in C1, change colour, 5 scs in C2, change colour, 4 scs in C1. Ch1 and turn your work.
Row 5 :
3 scs in C1, change colour, 5 scs in C2, change colour, 4 scs in C1, change colour, 4 scs in C2, change colour, 4 scs in C1, change colour, 5 scs in C2, change colour, 3 scs in C1. Ch1 and turn your work.
Row 6 :
3 scs in C1, change colour, 4 scs in C2, change colour, 4 scs in C1, change colour, 3 scs in C2, change colour, 8 scs in C1, change colour, 3 scs in C2, change colour, 4 scs in C1, change colour, 4 scs in C2, change colour, 3 scs in C1. Ch1 and turn your work.
Row 7 :
2 scs in C1, change colour, 4 scs in C2, change colour, 4 scs in C1, change colour, 3 scs in C2, change colour, 4 scs in C1, change colour, 2 scs in C2, change colour, 4 scs in C1, change colour, 3 scs in C2, change colour, 4 scs in C1, change colour, 4 scs in C2, change colour, 2 scs in C1. Ch1 and turn your work.
Row 8 :
1 sc in C1, change colour, 4 scs in C2, change colour, 4 scs in C1, change colour, 3 scs in C2, change colour, 3 scs in C1, change colour, 6 scs in C2, change colour, 3 scs in C1, change colour, 3 scs in C2, change colour, 4 scs in C1, change colour, 4 scs in C2, change colour, 1 sc in C1. Change colour, ch1 and turn your work.
Row 9 :
4 scs in C2, change colour, 4 scs in C1, change colour, 3 scs in C2, change colour, 3 scs in C1, change colour, 3 scs in C2, change colour, 2 scs in C1, change colour, 3 scs in C2, change colour, 3 scs in C1, change colour, 3 scs in C2, change colour, 4 scs in C1, change colour, 4 scs in C2. Ch1 and turn your work.
Row 10 :
3 scs in C2, change colour, 4 scs in C1, change colour, 4 scs in C2, change colour, 2 scs in C1, change colour, 3 scs in C2, change colour, 4 scs in C1, change colour, 3 scs in C2, change colour, 2 scs in C1, change colour, 4 scs in C2, change colour, 4 scs in C1, change colour, 3 scs in C2. Ch1 and turn your work.
Row 11 :
3 scs in C2, change colour, 3 scs in C1, change colour, 4 scs in C2, change colour, 3 scs in C1, change colour, 2 scs in C2, change colour, 6 scs in C1, change colour, 2 scs in C2, change colour, 3 scs in C1, change colour, 4 scs in C2, change colour, 3 scs in C1, change colour, 3 scs in C2. Ch1 and turn your work.
Row 12 :
2 scs in C2, change colour, 4 scs in C1, change colour, 3 scs in C2, change colour, 3 scs in C1, change colour, 2 scs in C2, change colour, 8 scs in C1, change colour, 2 scs in C2, change colour, 3 scs in C1, change colour, 3 scs in C2, change colour, 4 scs in C1, change colour, 2 scs in C2. Ch1 and turn your work.
Row 13 :
2 scs in C2, change colour, 3 scs in C1, change colour, 4 scs in C2, change colour, 2 scs in C1, change colour, 3 scs in C2, change colour, 8 scs in C1, change colour, 3 scs in C2, change colour, 2 scs in C1, change colour, 4 scs in C2, change colour, 3 scs in C1, change colour, 2 scs in C2. Ch1 and turn your work.
Row 14 :
1 sc in C2, change colour, 4 scs in C1, change colour, 3 scs in C2, change colour, 3 scs in C1, change colour, 3 scs in C2, change colour, 8 scs in C1, change colour, 3 scs in C2, change colour, 3 scs in C1, change colour, 3 scs in C2, change colour, 4 scs in C1, change colour, 1 sc in C2. Ch1 and turn your work.
Row 15 :
1 sc in C2, change colour, 3 scs in C1, change colour, 4 scs in C2, change colour, 3 scs in C1, change colour, 4 scs in C2, change colour, 2 scs in C1, change colour, 2 scs in C2, change colour, 2 scs in C1, change colour, 4 scs in C2, change colour, 3 scs in C1, change colour, 4 scs in C2, change colour, 3 scs in C1, change colour, 1 sc in C2. Change colour, ch1 and turn your work.
Row 16 :
4 scs in C1, change colour, 4 scs in C2, change colour, 3 scs in C1, change colour, 14 scs in C2, change colour, 3 scs in C1, change colour, 4 scs in C2, change colour, 4 scs in C1. Ch1 and turn your work.
Row 17 :
4 scs in C1, change colour, 4 scs in C2, change colour, 4 scs in C1, change colour, 5 scs in C2, change colour, 2 scs in C1, change colour, 5 scs in C2, change colour, 4 scs in C1, change colour, 4 scs in C2, change colour, 4 scs in C1. Ch1 and turn your work.
Row 18 :
4 scs in C1, change colour, 5 scs in C2, change colour, 5 scs in C1, change colour, 2 scs in C2, change colour, 5 scs in C1, change colour, 2 scs in C2, change colour, 4 scs in C1, change colour, 5 scs in C2, change colour, 4 scs in C1. Ch1 and turn your work.
Row 19 :
4 scs in C1, change colour, 5 scs in C2, change colour, 8 scs in C1, change colour, 2 scs in C2, change colour, 8 scs in C1, change colour, 5 scs in C2, change colour, 4 scs in C1. Ch1 and turn your work.
Row 20 :
5 scs in C1, change colour, 5 scs in C2, change colour, 6 scs in C1, change colour, 4 scs in C2, change colour, 6 scs in C1, change colour, 5 scs in C2, change colour, 5 scs in C1. Ch1 and turn your work.
Row 21 :
6 scs in C1, change colour, 24 scs in C2, change colour, 6 scs in C1. Ch1 and turn your work - move onto part 1B.
Part 1B: Making decreasing top section on first side :
ROW 22: 6 scs in C1, change colour, 6 scs in C2. Ch1 and turn your work.
Row 23 :
Sk 1 st, 3 scs in C2, change colour, 7 scs in C1, change colour, 1 sc in C2. Ch1 and turn your work.
Row 24 :
1 sc in C2, change colour, 7 scs in C1, sk 2 sts, 1 sc in C1. Ch1 and turn your work.
Row 25 :
Sk 1 st, 6 scs in C1, change colour, 2 scs in C2. Ch1 and turn your work.
Row 26 :
3 scs in C2, change colour, 2 scs in C1, sk 2 sts, 1 sc in C1. Change colour, ch1 and turn your work.
Row 27 :
Sk 1 st, 5 scs in C2. Ch1 and fasten off.
Part 1C :
Attach your yarn in C1 to the other corner of your main body, ch1 and repeat ROW 22 - ROW 27 from part 1B. One side of the main body of your bag is now complete. Repeat all the steps above one more time to create the other side of your bag.
— Part 2: Creating the base/bottom of the bag :
Info :
Tapestry chart: P2. Chart legend: black = C1, grey = C2. Begin by chaining 37 in C2, then follow the chart. Once finished, ch1 and fasten off.
Row 1 :
[note - place the first sc in the second ch from your hook] 1 sc in C2, change colour, 7 sc in C1, change colour, 5 sc in C2, change colour, 4 sc in C1, change colour, 2 sc in C2, change colour, 4 sc in C1, change colour, 5 sc in C2, change colour, 7 sc in C1, change colour, 1 sc in C2. Ch1 and turn your work.
Row 2 :
2 sc in C2, change colour, 8 sc in C1, change colour, 5 sc in C2, change colour, 6 sc in C1, change colour, 5 sc in C2, change colour, 8 sc in C1, change colour, 2 sc in C2. Ch1 and turn your work.
Row 3 :
3 sc in C2, change colour, 8 sc in C1, change colour, 5 sc in C2, change colour, 4 sc in C1, change colour, 5 sc in C2, change colour, 8 sc in C1, change colour, 3 sc in C2. Ch1 and turn your work.
Row 4 :
3 sc in C2, change colour, 8 sc in C1, change colour, 5 sc in C2, change colour, 4 sc in C1, change colour, 5 sc in C2, change colour, 8 sc in C1, change colour, 3 sc in C2. Ch1 and turn your work.
Row 5 :
2 sc in C2, change colour, 8 sc in C1, change colour, 5 sc in C2, change colour, 6 sc in C1, change colour, 5 sc in C2, change colour, 8 sc in C1, change colour, 2 sc in C2. Ch1 and turn your work.
Row 6 :
1 sc in C2, change colour, 7 sc in C1, change colour, 5 sc in C2, change colour, 4 sc in C1, change colour, 2 sc in C2, change colour, 4 sc in C1, change colour, 5 sc in C2, change colour, 7 sc in C1, change colour, 1 sc in C2. Ch1 and fasten off - the base of your bag is now complete.
— Part 3: Creating the strap of the bag :
Info :
The instructions for the strap are split into 3 parts - the first 27 rows (part 3A), the middle 57 (or more) rows (part 3B), and the last 27 rows (part 3C).
Part 3A: The first 27 rows of the strap (Tapestry chart: P3A) :
Chart legend: black = C1, grey = C2. Begin by chaining 9 in C1, and then follow the chart. Do NOT fasten off once you finish - move onto part 3B.
Rows 1 - 2 :
[note - place the first sc of ROW 1 in the second ch from your hook] 1 sc in C1, change colour, 6 scs in C2, change colour, 1 sc in C1. Ch1 and turn your work.
Rows 3 - 4 :
2 scs in C1, change colour, 4 scs in C2, change colour, 2 scs in C1. Ch1 and turn your work.
Rows 5 - 7 :
3 scs in C1, change colour, 2 scs in C2, change colour, 3 scs in C1. Ch1 and turn your work.
Row 8 :
3 scs in C1, change colour, 2 scs in C2, change colour, 3 scs in C1. Change colour, ch1 and turn your work.
Row 9 :
1 sc in C2, change colour, 6 scs in C1, change colour, 1 sc in C2. Ch1 and turn your work.
Row 10 :
2 scs in C2, change colour, 4 scs in C1, change colour, 2 scs in C2. Ch1 and turn your work.
Rows 11 - 25 :
3 scs in C2, change colour, 2 scs in C1, change colour, 3 scs in C2. Ch1 and turn your work.
Row 26 :
2 scs in C2, change colour, 4 scs in C1, change colour, 2 scs in C2. Ch1 and turn your work.
Row 27 :
1 sc in C2, change colour, 6 scs in C1, change colour, 1 sc in C2. Change colour, ch1 and turn your work (do NOT fasten off - move onto part 3B). If you'd like, add a stitch marker to mark this row - this may make it easier when attaching the strap to the main body, however it's not absolutely not compulsory.
Part 3B: The middle 57 (or more) rows of the strap (Tapestry chart: P3B) :
Chart legend: black = C1, grey = C2. Repeat rows 1-8 a total of 7 times (or as many times as you'd like for a longer strap - just ensure to repeat a full set of the 8 rows). After you've done this, repeat the pattern for the first row one more time but this time, change colour at the end of the row. Do NOT fasten off yet - move onto part 3C.
Row 1 :
2 scs in C1, change colour, 4 scs in C2, change colour, 2 scs in C1. Ch1 and turn your work.
Row 2 :
3 scs in C1, change colour, 4 scs in C2, change colour, 1 sc in C1. Change colour, ch1 and turn your work.
Row 3 :
4 scs in C2, change colour, 4 scs in C1. Change colour, ch1 and turn your work.
Row 4 :
1 sc in C2, change colour, 4 scs in C1, change colour, 3 scs in C2. Ch1 and turn your work.
Row 5 :
2 scs in C2, change colour, 4 scs in C1, change colour, 2 scs in C2. Ch1 and turn your work.
Row 6 :
3 scs in C2, change colour, 4 scs in C1, change colour, 1 sc in C2. Change colour, ch1 and turn your work.
Row 7 :
4 scs in C1, change colour, 4 scs in C2. Change colour, ch1 and turn your work.
Row 8 :
1 sc in C1, change colour, 4 scs in C2, change colour, 3 scs in C1. Ch1 and turn your work.
Row 9 - Row 56 :
Repeat ROW 1 - ROW 8 six more times, for a total of 7 sets. If you'd like a longer strap, feel free to repeat these rows as many times as you'd like, just make sure to do a repeat of all 8 rows.
Row 57 :
2 scs in C1, change colour, 4 scs in C2, change colour, 2 scs in C1. Change colour, ch1 and turn your work.
Part 3C: The last 27 rows of the strap (Tapestry chart: P3C) :
Chart legend: black = C1, grey = C2. We will now just be working the chart from part 3A in reverse. Once you finish, ch1 and fasten off - your strap is now complete!
Row 1 :
1 sc in C2, change colour, 6 scs in C1, change colour, 1 sc in C2. Ch1 and turn your work. If you'd like, add a stitch marker to mark this row - this may make it easier when attaching the strap to the main body, however it's not absolutely not compulsory.
Row 2 :
2 scs in C2, change colour, 4 scs in C1, change colour, 2 scs in C2. Ch1 and turn your work.
Row 3 - Row 17 :
3 scs in C2, change colour, 2 scs in C1, change colour, 3 scs in C2. Ch1 and turn your work.
Row 18 :
2 scs in C2, change colour, 4 scs in C1, change colour, 2 scs in C2. Ch1 and turn your work.
Row 19 :
1 sc in C2, change colour, 6 scs in C1, change colour, 1 sc in C2. Change colour, ch1 and turn your work.
Row 20 - Row 23 :
3 scs in C1, change colour, 2 scs in C2, change colour, 3 scs in C1. Ch1 and turn your work.
Row 24 - Row 25 :
2 scs in C1, change colour, 4 scs in C2, change colour, 2 scs in C1. Ch1 and turn your work.
Row 26 - Row 27 :
1 sc in C1, change colour, 6 scs in C2, change colour, 1 sc in C1. Ch1 and fasten off - your strap is now complete.
— Part 4: Attaching the pieces of the bag together :
Attach sides to base :
Align the base of the bag and one side of the main body as shown in the reference images. Attach yarn in C1 through the corner of both pieces, and ch1. Place scs through both layers to attach the two pieces. You may place scs in C1 as you go or change colours to match the base first row pattern. Once you've placed scs all the way along the two pieces, ch1 and fasten off.
Attach the other side :
Repeat the previous steps to attach the second side of the main body to the base, aligning edges and stitching with scs through both layers until complete.
Attach strap to base :
Attach the base of the strap to the base of the bag: attach yarn in C2 through both corners of the base and strap, ch1, then place scs in C2 through both layers as you go. There won’t be exact stitches to go through, so place scs in available spaces and keep it straight and aligned. Once reached the end of the base and strap, ch1 and fasten off.
Attach strap sides to bag :
Now attach one side of the strap to one side of the main body then the other. Begin by attaching yarn in C1 through both the bottom corner of the strap and the bag. Place scs through both layers to attach, aligning the top of the bag to the 27th row of the strap (where you may have placed a stitch marker). Once you reach the top of the bag and the stitch marker, ch1 and fasten off.
Finishing :
Weave in any remaining ends and tidy connections. Pin and adjust if needed to ensure symmetry. Fasten off securely and trim yarn tails. The bag is now complete.
This heart shoulder bag pattern is a fun tapestry crochet project that makes a gorgeous handmade accessory. It combines simple single crochet stitchwork with thoughtful colour changes for a bold effect. Make one for yourself or gift it to someone special — each bag is unique and full of handmade charm. 🧶💕✨