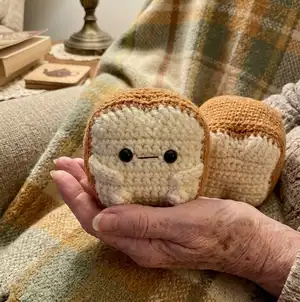
Create an irresistibly squishy Loafie the Bread Loaf with this friendly crochet pattern. You will work simple rows, bobble stitches, and a neat join to make a charming little plush loaf that is perfect for gifting. The pattern includes full step-by-step instructions, photos, and helpful tips so you can finish with confidence. Enjoy crafting this adorable loafy companion for your home or as a sweet handmade present.
Progress Tracker
0% Complete
— Arms :
Arms (P1) :
Starting with a long tail ch 6, slst in the 2nd ch from hook and in remaining ch spaces (5) f/o and leave a long tail for attaching
— Front of Loaf :
R1 :
ch 13, sc across starting in the 2nd ch from the hook (12) ch 1 and turn
R2 :
sc 2, BO, sc 6, BO, sc 2. ch 1 and turn
R3-10 :
sc across. (12) ch 1 and turn
R11 :
(top of the loaf) 2 HDC in one st, dc, dc, tr, tr, dc & HDC in one st, HDC and dc in one st, tr, tr, dc, dc, 2 HDC in last st (16)
Info :
Now you will crochet around the piece. -ch 1 and put a st marker in the ch 1 (it counts as a st) then sc 9 down the side -inc in corner -sc 10 across bottom
Info :
-inc in corner -sc 10 up the other side
Instruction :
-inc in the first st along the top, sc in the next 14 sts, inc in the last st
Info :
You are now back at the st marker... you are going to finish sc around the bread with tan.
Instruction :
-sc 10 down the side -inc in corner -sc 12 across the bottom -inc in corner -sc 10 up the other side (you will reach the tan yarn across the top) There should be 54 sts total around the entire bread—do not fasten off.
Info :
To change to tan, before finishing your last st in cream pull the tan yarn through to finish the st.
Info :
-Place safety eyes between rows 7&8, approx. 3 sts apart -Embroider mouth -Attach arms to edge of bread, between rows 5&6
Info :
Correct side out—the stitches should look like little v's.
Info :
If the feet are facing the wrong way on the front piece, just push them with the end of your crochet hook so they're popped out on the right side.
Instruction :
Now you will crochet around the bread to form the loaf. Remove your st marker and place it in the beginning st of this next row.
R1 :
Still using tan, sc around in the BLO (54)
R2-10 :
sc around (54) f/o and weave in yarn tail
— Back of Loaf :
R1 :
ch 13, sc across starting in the 2nd ch from the hook (12) ch 1 and turn
R2-10 :
sc across. (12) ch 1 and turn
R11 :
(top of the loaf) 2 HDC in one st, dc, dc, tr, tr, dc & HDC in one st, HDC & dc in one st, tr, tr, dc, dc, 2 HDC in last st (16)
Info :
Now you will crochet around the piece. -ch 1 and put a st marker in the ch 1 (it counts as a st) then sc 9 down the side -inc in corner -sc 10 across bottom -inc in corner -sc 10 up the other side
Instruction :
-inc in the first st along the top, sc in the next 14 sts, inc in the last st.
Info :
You are now back at the st marker... you are going to finish sc around the bread with tan.
Instruction :
-sc 10 down the side -inc in corner -sc 12 across the bottom -inc in corner -sc 10 up the other side (you will reach the tan yarn that is across the top of the loaf)
Info :
There should be 54 sts total around the entire bread. F/O and leave a long tail for sewing.
Section Title :
To attach, line up the front with the back and whip stich through the BLO of row 10 on the loaf and both loops on the back. *See pictures:
Info :
The easiest way to line up the front and the back is to look at them from above.
Info :
Correct side facing out. You want the border stitches to look like little v's.
Info :
Whip stitch through both loops of the back of the loaf and the back loop only of the main piece when attaching.
Info :
Wrong side facing out (photo reference).
— Stuffing & Final Assembly :
Info :
Stuff as you go... as firmly as you prefer.
Info :
*if you don't like his arms flapping around and looking crazy, sew or glue them in the position you like!
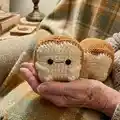
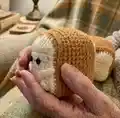
— Making Loafie's Buns :
Info :
Poke the needle between rows 8&9 and up through the back through rows 4&5, centered. Repeat twice.
Info :
Pull both tails tight—but not too tight (you don't want to see fiber fill poking out).
Info :
Tie ends together and knot at the bottom then weave in the tails.
— Bobble Stitch Guide :
Info :
[yarn over, insert through st and pull yarn through]. There are now 3 loops on your hook. [Yarn over then pull through two loops, leaving two loops (or however many loops depending on how many times you have repeated this step) on your hook]. Repeat the bracketed steps, pulling your yarn through 2 loops each time until you end up with 5 loops on your hook. Pull through all 5 loops to finish the st. Push the bobble out, it will be inverted if you don't. *Pretend like you are doing double crochets, but not pulling through the second time to finish it.
Thank you for making Loafie the Bread Loaf — a tiny handmade friend full of charm and squishy personality. This pattern is perfect for quick gifts, cute shelf decor, or a playful keychain-sized companion. I hope Loafie brings a smile and a little warmth to your crafting day. 🧶🍞