🧢 Beautiful ✨ Detailed πŸ’ Adorable

Plush Ballerina Bear Amigurumi Pattern

Plush Ballerina Bear Amigurumi Pattern
4.2β˜… Rating
5-7 Hours Time Needed
2.0K Made This
βœ‚οΈ

Beginner Friendly Level

Perfect for those just starting their crochet journey, with clear instructions and simple techniques

⏱️

Weekend Treat

Takes 5-7 hours, making it an enjoyable project to finish over a couple of days.

🧸

Cute Companion

An adorable friend to cherish, handcrafted with love to bring comfort and joy for years to come.

About This Plush Ballerina Bear Amigurumi Pattern

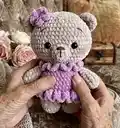
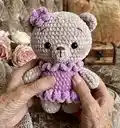
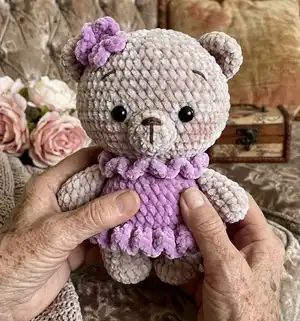
This pattern creates a plush ballerina bear amigurumi with a ruffled dress and a small flower accessory. It uses plush yarn for a soft, cuddly texture and straightforward shaping techniques. Youll work in continuous rounds and switch colors to make the dress detail stand out.

Plush Ballerina Bear Amigurumi Pattern crochet pattern - detailed view of completed project

The finished toy is approximately 23 cm (9") tall using the recommended yarn and hook. The pattern uses US crochet terminology and assumes familiarity with basic stitches.

Why You'll Love This Plush Ballerina Bear Amigurumi Pattern

I absolutely love this pattern because it turns into a soft, huggable bear that is quick to make and very rewarding. I appreciate how the plush yarn gives it an irresistibly tactile finish that children and adults both adore. The ruffled dress and little flower allow me to add a personal touch while keeping the construction simple. I enjoy sharing patterns that are beginner-friendly yet produce professional-looking results I would proudly gift.

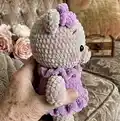
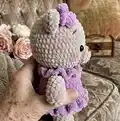
Plush Ballerina Bear Amigurumi Pattern step 1 - construction progress Plush Ballerina Bear Amigurumi Pattern step 2 - assembly progress Plush Ballerina Bear Amigurumi Pattern step 3 - details and accessories Plush Ballerina Bear Amigurumi Pattern step 4 - final assembly and finishing

Switch Things Up

I love customizing this bear by changing the yarn colors to suit different themes; try mint and cream for a baby-friendly version or teal and coral for a modern twist.

I often change the yarn weight and hook size to create different sizes: a smaller hook with thinner yarn makes a delicate mini, while bulky yarn makes a chunky cuddle buddy.

I like adding tiny accessories like a crocheted bow, mini tutu, or embroidered initials to personalize each toy for gifting.

Try different eye styles for varying expressions: safety eyes give a glossy look, while embroidered eyes create a softer, child-safe option.

You can experiment with the dress length by working fewer or more rounds before adding the ruffleβ€”shorter for a tutu or longer for a full skirt.

I sometimes embroider freckles or a small heart on the chest to add character and personality to each bear I make.

If you want posable arms, add thin wire inside the arms before stuffing, but make sure ends are well wrapped and not exposed for safety.

Swap the flower for other motifs like a star, heart, or tiny crochet balloon to match holidays or special occasions.

Use surface crochet or contrasting yarn to add stripes or patterns on the dress for a fun, playful look.

I always recommend making one test bear to tweak tension and placement, then note changes for consistent results when making multiples.

Common Mistakes & How to Fix Them

βœ— Skipping stitch markers when joining the legs and body can shift your starting point; place a marker at the new start as instructed to keep symmetry. βœ— Not stuffing as you go causes hard-to-fill gaps and misshapen limbs; stuff gradually during rounds to maintain smooth shaping. βœ— Cutting the purple yarn when switching colors for the dress will lose the working yarn; tuck the purple yarn to the front and continue when instructed. βœ— Forgetting to flatten the arm before joining can make seams bulky; flatten and crochet through both sides exactly where shown to create a neat hand seam. βœ— Placing safety eyes too high or too low changes expression; insert the safety eyes between rounds 6 and 7 with eight stitches between them for the intended look.

Plush Ballerina Bear Amigurumi Pattern

Make a sweet plush ballerina bear using soft plush yarn and simple crochet stitches. This pattern guides you through arms, legs, body, head, ears, muzzle, dress and accessories with clear step-by-step rounds. Perfect for gifting or keeping as a cuddly handmade companion, the finished toy measures about 23 cm tall when made with the recommended materials. Youll enjoy quick shaping and charming details like a ruffled dress and a little flower.

Beginner Friendly 5-7 Hours

Materials Needed for Plush Ballerina Bear Amigurumi Pattern

β€” Main Fabric

  • 01
    Plush yarn (100g/120m) Beige - Himalaya Dolphin Baby 80301 (main color for body, limbs, head)
  • 02
    Plush yarn (100g/120m) Purple - Himalaya Dolphin Baby 80317 (dress and accents)
  • 03
    Dark brown thread for embroidery - YarnArt Jeans 70 (nose, eyebrows, mouth)
  • 04
    Polyester fiber fill stuffing (enough to firmly stuff head and body)
  • 05
    Safety eyes 12 mm (2 pieces)

β€” Tools Required

  • 01
    Crochet hook 4.00 mm
  • 02
    Safety eyes 12 mm (2 pieces)
  • 03
    Scissors
  • 04
    Yarn needle for sewing and embroidery
  • 05
    Stitch markers
  • 06
    Polyester stuffing (fiber fill)
  • 07
    Pins for assembly (optional)

Progress Tracker

0% Complete

β€” Materials and Tools :

Infos :

Plush yarn (100g/120m): Beige (Himalaya Dolphin Baby 80301). Purple (Himalaya Dolphin Baby 80317). Dark brown thread to embroider the eyebrows and the mouth (I use YarnArt Jeans 70). Safety eyes 12 mm. Crochet hook 4.00 mm. Stuffing (Polyester fiber fill). If you use these materials, the finished toy is around 23 cm (9\") tall. The difficulty level of the pattern is EASY. I use US terminology in this pattern.

β€” Abbreviations :

Infos :

st - stitch. ch - chain. sl st - slip stitch. sc - single crochet. dc - double crochet. inc - increase. dec - decrease. (sc, inc)* n - repeat those in brackets n-times. MR - magic ring.

β€” Arms :

Info :

Crochet with the beige yarn. Stuff only lower half of the arm.

Round 1 :

6 sc into a magic ring (6)

Round 2 :

6 inc (12)

Round 3-4 :

12 sc (2 rounds)

Round 5 :

(4 sc, dec)*2 (10)

Round 6 :

10 sc

Round 7 :

(3 sc, dec)*2 (8)

Round 8 :

8 sc

Round 9 :

Flatten the arm and crochet 4 sc through both sides.

Info :

Fasten off and cut the yarn.

β€” Legs :

Info :

Crochet with the beige yarn. Stuff as you go.

Round 1 :

8 sc into a magic ring (8)

Round 2 :

8 inc (16)

Round 3 :

16 sc

Round 4 :

4 sc, 4 dec, 4 sc (12)

Round 5 (Left leg) :

For the left leg: 7 sc, place additional marker, 5 sc (12)

Info :

Make a sl st, fasten off and cut the yarn.

Round 5 (Right leg) :

For the right leg: 12 sc (12)

Info :

Don't cut the yarn, we will continue with the body:

β€” Body :

Info :

Continue crocheting with the beige yarn. Stuff as you go.

Round 1 :

Crochet 5 sc more on the right leg. Make chain 3 and attach the yarn to the left leg where you placed the additional marker. Crochet 12 sc on the left leg; 3 sc on the front of the chain; 12 sc on the right leg; 3 sc on the back of the chain (30)

Info :

Place the marker here, it will be the new start. (The marker should be in the back)

Round 2 :

12 sc, 3 inc, 12 sc, 3 inc (36)

Round 3 :

(11 sc, inc)*3 (39)

Round 4 :

39 sc

Info :

Change the yarn to purple color.

Round 5 :

39 sc

Round 6 :

Back loops only: 39 sc

Round 7-8 :

39 sc (2 rounds)

Round 9 :

(11 sc, dec)*3 (36)

Round 10 :

36 sc

Round 11 :

(4 sc, dec)*6 (30)

Info :

Check if the marker is exactly in middle of the back. If not - crochet 1-2 sc more to correct it.

Info :

Now we will join the arms:

Round 12 :

6 sc, 4 sc through the first arm and the body, 10 sc, 4 sc through the second arm and the body, 6 sc (30)

Info :

Check if the arms are symmetrical. If not, correct the stitches.

Info :

Change the yarn to beige color. Don't cut the purple yarn - move it to the front of your work.

Round 13 :

Back loops only: (3 sc, dec)*6 (24)

Round 14 :

24 sc

Info :

Don't cut the beige yarn, we will continue with the head, but first we need to finish the dress.

β€” Dress :

Info :

Take the purple yarn and crochet in the front loops of round 13 with the body turned upside down (look at the picture):

Round 1 :

((sc, chain 1, sc) in one stitch)*24 (72)

Info :

Make a sl st, fasten off and cut the yarn. Hide the thread inside the body.

Info :

Now attach the purple yarn to back in the front loops of round 6. Crochet with the body turned upside down:

Round 1 :

ch 2, (2 dc in one st, 2 dc in one st, 3 dc in one st)*13, sl st (91)

Round 2 :

91 sc

Info :

Make a sl st, fasten off and cut the yarn. Hide the thread inside the body.

β€” Head :

Info :

Continue crocheting with the beige yarn. Stuff as you go.

Round 1 :

(sc, inc)*12 (36)

Round 2 :

(2 sc, inc)*12 (48)

Round 3 :

(7 sc, inc)*6 (54)

Round 4 :

4 sc, inc, (8 sc, inc)*5, 4 sc (60)

Round 5-7 :

60 sc (3 rounds)

Round 8 :

4 sc, dec, (8 sc, dec)*5, 4 sc (54)

Round 9-11 :

54 sc (3 rounds)

Info :

Insert the safety eyes between rounds 6 and 7 with 8 stitches between them (6 stitches visible).

Round 12 :

(7 sc, dec)*6 (48)

Round 13 :

3 sc, dec, (6 sc, dec)*5, 3 sc (42)

Round 14 :

(5 sc, dec)*6 (36)

Round 15 :

2 sc, dec, (4 sc, dec)*5, 2 sc (30)

Round 16 :

(3 sc, dec)*6 (24)

Round 17 :

sc, dec, (2 sc, dec)*5, sc (18)

Round 18 :

(sc, dec)*6 (12)

Round 19 :

6 dec (6)

Info :

Tip: Make sure that the head is stuffed firmly, especially in the lower part.

Info :

Close the opening and hide the yarn inside.

β€” Ears :

Info :

Crochet with the beige yarn. Don't stuff.

Round 1 :

7 sc into a magic ring (7)

Round 2 :

7 inc (14)

Round 3-4 :

14 sc (2 rounds)

Info :

Tip: If you crochet wider and it looks like the ears are too big, just skip round 4 and make them only 3 rounds.

Info :

Make a sl st, fasten off and cut the yarn, leaving a tail for sewing.

Info :

Sew the ears to the head in rounds 10-14.

Info :

I sew the ears 5 st away from the end of the eyebrows (counted in round 10). That's 23 st total between the ears in their lower end. The ears should be slightly curved.

β€” Muzzle :

Info :

Crochet with the beige yarn. Stuff lightly.

Round 1 :

6 sc into a magic ring (6)

Round 2 :

6 inc (12)

Round 3 :

(3 sc, inc)*3 (15)

Info :

Make a sl st, fasten off and cut the yarn, leaving a tail for sewing.

Info :

Sew the muzzle to the head in rounds 3-6 (look at the picture).

β€” Embroidering :

Info :

With a brown thread embroider the nose, as it's shown in the pictures. It's between rounds 2 and 3 of the muzzle and is 2 st wide.

Info :

Tip: The toy looks cuter if the nose is smaller.

Info :

The vertical line on the muzzle must be 2 rounds long.

Info :

Embroider the eyebrows in round 10. They are 2 st wide and with 8-9 st between them.

Info :

Color the cheeks with pink blush.

β€” Flower :

Info :

Crochet with the purple yarn.

Round 1 :

Make a magic ring and crochet in it: (2 ch, dc, 2 ch, sl st)*5

Info :

Tighten the magic ring, fasten off and cut the yarn, leaving a long thread for sewing.

Info :

Sew the flower to the head near one of the ears.

Assembly Instructions

  • Flatten the arm and crochet 4 sc through both sides to close the arm opening, then fasten off and hide the tail.
  • Insert and secure the safety eyes between rounds 6 and 7 of the head with 8 stitches between the eyes, then attach safety backs securely.
  • Sew the muzzle to the head aligning it with rounds 3-6 of the head and hide the sewing thread inside the head.
  • Sew the ears to the head between rounds 10-14, spacing them 23 stitches apart at their lower ends and curving them slightly for a natural look.
  • Sew the flower to the head near one ear; weave in and hide all yarn ends inside the body and head after assembly.

Important Notes

  • πŸ’‘Use stitch markers to mark the new start after joining the legs and when instructed to keep the shaping symmetrical.
  • πŸ’‘Stuff firmly but gradually; add stuffing while shaping to avoid lumps and to maintain smooth curves.
  • πŸ’‘Hide and secure all color joins and tails inside the body to keep the toy neat and prevent loose threads from showing.
  • πŸ’‘Do not cut the purple yarn when instructed to keep it for later shaping of the dress; tuck it to the front until needed.
  • πŸ’‘Check placement of safety eyes and ears before final sewing and use pins or stitch markers to preview positions.

This adorable Plush Ballerina Bear is ready to dance into your handmade collection! 🧸 The pattern combines soft plush yarn with simple shaping for a cuddly finish you will love. 🌸 Perfect for gifts, nursery decor, or a cozy companion to cherish. ✨
You ask,

we answer.

FAQs

What size will the finished piece be?

The finished amigurumi measures approximately 23 cm (9 inches) tall when using the recommended plush yarn and a 4.00 mm hook.

Can I use different yarn weights for this pattern?

Yes, you can use different yarn weights but this will change final size and texture; adjust the hook accordingly and expect the toy to be larger or smaller.

Do I need prior crochet experience for this pattern?

This pattern is rated beginner friendly (EASY) and assumes familiarity with basic stitches such as sc, inc and dec; beginners with basic skills can complete it.

How long does this project typically take to complete?

Most crocheters complete this project in 5-7 hours, though time may vary based on experience level and working pace.