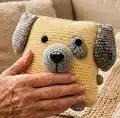
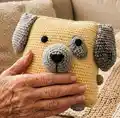
About This Pillow-dog Amigurumi Pattern
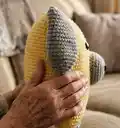
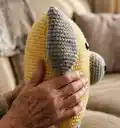
This pattern creates a soft, square Pillow-dog amigurumi with plush texture and charming facial details. It uses velor plush yarn to give a squishy, child-friendly finish that retains shape well. The construction is modular — crochet a square pillow panel and several small parts (ears, nose, spots, legs, arms) then assemble. Photographs and placement measurements help you position eyes, nose and limbs accurately.
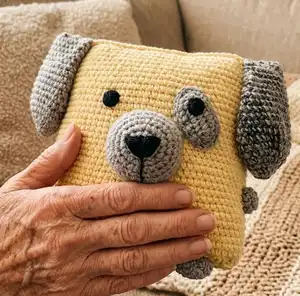
The finished pillow is approximately 30x30 cm depending on yarn and hook size. Suitable as a handmade gift for children and adults, the design is playful yet simple to crochet.
Why You'll Love This Pillow-dog Amigurumi Pattern
I absolutely love this pattern because it turns basic single crochet stitches into a playful pillow with big personality. I designed it to be approachable for beginners while still delivering a charming finished piece. The plush yarn creates a luxurious, squishy texture that makes the pillow feel cozy and gift-worthy. Sewing the facial details is very satisfying — small accents like the spot and nose bring the dog to life.
Switch Things Up
I love customizing the Pillow-dog by changing colors and textures to match any decor or gift recipient.
You can swap the yellow and gray for pastel tones or bright contrasting shades to create different personalities.
If you want a larger pillow, I change yarn weight and hook size — bulky yarn with a larger hook gives a chunkier, cozier pillow.
To make a tiny keychain version, I use a finer plush yarn and smaller hook and reduce chain counts proportionally.
I often replace bead eyes with embroidered eyes for a child-safe version; use black acrylic yarn to stitch small circles instead of beads.
Try adding tiny crocheted accessories like a bow, scarf or a tiny heart sewn to the corner for a personal touch.
For a posable look, I sometimes insert thin wire into the arms before stuffing so they can be posed slightly.
I like to experiment with different placements for the spot — higher or lower changes the expression a lot, so pin before sewing to test.
Embroidering different mouth shapes with black thread creates smiles, surprised looks, or sleepy faces — small changes, big character differences.
Don’t be afraid to mix yarn types: a slightly different texture for the ears or nose can add contrast and interest.
I also recommend trying two-tone spots or crocheting a small pocket on the front to tuck little treasures or notes inside the pillow.
Common Mistakes & How to Fix Them
✗ Skipping the instruction to secure the beginning of each round can cause uneven edges; fix the start of each new circle with a pin or a short length of thread to keep your rounds aligned.
✗ Not counting stitches after increases or decreases often leads to incorrect shaping; count your stitches each round and mark the start with a stitch marker so you always know where the round begins.
✗ Overstuffing or stuffing unevenly creates lumps and distortions in the pillow shape; stuff gradually, smoothing and distributing filling as you go to keep the surface even and soft.
✗ Using a much larger or smaller hook than recommended can change the finished size and stitch appearance; stick to the suggested 4-5 mm hook or adjust yarn weight and remeasure gauge before continuing.
✗ Attaching parts without pinning can lead to misplacement of ears and eyes; pin each piece and check photographic placement before sewing to ensure symmetrical results.