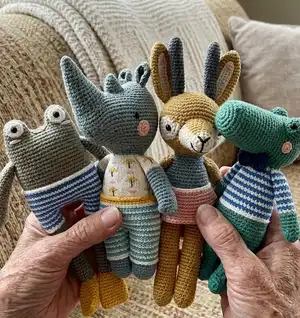
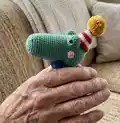
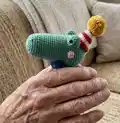
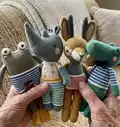
Make charming hand-crocheted animal friends inspired by Pica Pau with clear, illustrated guidance. This collection focuses on small stuffed characters made with sporty to worsted weight yarns and simple shaping techniques. Youll learn how to choose hooks and yarns, basic amigurumi stitches, and finishing tips so your toys look neat and durable. Perfect for makers who love colorful, modern soft toys with personality.
Progress Tracker
0% Complete
— Tools and Supplies :
Info :
One of the most interesting things about crochet is the fact that a hook and a strand of yarn are all you need to start working. If you have been crocheting for years, or have the incredible fortune of having someone who crochets in the family, it's more than likely that you have in your possession a case filled with hooks and needles, in various sizes and from different origins. If you started recently, and you have crocheted everything you can find on the Internet, in magazines and books, it's almost sure that you have a cute and fancy set of pastel rubber handle hooks, in all the possible sizes. And if you are one of those who is about to try crochet for the first time and never had a hook in your hands, don't be afraid! Next, you will find an essential guide to diving into the fantastic universe of hooks, threads and other supplies. Always remember that high quality hooks and yarns can save you hours of frustration. Hooks and needles do have the habit of getting lost, so make sure you always have a backup, especially of the ones you love and use all the time (I have about ten backups of my favorite hook, perhaps a little too much).
— Crochet Hook :
Info :
Crochet is a technique for creating fabric by interlocking loops of threads worked into a chain using a thin rod with a hook at the end: the crochet hook. In fact, the term crochet is derived from French and means "small hook." Although we can make the same movement without the crochet hook (as the fisherman does with his nets or when we make superchunky blankets with our hands), we'll need this small hook if we want to crochet a toy that a child can hold in his or her hands. When selecting a hook, apart from size you must consider how comfortable it is for you to hold. In my case, as I hold the hook like a knife (see page 19), I prefer to use crochet hooks without an ergonomic handle, since they can feel a bit uncomfortable in my hand.
— Anatomy of a Crochet Hook :
Info :
Point: This is the end of the hook that you insert into the stitches. I like the rounded ones, so they slide easily through the stitches. Also, you have to make sure they are blunt enough, so they don't split the yarn. Although my favorite crochet hook has a blunt tip, I cannot avoid stabbing my left index finger by accident. That's why you might once in a while see a picture with my finger wrapped in scotch tape. Throat: This part does the actual hooking (catching) of the yarn and allows you to pull it through the stitches and loops. Shaft: This part holds the loops that you are working with. Its diameter determines the size of the stitches, and is the actual size of the hook. Thumb rest: This is the flat part where you place your thumb and middle or index finger to hold the hook. Some ergonomic and larger hooks don't have this flat section. Handle: Actually, we don't hold the hook by the handle, but it's used for balance and leverage. You can find a wide variety of coverings for the handle, for ergonomic reasons or embellishment.
— Sizes :
Info :
Hook sizes are indicated using different, land-specific systems, drawing on either numbers or letters or a combination of both. Below you can find the three most common systems in use: the metric system, the UK system and the US system. As a basic guide, the thicker the thread, the bigger the hook and larger the stitch. If you crochet loosely, use a smaller hook to tighten your crochet fabric, and if you crochet tightly, use a larger hook to loosen your fabric. The hook size should be what's comfortable for you to use to obtain the desired result. It's easier to change the size of the hook than to modify the tension (we tend to have a "natural" tension when we crochet).
— Crochet Hook Conversions :
Info :
Conversion chart examples include: 2 mm = UK 14; 2.25 mm = UK 13 = US B/1; 2.5 mm = UK 12; 2.75 mm = US C/2; 3 mm = UK 11; 3.25 mm = UK 10 = US D/3; 3.5 mm = UK 9 = US E/4; 3.75 mm = US F/5; 4 mm = UK 8 = US G/6; 4.5 mm = UK 7 = US 7; 5 mm = UK 6 = US H/8; 5.5 mm = UK 5 = US I/9; 6 mm = UK 4 = US J/10; 6.5 mm = UK 3 = US K/10.5; 7 mm = UK 2; 8 mm = UK 0 = US L/11; 9 mm = UK 00 = US M/13; 10 mm = UK 000 = US N/15.
— Materials :
Info :
Formerly, hooks were made of bone, glass Bakelite and even ivory (thankfully, the last ones are no longer made), with impressively adorned handgrips in the shape of animals or floral motifs. Nowadays, steel, aluminum, plastic, bamboo and wood are the most used materials. Stainless steel: Traditionally, crochet hooks were lace hooks. Almost all hooks under 2.00 mm are made of steel for its strength. The smaller ones, up to 0.35 mm, are used only for lace threads. The larger ones, between 2.0 and 3.5 mm, are excellent for crocheting amigurumi with sport or light worsted (DK) weight yarn. Aluminum: These hooks slip easily between stitches. The aluminum ones have the widest range of sizes and are suitable for all types of yarn. They're the most common choice because of their strength, lighter weight and durability. Beware when choosing thinner aluminum hooks (less than 4 mm) or of dubious quality, because they tend to bend if you apply some pressure (which happens a lot when crocheting toys). Wood / Bamboo: These hooks are beautiful and super-decorative, but I only recommend them to work with thicker yarns. The good ones usually come from 4 mm and they are very light and excellent for working worsted and bulky weight yarns. Poor quality ones are likely to have a rough finish, so they do not slip well and tend to break easily. Plastic / Acrylic: These hooks are used to work thicker materials such as T-shirt yarn, sheep's wool roving, etc.
— Yarns :
Info :
Traditionally, crochet was worked only with very fine cotton yarns specially made for this craft, and intended to produce table cloths, doilies, decorative elements, etc. However, we can use almost any material that can be worked into a thread: wool, cotton, string, ribbon, fabric, leather, wire, even plastic bags or paper. Each kind of thread has its pros and cons. Allow yourself to have the incredible experience of experimenting with different materials. It's the best way to learn and find what you like most and is most suitable for your purpose. Of course, it's always recommendable to keep the intended use of the finished product in mind (crocheting a wire toy for a baby may not be the best choice). Cotton is probably the most used thread for crochet and, in my opinion, the one that gives the best results when crocheting a toy. This thread has practically no elasticity, which is something you definitely want when making toys (so it keeps its shape). In addition to being a hypoallergenic material, cotton is extremely durable and also very soft, and color choices abound! The downside is that the hook may not slide easily (because it's not very elastic) and, sometimes, as the cotton is constituted by several strands, the thread can be frayed by the hook. Another drawback of cotton is that cotton plantations are regrettably one of the main users of pesticides in the world. Ideally, it'd be best if we can get organic cotton to work with. You can find cotton threads in a variety of presentations, from "rustic" ones, over opaque ones and more economical choices, to mercerized cottons, with threads that were treated to obtain strength, giving them a shiny appearance.
— Other essential tools and supplies :
Info :
Yarn needles and tapestry needles are used for joining motifs, sewing and finishing pieces. They have a blunt tip, so you don't split the thread or the crochet stitches. They also have a large eye that allows thicker yarns to pass through. They're available in various lengths and sizes, straight and with a bend end. Choose one suitable for the thickness of the yarn you're using. I use number 16 or 18. Pins: Try to get plastic or glass-headed pins. They're easy to see, and their large head prevents them from slipping through the stitches. Scissors: I kind of have a thing for scissors, so I have quite a bunch of them, in different sizes and shapes. The best for this kind of craft are the small, lightweight scissors with sharp points. You'll be using the scissors regularly, so choose a good, sharp pair.
— Stitch markers, Stuffing and Facial features :
Info :
Stitch markers are used to mark a stitch. You can find them in a variety of shapes and qualities. Alternatively, you can use paper clips, safety pins or hair clips to help indicate the round, row or any location on the worked piece. When crocheting in rounds, always mark the first (or the last) stitch of the previous round. Stuffing: I always use polyester fiberfill, the same filling used to stuff cushions. It's easy to find in any craft shop, and it's inexpensive, washable and hypoallergenic. Stuffing a toy can be trickier than it seems: overstuffing might stretch the fabric and show through. Too little stuffing gives the toy a sad look, as if the poor thing was deflated. Facial features: There are a great variety of extra elements to decorate crocheted toys: plastic eyes and noses in all colors and sizes, buttons, bows, ribbons, etc. For my characters, I only use plastic eyes. These safety eyes have two parts: the front with a straight or threaded rod, plus a washer that goes inside the toy. If it's fastened correctly, it's practically impossible to remove. If you're afraid that a child's tenacity can pull them out (especially if children are under the age of three), you can apply universal glue before placing them on the toy (be careful that the eye is where you want it to be before attaching it!). On the other hand, features can also be embroidered for safety.
— Crochet Introduction :
Info :
In many years of teaching, I've seen almost as many ways of holding the hook and yarn as students. Usually, we handle the hook with the same hand we use to write, but it's not a rule. If you take it with your right hand, you will crochet from right to left (except with a chain stitch and a crab or reverse single crochet stitch). Holding a new tool can be a little tricky. You probably don't remember the first time you held a pencil or a knife, but I'm sure you can manage pretty well with those tools right now. The same goes for a crochet hook. There are no hard rules and there's no "best way" to hold this tool. If you already know how to crochet and you feel comfortable with it, keep going! If you're learning, try as many ways as you like, so you can find the one most suitable for you.
— Hold the Hook and Yarn (hand position) :
Info :
Pencil grip: Hold the hook as you would a pencil, grasping the hook between your thumb and index finger, in the middle of the flat section (the thumb rest). Knife grip: Hold the hook in the same manner as you would hold a knife, grasping it between your thumb and index finger, resting the end of the hook against your palm. Hold the yarn: The free hand is used to control the thread and hold the work. There are several methods to hold the yarn, and everyone has his or her preferred way. For example, you can weave the yarn through your fingers or just place the thread between your palm and two or three fingers. You only have to keep in mind that you have to maintain a steady tension while crocheting. Holding the hook may seem awkward at first, but holding the yarn is the real deal: you will need to practice to control the thread and make the tension feel comfortable and natural. Also, it's important to keep this hand "in shape", because it's the one that is going to be stressed. Try to exercise before and after crocheting. I know it sounds almost impossible but, please, try not to crochet too many hours in a row!
— Stitches :
Info :
There are only a few basic stitches and although the variations and combinations are endless, we'll only need to master a few. All crochet stitches are made from the combination of two or three of these movements: Wrap the yarn from back to front over the hook (yarn over). Insert the hook into the stitch. Draw the yarn through one or more loops on the hook. There are several methods to make the basic crochet stitches. In this book, I will explain the ones that I learned throughout the years and still use. But remember that, as in almost any craft, there's no strict manual of rules and you can (and should) adapt the techniques to your needs and possibilities.
— Slip Knot :
Info :
Almost all crochet works begin with this knot. The slip knot is the first loop you'll need to make on your hook. 1 Make a loop shape with the tail end of the yarn. 2 Insert the hook into it and draw another loop through it. 3 Pull the yarn tail to tighten the loop around the hook. The slip knot does not count as a stitch. I usually make another knot ... Yes, another knot to secure the slip knot.
— Chain stitch (abbreviation: ch) :
Info :
This stitch is the basis for most crochet works: if you are working in rows, your first row will (almost) always be chain stitches, known as a foundation chain. It is also used to join motifs and as a turning stitch. 1 Holding the slip knot, wrap the yarn from back to front around the hook. This movement is called yarn over. You can wind the yarn over the hook or twist the hook to go under the yarn. 2 Draw the hook backward to pull the yarn through the loop on the hook (the slip knot). 3 You will form a new loop, which is your first chain stitch. Repeat the previous steps to form as many chain stitches as required. Note: It's crucial to hold the work firmly to prevent it from spinning around the hook every time you try to yarn over. Foundation chain: This is the string of chain stitches you have to crochet if you want to make a flat fabric worked in rows. It's the equivalent of casting on when you start knitting. Note: To help maintain an even foundation chain, keep changing your grip on the crocheted chains, so you are always holding them near the hook. Turning chain: When crocheting in rows, these are the chain stitches you have to make in order to move to the beginning position. You do this to bring the hook up to the height of the stitches you are crocheting. Each stitch has a corresponding number of turning chains: a row of single crochet: 1 turning chain; a row of half double crochet: 2 turning chains; a row of double crochet: 3 turning chains. Note: When you work half double crochet or longer stitches, the turning chain counts as the first stitch.
These adorable animal friends capture personality in small, handmade forms that are perfect for gifting or displaying. Each character is designed to be cheerful, colorful, and approachable for makers who love playful amigurumi. Whether youre making one or collecting the whole set, these toys are sure to bring warmth and smiles to any home. 🧵🧶