About This Octopus Surprise Amigurumi Pattern
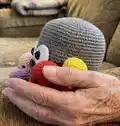
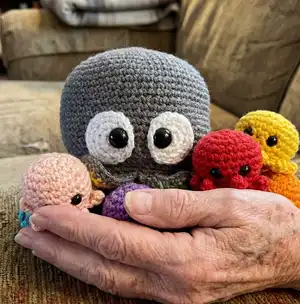
This pattern creates a large cuddly octopus and eight tiny colorful mini octopuses that fit inside and stack together. It features removable colored arm pieces and clear assembly steps for attaching the inside and arms. You can personalize each mini with different colors for a bright, cheerful set.
Written in easy-to-follow rounds and rows using fingering-weight cotton and a 2.5 mm hook. The instructions include eye placement, arm construction, and finishing tips for a neat result.
Why You'll Love This Octopus Surprise Amigurumi Pattern
I absolutely love this pattern because it combines a playful nesting surprise with simple amigurumi techniques to make a delightful set. I enjoy how the colorful arm pieces let me mix and match bright palettes for each mini octopus. The design is versatile enough to create tiny keychains or a full display piece, which always delights recipients. I find the construction method satisfying, especially joining the inside piece so the minis sit neatly.
Switch Things Up
I love how easy it is to customize the color palette for each mini octopus to create a unique set that matches your decor or gift recipient.
You can change the size by switching yarn weight and hook size; bulky yarn with a larger hook makes a chunky cuddly version, while thinner yarn creates tiny keychain-friendly minis.
I often experiment with eye types: use safety eyes for durability or embroider eyes for a child-safe option if making toys for babies.
Try alternating the order of the colored arm pieces or using gradient colors to create an ombre effect around the big octopus.
If you want posable arms, consider adding thin craft wire inside the arms before final sewing and tucking the ends securely.
I recommend varying stuffing firmness: slightly firmer for the big octopus body and a softer fill for the minis so they nest nicely inside.
Embroider small smiles or blushing cheeks on the minis to give each one a different personality.
Make a set with matching accessories like tiny crocheted hats or bows for the minis to create themed characters.
You can transform a mini into a keychain by leaving a longer tail and attaching a split ring before closing the final stitches.
I also like to use the minis as party favors by using seasonal colors or wrapping them as tiny surprises for guests.
Common Mistakes & How to Fix Them
✗ Skipping stitch markers when placing the inside piece can cause uneven arm spacing; place markers in the 8 marked sts with 5 sts between to maintain symmetry.
✗ Forgetting to crochet in a spiral for rounds will create visible joins and misaligned stitch counts; keep rounds unjoined and use a marker to track rounds in a spiral.
✗ Attaching the colored arm pieces in the wrong order can ruin the rainbow sequence; follow the exact order (red, orange, yellow, green, turquoise, blue, purple, pink) when sewing or crocheting them on.
✗ Not stuffing gradually causes lumps or misshapen arms; stuff little by little and adjust shaping before closing to keep a smooth silhouette.
✗ Pulling yarn ends too tight when tucking colored ends can pucker the seam; gently tug and weave ends in, using the hook to ease ends through without distorting stitches.