About This Lily Bunny Amigurumi Pattern
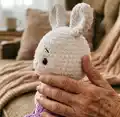
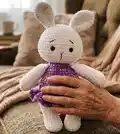
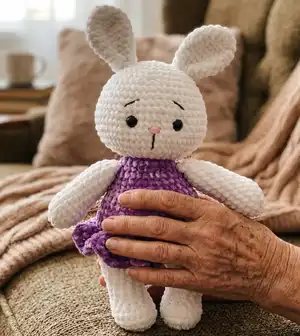
This pattern makes a plush Lily Bunny amigurumi worked in soft chenille sport yarn with a pretty ruffled skirt. You will crochet the head, body, arms, legs, ears and skirt, then assemble and embroider simple facial features. The design uses basic amigurumi shaping techniques and back-loop detail for the dress.
Written in US terminology, the pattern gives round-by-round counts and placement notes for safety eyes and embroidery. The finished toy measures about 35 cm tall when using the recommended materials.
Why You'll Love This Lily Bunny Amigurumi Pattern
I absolutely love this pattern because it combines the plush texture of chenille yarn with sweet, simple shaping to make a toy that's both huggable and elegant. I enjoy the quick results the pattern gives — you can see progress round by round and it builds into a full character fast. The ruffled skirt detail is one of my favorite parts because it adds personality with just a few extra stitches. I also appreciate how easy it is to customize colors and embroidery to make each bunny your own.
Switch Things Up
I love customizing this pattern by changing the dress color and adding tiny accessories; try pastel tones for a baby-friendly version or bold brights for a playful look.
To make the bunny smaller or larger, change your yarn weight and hook size: use thinner yarn and a smaller hook for a mini keychain version or bulky yarn with a larger hook for a jumbo plush.
I often embroider different expressions — moving the eyebrows or changing the mouth stitch can make the bunny look sleepy, surprised, or cheerful.
Try adding felt cheeks, a tiny bow, or lace trim to the skirt to make the toy extra special and gift-ready.
If you want posable limbs, insert a bit of craft wire into the arms and legs before stuffing and secure it inside to keep the wire hidden.
You can experiment with eye options: safety eyes create a polished look, while embroidered eyes give a softer, toddler-safe finish.
For a textured skirt, work a few extra rounds with puff or bobble stitches instead of simple double crochets to create ruffles with more volume.
I like to vary the amount of stuffing to change the feel — a lightly stuffed toy is floppy and cuddly, while firmer stuffing gives a more sculpted look.
When making multiple bunnies for a set, use a consistent tension and hook to ensure uniform sizing, then mix colors for a coordinated collection.
Don’t be afraid to combine yarns: holding two strands together or using a sparkly accent thread can add unique texture and shine to the dress or ears.
Common Mistakes & How to Fix Them
✗ Skipping safety eyes placement can make the face look uneven; insert the safety eyes between rounds 8 and 9 with 8 stitches between them before stuffing further.
✗ Overstuffing the limbs causes bulky, distorted shapes; stuff gradually and only about two-thirds of the arm before closing, as instructed.
✗ Not using a stitch marker on the join between legs and body will cause lost stitch counts; place a marker after joining legs and chains to mark the start of the round.
✗ Ignoring back loop instructions for the skirt attachment will hide the front-loop detail; attach pink yarn to the back of the body in the front loops of round 8 as directed to get the correct edge.
✗ Cutting yarn too early when continuing to another section can result in missing joins; do not cut the right leg yarn when instructed to continue with the body until the note tells you to do so.