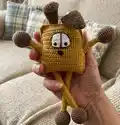
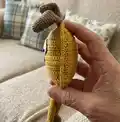
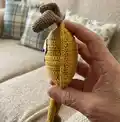
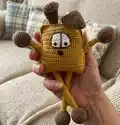
About This Woof the Dog Amigurumi Pattern
This pattern creates "Woof the Dog", a stretchy square-bodied amigurumi with long movable limbs and sweet facial details. You will crochet separate parts and assemble them to create a playful toy with character. The pattern uses simple shaping, surface embroidery, and clear assembly guidance to produce a durable, child-friendly toy.
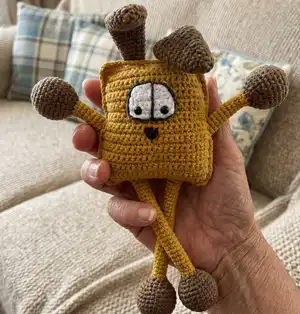
Worked mostly in single crochet rounds and rows, the toy is made from YarnArt Jeans and requires small hooks for neat gauge. The finished toy measures about 30 cm from ears to feet when using the recommended materials.
Why You'll Love This Woof the Dog Amigurumi Pattern
I absolutely love this pattern because it combines simple construction with a playful stretchy mechanism that sparks imaginative play. I enjoy the satisfying rhythm of crocheting long legs and arms in one piece and then watching them become quirky, movable features. The square body gives so much personality with minimal shaping and fun embroidered details. Creating the face and deciding how bent to make the ears is always a delightful finishing touch that makes each toy unique.
Switch Things Up
I love customizing this pattern by changing yarn color combinations; try pastel gold with light brown details for a softer look.
I sometimes use a thicker yarn and larger hook to create a chunky, squishy version that becomes a cozy pillow-friend.
I often make a mini version using thinner yarn and a 2 mm hook for keychains or pocket pals.
I like to embroider different facial expressions—move the nose and mouth placement to make a surprised, sleepy, or smiling Woof.
I add tiny crocheted accessories like a bow, scarf, or pocket to give each toy personality and story.
I experiment with eye types: safety eyes for durability or embroidered eyes for a baby-safe option.
I sometimes insert thin wire into limbs for posability, securing and covering the wire well before stuffing.
I vary ear shapes—longer floppy ears or short pointed ones—to change the silhouette dramatically.
I recommend trying gradient or variegated yarns for the body to add visual texture without extra sewing.
I also adapt the size of the limb bulbs to make either rounded paws or flatter foot shapes depending on the character you want to create.
Common Mistakes & How to Fix Them
✗ Skipping stitch markers during long straight rounds leads to losing the start of round; place a marker at the beginning of each round to maintain accurate counts.
✗ Overstuffing small parts like the head or limb bulbs causes distortion and bulky seams; stuff gradually and lightly to keep shape smooth and easy to join.
✗ Not counting stitches after increases and decreases will cause mismatched seams during assembly; count stitches at the end of each round and correct errors immediately.
✗ Changing tension between the gold body and limb yarn makes seams uneven when joining parts; maintain consistent tension and use the same hook where recommended to match gauge.