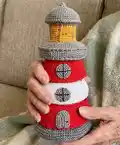
Make a charming lighthouse stacking toy that stacks into a whimsical amigurumi lighthouse. This pattern guides you step-by-step through crocheting rings, the pole, roof, windows and door so you can assemble a sturdy, child-friendly toy. Perfect as a unique handmade gift or nursery decor, the pieces stack neatly and are fun to sew together.
Progress Tracker
0% Complete
— Base :
Info :
make 2 parts. Start with grey color
Round 3 :
(1 sc; inc)*6 (18)
Round 4 :
(2 sc; inc)*6 (24)
Round 5 :
(3 sc; inc)*6 (30)
Round 6 :
FLO (4 sc; inc)*6 (36)
Round 7 :
(5 sc; inc)*6 (42)
Round 8 :
3 sc; inc; (6 sc; inc)*5; 3 sc (48)
Round 9 :
(7 sc; inc)*6 (54)
Round 10 :
4 sc; inc; (8 sc; inc)*5; 4 sc (60)
Round 11 :
FLO (9 sc; inc)*6 (66)
Round 12 :
5 sc; inc; (10 sc; inc)*5; 5 sc (72)
Round 13 :
(11 sc; inc)*6 (78)
Round 14 :
6 sc; inc; (12 sc; inc)*5; 6 sc (84)
Round 15 :
(13 sc; inc)*6 (90)
Round 16-17 :
90 sc (90) cut the yarn, leave a long tail for sewing.
— Pole :
Info :
Crochet with white color, fill with stuffing as you go
Round 3 :
(1 sc; inc)*6 (18)
Round 4 :
(2 sc; inc)*6 (24)
Round 50 :
(3 sc; inc)*6 (30)
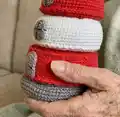
— Sewing Base & Pole :
Info :
Sew the pole with the part of the base (in round 5) like in the pictures. Then sew two parts of the base together in back loops of rounds 6 and 11. Fill with stuffing as you go. After that sew edges of two parts of base in round 17.
— Large Ring :
Info :
Crochet with red color
Round 1 :
36 ch, sl st in 1st ch (36) continue to work in rounds
Round 2-11 :
1 ch; 36 sc; sl st (36) turn the work inside out and continue in rounds
Round 12 :
BLO (5 sc; inc)*6 (42)
Round 13 :
3 sc; inc; (6 sc; inc)*5; 3 sc (48)
Round 14 :
(7 sc; inc)*6 (54)
Round 15 :
4 sc; inc; (8 sc; inc)*5; 4 sc (60)
Round 16 :
(9 sc; inc)*6 (66)
Round 17 :
5 sc; inc; (10 sc; inc)*5; 5 sc (72)
Round 18 :
(11 sc; inc)*6 (78)
Round 19 :
6 sc; inc; (12 sc; inc)*5; 6 sc (84)
Round 20 :
(13 sc; inc)*6 (90)
Round 21 :
BLO (13 sc; dec)*6 (84)
Round 26 :
6 sc; dec; (12 sc; dec)*5; 6 sc (78)
Round 31 :
BLO (11 sc; dec)*6 (72)
Round 32 :
5 sc; dec; (10 sc; dec)*5; 5 sc (66)
Round 33 :
(9 sc; dec)*6 (60)
Round 34 :
4 sc; dec; (8 sc; dec)*5; 4 sc (54)
Round 35 :
(7 sc; dec)*6 (48)
Round 36 :
3 sc; dec; (6 sc; dec)*5; 3 sc (42)
Round 37 :
(5 sc; dec)*6 (36) fill with stuffing, cut the yarn, leave a tail for sewing. Sew round 37 with round 1.
Info :
There are two ways to make pretty edges of the rings - in rounds 21 and 31 in the front loops make slip stitch round or reverse crochet (crab stitch) round.
— Middle Ring :
Info :
Crochet with white color
Round 1 :
36 ch, sl st in 1st ch (36) continue to work in rounds
Round 2-11 :
1 ch; 36 sc; sl st (36) turn the work inside out and continue in rounds
Round 12 :
BLO (5 sc; inc)*6 (42)
Round 13 :
3 sc; inc; (6 sc; inc)*5; 3 sc (48)
Round 14 :
(7 sc; inc)*6 (54)
Round 15 :
4 sc; inc; (8 sc; inc)*5; 4 sc (60)
Round 16 :
(9 sc; inc)*6 (66)
Round 17 :
5 sc; inc; (10 sc; inc)*5; 5 sc (72)
Round 18 :
(11 sc; inc)*6 (78)
Round 19 :
BLO (11 sc; dec)*6 (72)
Round 24 :
5 sc; dec; (10 sc; dec)*5; 5 sc (66)
Round 29 :
BLO (9 sc; dec)*6 (60)
Round 30 :
(5 sc; dec)*6 (36) fill with stuffing, cut the yarn, leave a tail for sewing. Sew round 29 with round 1.
— Small Ring :
Info :
Crochet with red color
Round 1 :
36 ch, sl st in 1st ch (36) continue to work in rounds
Round 2-11 :
1 ch; 36 sc; sl st (36) turn the work inside out and continue in rounds
Round 12 :
BLO (5 sc; inc)*6 (42)
Round 13 :
3 sc; inc; (6 sc; inc)*5; 3 sc (48)
Round 14 :
(7 sc; inc)*6 (54)
Round 15 :
4 sc; inc; (8 sc; inc)*5; 4 sc (60)
Round 16 :
(9 sc; inc)*6 (66)
Round 17 :
BLO (9 sc; dec)*6 (60)
Round 22 :
4 sc; dec; (8 sc; dec)*5; 4 sc (54)
Round 27 :
BLO (7 sc; dec)*6 (48)
Round 28 :
3 sc; dec; (6 sc; dec)*5; 3 sc (42)
Round 29 :
(5 sc; dec)*6 (36) fill with stuffing, cut the yarn, leave a tail for sewing. Sew round 29 with round 1.
— Top :
Info :
Crochet with grey color
Round 3 :
(1 sc; inc)*6 (18)
Round 4 :
(2 sc; inc)*6 (24)
Round 5 :
(3 sc; inc)*6 (30)
Round 6 :
(4 sc; inc)*6 (36)
Round 7-14 :
1 ch; 36 sc; sl st (36) turn the work inside out and continue in rounds.
Round 15 :
BLO (5 sc; inc)*6 (42)
Round 16 :
3 sc; inc; (6 sc; inc)*5; 3 sc (48)
Round 17 :
(7 sc; inc)*6 (54)
Round 18 :
4 sc; inc; (8 sc; inc)*5; 4 sc (60)
Round 19 :
(9 sc; inc)*6 (66)
Round 20 :
5 sc; inc; (10 sc; inc)*5; 5 sc (72)
Round 25 :
BLO 5 sc; dec; (10 sc; dec)*5; 5 sc (66)
Round 26 :
(9 sc; dec)*6 (60)
Round 27 :
4 sc; dec; (8 sc; dec)*5; 4 sc (54)
Round 28 :
(7 sc; dec)*6 (48)
Round 29 :
3 sc; dec; (6 sc; dec)*5; 3 sc (42)
Round 30 :
(5 sc; dec)*6 (36) fill with stuffing, change to yellow color
Round 32-38 :
36 sc (36) change to grey color
Round 39 :
FLO (5 sc; inc)*6 (42)
Round 40 :
3 sc; inc; (6 sc; inc)*5; 3 sc (48) cut the yarn, hide a tail, fill with stuffing.
— Roof :
Info :
Crochet with grey color
Round 7 :
(1 sc; inc)*6 (36)
Round 9 :
(2 sc; inc)*6 (48)
Round 10-12 :
48 sc (48) connect the roof with the top of lighthouse with one single crochet round (48 sc), fill with stuffing as you go.
— Door :
Info :
Crochet with grey color
Round 3 :
1 ch, 6 sc; 3 sc in one; 6 sc; turn (15)
Round 4 :
1 ch, 6 sc; 3 inc; 6 sc; turn (18) cut the yarn leave a tail for sewing.
— Windows :
Info :
make 3. Crochet with grey color
Round 3 :
(1 sc; inc)*6 (18) cut the yarn leave a tail for sewing.
— Assembly :
Info :
Sew the door and windows to a rings (blocks). Connect roof to the top with a single crochet round. Sew round 37 of the large ring to round 1 to close. Sew round 33 of the middle ring to round 1 to close. Sew round 29 of the small ring to round 1 to close. Stack the rings over the pole and adjust stuffing/position as needed.
This lighthouse stacking toy is a delightful handmade project that stacks into a charming nursery companion. The pattern uses simple rounds with clear shaping to build each ring and the roof, creating a satisfying, tactile toy. Enjoy stitching each piece, stuffing as you go, and assembling a unique, heirloom-quality lighthouse. 🧶🏖️