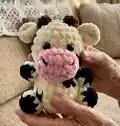
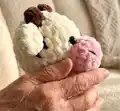
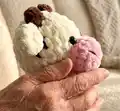
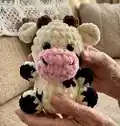
About This Keychain Cow Amigurumi Pattern
This pattern creates a tiny plush keychain cow worked in soft chenille yarn for an irresistibly squishy finish. It includes full round-by-round instructions for the head, body, ears, horns, hands, legs and nose, plus assembly steps. The design uses basic amigurumi techniques so you can focus on shaping and finishing cute details.
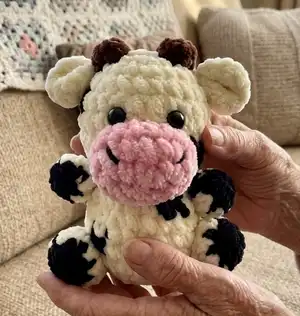
Perfect for gifting or making a set of tiny animals, this pattern is quick to work up and beginner-friendly. Change colors to personalize each cow.
Why You'll Love This Keychain Cow Amigurumi Pattern
I absolutely love this pattern because it transforms fluffy chenille yarn into a character with tons of personality using simple stitches. I enjoy how quickly the little pieces come together, making it satisfying to finish in one sitting. The design is forgiving for beginners yet still rewarding to assemble with thoughtful placement of ears and spots. Sewing the nose and adding 8mm eyes always gives the cow its charming expression, and I love gifting the finished keychains to friends.
Switch Things Up
I love customizing this little cow by changing the color palette; try pastel shades for a softer look or bright colors for playful variety.
I often make a mini version using thinner yarn and a smaller hook to create tiny keychains perfect for gifts.
I sometimes use larger bulky chenille and a bigger hook to make a chunkier, cuddlier version for a plush toy.
I like swapping safety eyes for embroidered eyes on toys intended for small children to increase safety.
I enjoy adding tiny accessories like a crocheted bow, scarf, or bell to give each cow its own personality.
I sometimes embroider extra spots or freckles with contrasting yarn to make each cow unique.
I recommend trying felt or embroidered nostrils instead of a separate crocheted nose if you prefer a flatter look.
I occasionally add a small metal keyring or lobster clasp to the top so the cow becomes a ready-to-use keychain.
I also experiment with stitch tension to subtly change body shape—tighter stitches give a firmer toy while looser stitches create a softer feel.
I encourage you to mix and match horn shapes, ear sizes, and leg lengths to design a whole herd of different cows.
I find that personal touches like tiny embroidered eyelashes or painted eye highlights really bring the character to life.
Common Mistakes & How to Fix Them
✗ Skipping the instruction to join rounds with a slip stitch can create a visible seam; always join rounds with a slip stitch to keep your rounds neat and uniform.
✗ Not changing yarn colors exactly where indicated can make spots or details misaligned; follow the font color cues and change colors in the correct stitch to match the photos.
✗ Forgetting to stuff pieces before finishing shaping will make assembly difficult; stuff each piece as soon as instructed, adding small amounts to avoid lumps.
✗ Cutting tails too short prevents easy sewing of small parts; leave a long tail for sewing on ears, horns, nose and limbs so you can attach them securely.
✗ Using a different hook size or yarn weight without adjusting gauge will alter size and fit; if you change yarn weight, test a small swatch and adjust hook to match proportions.