About This Donut Amigurumi Pattern
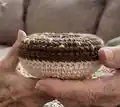
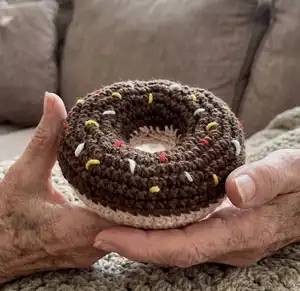
This pattern makes a small crochet donut with a two-part construction: a beige base and a brown frosting/top. It uses simple single crochet rounds and a back-loop join to create the stacked donut shape. Perfect for practicing shaping, joining, and simple surface embellishment with yarn sprinkles.
Youll work in the round using sport/fine yarn and a 3 mm hook to achieve a neat, compact finish. The finished donut is quick to make and perfect as a gift, decor piece, or keyring.
Why You'll Love This Donut Amigurumi Pattern
I absolutely love this pattern because it turns a simple idea into a delightful handmade treat that brings smiles. I enjoy how quickly the donut comes together while still offering satisfying shaping and a neat finishing process. The two-part design is fun to assemble and gives a real 'sliceable' look that kids and adults both adore. I also love adding tiny yarn sprinkles — theyre a small detail that really personalizes each piece and makes every donut unique.
Switch Things Up
I love changing the frosting colour to create seasonal or themed donuts like pastel for spring or bright neons for party sets.
I sometimes swap the sport yarn for a DK or worsted yarn and a larger hook to make a chunky, squishier donut that is great as a pincushion or decorative pillow.
I often replace yarn sprinkles with tiny beads or embroidery to add sparkle and texture to the frosting.
I recommend making a keyring version by stitching a short loop into the top before finishing and attaching a keychain ring.
I like to embroider small faces to turn the donut into a cute character — experiment with eye placement to change expression and personality.
I sometimes use variegated yarn for the frosting to create a marbled icing effect without changing colours mid-project.
For a more realistic cut donut, make two identical donuts and sew them together slightly offset to mimic a halved look with contrasting filling.
I also enjoy creating matching sets by varying only the sprinkle colours while keeping base and frosting consistent — great for gift boxes.
Try adding a tiny crocheted plate or coaster underneath the donut to present it as a miniature dessert scene.
I often add a small bell or crinkle insert inside for a baby-safe toy, ensuring finishes are secure and materials are suitable for infants.
Common Mistakes & How to Fix Them
✗ Not leaving the long tail on the base can make inner joining difficult; make a 15 cm tail and save it for sewing the inner join.
✗ Overstuffing the donut before joining can distort the shape and make seams uneven; stuff gradually and fill lightly until you reach the suggested firmness.
✗ Skipping stitch counts during increases leads to an incorrect circumference; count stitches after each increase round to ensure you have the right total.
✗ Failing to use the BLO when slip stitching frosting to the base will hide the join detail; work in the back loop only when instructed to create the correct top edge.