🧢 Beautiful ✨ Detailed πŸ’ Adorable

Mussel Amigurumi Pattern

Mussel Amigurumi Pattern
4.7β˜… Rating
2-3 Hours Time Needed
1.7K Made This
βœ‚οΈ

Intermediate Level

Ideal for those with basic crochet experience, featuring slightly more advanced stitches and techniques to expand your skills.

⏱️

Bite-Sized Project

Finishes in 2-4 hoursβ€”perfect for an afternoon of creative relaxation.

🎁

Tiny Treasure

Small, sweet, and gift-worthy creations that fit perfectly in the palm of your hand with detailed charm.

About This Mussel Amigurumi Pattern

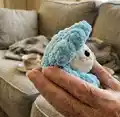
This pattern teaches you to crochet a tiny mussel amigurumi composed of a small pearl and two matching seashell halves. The design uses super bulky yarn and clear step-by-step rows for both the pearl and the shell. Photos guide key steps such as working in the BLO and joining the shell halves. The final piece is a delightful mini gift or pocket-sized decoration.

Mussel Amigurumi Pattern crochet pattern - detailed view of completed project

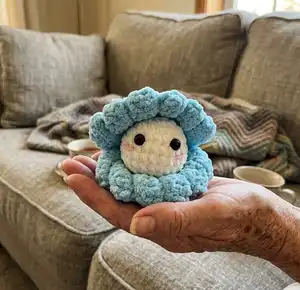
You will crochet a white pearl and two blue seashell pieces, then sew them together to form the mussel. The pattern includes materials, abbreviations, stitch counts and assembly instructions to finish neatly.

Why You'll Love This Mussel Amigurumi Pattern

I absolutely love this pattern because it transforms simple stitches into a tiny, detailed keepsake that everyone will smile at. I enjoy how the seashell texture is created using BLO rows and clever joining techniques to give a real shell look. Making the small pearl is quick and satisfying, and assembling the pieces brings the whole character to life. I also love that it is portable β€” you can finish it in an afternoon and gift it right away.

Mussel Amigurumi Pattern step 1 - construction progress Mussel Amigurumi Pattern step 2 - assembly progress Mussel Amigurumi Pattern step 3 - details and accessories Mussel Amigurumi Pattern step 4 - final assembly and finishing

Switch Things Up

I love customizing this pattern by changing yarn colors to match coastal themes, like soft pastels or bright ocean hues.

You can make the mussel larger by using thicker super bulky yarn and a larger hook, or smaller by using lighter weight yarn and a smaller hook.

I often switch the shell color to variegated yarn for a marbled shell effect that looks very organic.

Try different eye styles: safety eyes, embroidered eyes, or tiny felt circles to change the personality of the pearl.

For a keychain, use a small amount of stuffing, a thinner yarn, and attach a keyring through a secure loop at the top.

I sometimes add a tiny ribbon or sequin inside the shell for a little sparkle when the shell opens.

Experiment with adding blush using a little pink yarn or fabric paint to give the pearl a sweet expression.

You can create a whole set of shells in different sizes and colors to make a charming display or mobile.

If you want posability, add a loop of wire inside the shell edge before finishing to help it hold a slightly open shape.

I recommend testing stitch placement for the eyes and mouth on a scrap before final attachment so you can easily adjust the expression.

Common Mistakes & How to Fix Them

βœ— Placing safety eyes too high or low will throw off the face placement; attach the eyes between rows 4 and 5 with five stitches between them for correct positioning. βœ— Forgetting to stuff as you go creates lumps and uneven shaping; stuff the pearl gradually and firmly before closing to maintain a smooth round shape. βœ— Skipping stitch counts during increases or decreases leads to incorrect shaping; count stitches at the end of each round, especially after increases and decreases. βœ— Crocheting into the wrong loop when instructed BLO will change the shell texture; be sure to work in the back loop only from rows 2 to 11 as stated to achieve the ridged look.

Mussel Amigurumi Pattern

Create an adorable tiny mussel with a cuddly pearl using this step-by-step crochet pattern. You'll make a small plush pearl and two seashell pieces, then assemble them into a charming little keepsake. The pattern is clear and photo-assisted so you can follow along easily. Perfect for gifts, decor, or pocket-sized cuteness.

Intermediate 2-3 Hours

Materials Needed for Mussel Amigurumi Pattern

β€” Main Fabric

  • 01
    Super Bulky yarn / Category 6
  • 02
    White yarn - for the pearl (Begin with White yarn)
  • 03
    Blue yarn - for the seashell pieces (Begin with Blue yarn)
  • 04
    Purple color (listed as Color: Purple color in materials)
  • 05
    Fiberfill for stuffing

β€” Tools Required

  • 01
    Crochet hook size 3.5mm (E)
  • 02
    Stitch maker (stitch marker)
  • 03
    Sewing needle
  • 04
    Scissors
  • 05
    Plastic safety eyes 8mm (2 pieces)
  • 06
    Hot gun glue
  • 07
    Yarn needle for sewing and finishing

Progress Tracker

0% Complete

β€” Pearl :

Round 1 :

6SC in a MR (6)

Round 2 :

61NC (12)

Round 3 :

(SC, INC) 6 times (18)

Round 4 :

(2SC, INC) 6 times (24)

Round 5-7 :

24SC (24)

Round 8 :

(2SC, DEC) 6 times (18)

Info :

*Stuffing*

Round 9 :

(SC, DEC) 6 times (12)

Round 10 :

6DEC (6)

Info :

Cut the yarn

Info :

Attach the eyes between rows 4 and 5, with 5 stitches between them. Embroider pink for the mouth.

β€” Seashell (Make 2) :

Info :

Begin with Blue yarn. From rows 2 to 11, crochet all stitches in the BLO. On even rows, start crocheting into the second stitch from the hook. On odd rows, start crocheting into the third stitch from the hook.

Round 1 :

13Ch, turn: 7DC, HDC, SC, 2Slst, turn (11)

Round 2 :

Ch, 11Slst, turn (11)

Round 3 :

3Ch, 8DC, HDC, SC, 2Slst, turn (12)

Round 4 :

Ch, 12Slst, turn (12)

Round 5 :

3Ch, 9DC, HDC, SC, 2Slst, turn (13)

Round 6 :

Ch, 13Slst, turn (13)

Round 7 :

2Ch, 9DC, HDC, SC, 2Slst, turn (13)

Round 8 :

Ch, 12Slst, turn (12)

Round 9 :

2Ch, 8DC, HDC, SC, 2Slst, turn (12)

Round 10 :

Ch, 11Slst, turn (11)

Round 11 :

2Ch, 7DC, HDC, SC, 2Slst (11)

Round 12 :

Thread the needle through the loops in pairs as shown in the image, with a total of 3 pairs. When you have all 4 loops on the needle, pass the thread through all 4 loops to create one stitch.

β€” Assembly :

Info :

After completing the two seashell pieces, fold them in half and place the wrong sides together. Use SLST to join the two pieces together.

Info :

Starting from the single stitch in row 12, count backward to row 11, adding 7 stitches. Begin joining from this point. Make 15 SLST.

Info :

7Slst (row 11), Slst (row 12), 7Slst (row 1)

Info :

Cut the yarn and finish product.

Info :

Place the completed pearl inside the shell and adjust positioning before finishing. Ensure the eyes are attached between rows 4 and 5 and embroidered details are complete.

Assembly Instructions

  • Attach the safety eyes between rows 4 and 5 of the pearl, leaving 5 stitches between them; embroider a small pink mouth beneath the eyes.
  • Fold each seashell piece in half with wrong sides together and join them using slip stitch (SLST) around the edge to form the shell.
  • Starting from the single stitch in row 12 of the shell, count backward to row 11 and add 7 stitches; begin joining from this point and make 15 SLST total (7 SLST row 11, 1 SLST row 12, 7 SLST row 1).
  • Insert the stuffed pearl into the finished shell, adjust position for symmetry, and secure any loose edges with a few hidden stitches to keep the pearl in place.
  • Cut the yarn and weave in all ends neatly on the inside of the shell to hide tails and keep the exterior tidy.
  • Use hot glue sparingly if desired to secure the pearl in place before closing the shell fully for display stability.

Important Notes

  • πŸ’‘Use a stitch marker to mark the start of each round to maintain accurate stitch counts and avoid losing your place.
  • πŸ’‘Work the seashell rows in the back loop only (BLO) from rows 2 to 11 to achieve the correct ridged texture.
  • πŸ’‘Stuff the pearl gradually and firmly before finishing the closing rounds to create a smooth, round shape without lumps.
  • πŸ’‘Pin the shell pieces together and check symmetry before slip stitching them together to ensure even alignment.

This tiny mussel amigurumi is a sweet little project that adds coastal charm to your handmade collection. The pattern pairs a plush pearl with a textured shell for an irresistible mini keepsake. Make one as a gift, keychain, or decorationβ€”small projects bring big smiles. 🐚🧢

You ask,

we answer.

FAQs

What size will the finished piece be?

The finished mussel amigurumi will be a small, palm-sized piece when using super bulky yarn and the recommended 3.5mm (E) hook.

Can I use different yarn weights for this pattern?

Yes, you can use different yarn weights, but the finished size will change; adjust your hook size accordingly and expect a larger or smaller shell and pearl.

Do I need prior crochet experience for this pattern?

This pattern is rated intermediate due to working in BLO, shaping with increases and decreases, and joining techniques; basic crochet skills are recommended.

How long does this project typically take to complete?

Most crocheters finish this bite-sized project in approximately 2-3 hours, depending on experience and assembly time.