About This Wallace and Wanda Whales Amigurumi Pattern
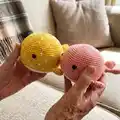
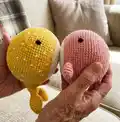
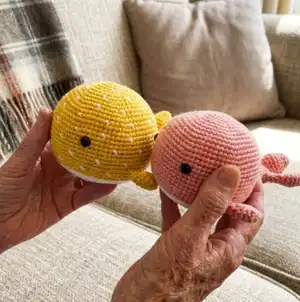
This pattern creates two small whale amigurumi: one with playful color dots (Wallace) and one plain (Wanda). The whales are worked in continuous rounds from top to bottom and include a joined tail construction and separate side fins. The fair isle color dot section shows how to carry yarn on the wrong side to make tidy spots. Finished whales measure approximately 6.5 inches long.
Clear round-by-round instructions are included for the body, tail, and fins, plus assembly guidance. Materials and abbreviations are listed to make following the pattern straightforward.
Why You'll Love This Wallace and Wanda Whales Amigurumi Pattern
I absolutely love this pattern because it combines a sweet, round silhouette with a fun little fair isle dot technique that adds personality without being difficult. I enjoy how quickly the whale body grows in continuous rounds — you get a satisfying, fast result. The joined tail construction is clever and creates a neat, sculpted finish I am proud of. I also appreciate that the design is versatile: you can make Wallace with dots or Wanda plain, and both look adorable on a shelf or as a gift.
Switch Things Up
I love customizing these whales by swapping color palettes; try pastels for a nursery-friendly Wanda or bold contrasts for Wallaces dots.
I sometimes use a sport-weight yarn and a slightly smaller hook to make a tinier keychain-sized whale that still reads well.
I often add embroidered smiles or tiny felt cheeks to give each whale more personality and charm.
I recommend experimenting with eye sizes — 6 mm eyes give a different look than the 8 mm recommended in the pattern.
I like to add a loop at the top of the head to turn the whale into an ornament or hanging decoration.
I occasionally substitute safety eyes with French knots for a fully baby-safe toy when needed.
I find changing the placement of the side fins slightly higher or lower alters the whale's perceived posture — test with pins first.
I sometimes use variegated yarn for the body to create a subtle, textured finish without doing any colorwork.
I also make matching mini whales in contrasting colors to create a family set or mobile for a nursery.
I like to stitch little accent spots with a contrasting yarn color instead of carrying color for a handcrafted dotted effect.
I encourage you to try surface crochet or embroidered patterns after completing the basic whale to create stripes, waves, or initials.
Common Mistakes & How to Fix Them
✗ Forgetting to use a stitch marker in continuous rounds leads to lost beginnings; always place and move a marker at the first stitch of each round.
✗ Not inserting safety eyes at the correct rounds will ruin placement symmetry; insert safety eyes between rounds 17 and 18 about 13 stitches apart as directed.
✗ Not carrying the unused color properly for the Fair Isle dots causes messy floats; work the unused strand on the wrong side and crochet over it every few stitches.
✗ Understuffing or overstuffing the body creates misshapen results; stuff firmly as you work and overstuff slightly before finishing each section for proper shape.
✗ Using a visible decrease can leave gaps in the fabric; use an invisible decrease as recommended to avoid gaps at the closing rounds.