About This Wallace and Wanda Whales Amigurumi Pattern
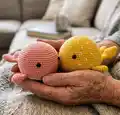
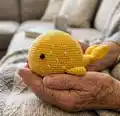
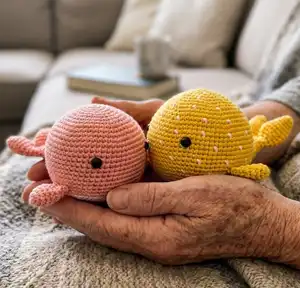
This pattern creates two small whale amigurumi named Wallace and Wanda. The basic construction is the same for both whales, with optional fair isle color dots for Wallace to add playful speckles. You will crochet the body from top to bottom and make fins and tail separately for neat assembly.
Complete rounds are provided for every section including body, tail, and fins, plus clear joining and finishing instructions. The pattern uses DK cotton and small safety eyes to create a polished, child-safe toy.
Why You'll Love This Wallace and Wanda Whales Amigurumi Pattern
I absolutely love this pattern because it blends a simple spherical body shape with playful details like a dotted fair isle finish. I enjoy how quickly one whale comes together while still offering room for creative color choices and tiny finishing touches. The construction is rewarding — the invisible decreases and separate fins give a professional look that I always appreciate when gifting. I also love that it adapts easily: change yarn weight or hook size and you have a new-sized friend in no time.
Switch Things Up
I love how easy it is to customize these whales with different colors and scales — try pastel colors for a soft nursery buddy or bright neons for a playful shelf friend.
To make a mini keychain version, I change to a thinner yarn and a smaller hook; the proportions stay the same and the result is adorable.
I sometimes add embroidery details instead of safety eyes for a fully handmade finish that is child-safe for little ones.
Swap the fair isle dots for stripes or speckles by alternating small sections of contrasting color as you work around the body.
I like to sew tiny felt or crochet accessories — a bow, a little hat, or a tiny scarf — to personalize each whale.
If you want a sturdier, posable whale, add a short length of wire inside the tail or fins when attaching them during assembly.
For a fluffy, plush look, try using a slightly bulkier yarn and a bigger hook; you will get a cuddlier, larger whale.
I sometimes experiment with different eye placements to create distinct personalities — closer together for a cute look, or slightly wider for a surprised expression.
To make a set, change color combinations for a matching family — for example, two tinted shades and one neutral to create a coordinated trio.
I recommend practicing the invisible decrease on a swatch if you want the neatest closure; once I perfected it my finished pieces looked much cleaner.
Common Mistakes & How to Fix Them
✗ Skipping the stitch marker at the beginning of rounds causes you to lose track of the round start; use a marker and move it each round to stay accurate.
✗ Failing to stuff as you go leads to uneven shaping and lumps; stuff firmly and add more stuffing slightly before finishing each section to keep the shape consistent.
✗ Not using an invisible decrease will create gaps in your closure area; practice and use an invisible decrease to create a smooth finish at the closing rounds.
✗ Cutting and rejoining yarn for color dots can create messy joins and many ends; carry the yarn on the wrong side for color changes and work over the unused strand every few stitches to hide floats.