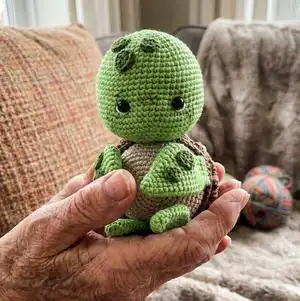
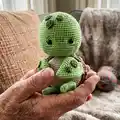
Make a sweet crochet turtle using this detailed pattern designed for intermediate crocheters. You will create a cute head, shell, legs, and charming spots with step-by-step rounds and clear placement instructions. The pattern includes materials, abbreviations, assembly guidance, and helpful finishing tips so you can complete a 20 cm toy you will be proud of.
Progress Tracker
0% Complete
— Head :
Round 3 :
(1 sc, inc) x 6 (18)
Round 4 :
(2 sc, inc) x 6 (24)
Round 5 :
(3 sc, inc) x 6 (30)
Round 6 :
(4 sc, inc) x 6 (36)
Round 7 :
(5 sc, inc) x 6 (42)
Round 8 :
(6 sc, inc) x 6 (48)
Round 9 :
(7 sc, inc) x 6 (54)
Round 10-11 :
54 sc (54) 2 rounds
Round 12 :
(8 sc, inc) x 6 (60)
Round 13-20 :
60 sc (60) 8 rounds
Round 21 :
10 sc, (inc) x 3, 7 sc, (inc) x 3, 37 sc (66)
Round 22-23 :
66 sc (66) 2 rounds
Round 24 :
(9 sc, dec) x 6 (60)
Round 25 :
(8 sc, dec) x 6 (54)
Round 26 :
(7 sc, dec) x 6 (48)
Round 27 :
(6 sc, dec) x 6 (42)
Info :
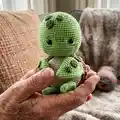
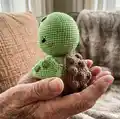
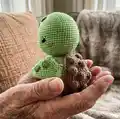
Place the eyes between rnds 19/20, with a distance of 8 sts between the eyes. Insert the first eye over the second increase of rnd 21, insert the second eye over the fifth increase of rnd 21. Pic. 1-3
Round 28 :
(5 sc, dec) x 6 (36)
Info :
Start to stuff the head.
Round 29 :
(4 sc, dec) x 6 (30)
Round 30 :
(3 sc, dec) x 6 (24)
Round 31 :
(2 sc, dec) x 6 (18)
Info :
Stuff the head from rnd 29 to rnd 31 not tightly.
Round 32 :
(1 sc, dec) x 6 (12)
Info :
Cut the thread leaving a long tail. After all the head details are made, we'll close the opening on the head using this thread tail. Pic. 5
— Big spots :
Info :
Join the beginning and the end of rnd with sl st. Cut the thread leaving a long tail. Pic. 6
— Small spots :
Info :
Join the beginning and the end of rnd with sl st. Cut the thread leaving a long tail. Pic. 7
— Head details :
Info :
The beginning and the end of all threads are located in the head opening. I tie all thread tails in knots and cut the ends after all the head details are made.
Info :
Make shaping for the eyes. Use the thread of the green color YarnArt Jeans. Using a needle, insert the thread into the hole on the head, bring it out at point 1, insert it at point 2 and bring it out at point 3, insert it at point 4 and bring it out into the hole on the head. Tighten the ends of the threads well and fix them with a knot. Pic. 8
Info :
Embroider the eye whites with the thread of cream color. Pic. 9-11
Info :
Embroider the eyebrows above the eyes with brown thread YarnArt Jeans. Divide it into 4 thin strands and use 2 strands. Pic. 12 Draw freckles between the eyes and on the cheeks. Pic. 12
Info :
1. Sew a large spot between rnds 8 and 12. 2. Sew a small spot between rnds 5 and 8. 3. Sew a small spot between rnds 6 and 9. Count the rnds from the top of the head. Pic. 13
Info :
Close the opening on the head using the thread tail as follow: (dec) x 6 (6)
Info :
Pull the opening closed pulling a needle through front loops of stitches. Weave in the thread tail. Pic. 14-15
— Lower legs :
Round 2 :
(1 sc, inc) x 3 (9)
Round 4 :
(2 sc, inc) x 3 (12)
Round 5 :
(3 sc, inc) x 3 (15)
Round 7 :
(4 sc, inc) x 3 (18)
Round 8-10 :
18 sc (18) 3 rounds
Round 11 :
6 sc, (dec) x 3, 6 sc (15)
Round 12 :
4 sc, (dec) x 3, 5 sc (12)
Round 13-14 :
12 sc (12) 2 rounds
Round 15 :
Fold the leg in half and work 6 sc through two layers. Cut the thread. Pic. 16
— Upper legs :
Info :
Please note! Before you start crocheting the upper legs, you need to crochet the spots.
Round 2 :
(1 sc, inc) x 3 (9)
Round 4 :
(2 sc, inc) x 3 (12)
Round 6 :
3 sc, (1 sc, inc) x 3, 3 sc (15)
Round 7 :
3 sc, (2 sc, inc) x 3, 3 sc (18)
Round 8 :
3 sc, (3 sc, inc) x 3, 3 sc (21)
Round 9-10 :
21 sc (21) 2 rounds
Round 11 :
3 sc, (4 sc, inc) x 3, 3 sc (24)
Round 12-14 :
24 sc (24) 3 rounds
Round 15 :
6 sc, (dec) x 6, 6 sc (18)
Round 16 :
6 sc, (dec) x 3, 6 sc (15)
Info :
Sew the spots on the legs, sew a large spot on top, and a smaller spot under it. Pay attention to the location of the spots on both legs. Pic. 17
Round 17 :
(3 sc, dec) x 3 (12)
Round 18-19 :
12 sc (12) 2 rounds
Round 20 :
Sc, fold the leg in half and work 6 sc through two layers. Cut the thread. Pic. 18
— Shell (upper part) :
Round 2 :
(bo, sc) x 6 (12)
Round 3 :
(1 sc, inc) x 6 (18)
Round 4 :
(bo, sc, in next st: bo, sc ) x 6 (24)
Round 5 :
(3 sc, inc) x 6 (30)
Round 6 :
(bo, sc, bo, sc, in next st: bo, sc) x 6 (36)
Round 7 :
(5 sc, inc) x 6 (42)
Round 8 :
(bo, sc, bo, sc, bo, sc, in next st: bo, sc) x 6 (48)
Round 9 :
(7 sc, inc) x 6 (54)
Round 10 :
(bo, sc) x 23, ch7, skip 7 st, beginning from the 8th st crochet 1 sc (54)
Info :
Let's start crocheting the lower part of the shell. Use a 2 mm crochet hook. Change to beige color. Don't cut the brown thread, leave it in front of the work. Pic. 22 Next crochet in beige color.
Round 12-13 :
54 sc (54) 2 rounds
— Shell (joining legs and lower part) :
Info :
Return to the brown thread. We are going to join the legs. Use a crochet hook 2 mm. Ch1, 3 sc, take the upper leg and crochet through both pieces layers 6 sc. Pay attention to the position of the leg. Pic. 25
Info :
Next crochet 6 sc, take the lower leg and crochet through both pieces layers 6 sc, 3 sc, take the second lower leg and crochet 6 sc through both pieces layers. Pay attention to the position of the lower legs. Pic. 27
Info :
Then crochet 6 sc, take the upper leg and crochet through both pieces layers 6 sc. Pay attention to the position of the second upper leg. Pic. 28
Info :
3 sc, sl st. Cut the thread leaving a long tail. Pic. 29
Round 14 :
(7 sc, dec) x 6 (48)
Round 15 :
(6 sc, dec) x 6 (42)
Round 16 :
(5 sc, dec) x 6 (36)
Round 17 :
(4 sc, dec) x 6 (30)
Round 18 :
(3 sc, dec) x 6 (24)
Round 19 :
(2 sc, dec) x 6 (18)
Round 20 :
(1 sc, dec) x 6 (12)
Info :
Cut the thread leaving a long tail. Using this thread tail pull the opening closed pulling a needle through front loops of stitches. Weave in the thread tail. Add some stuffing through the hole on top, giving the shell a beautiful shape. Pic. 30
— Pattern for the upper part of the shell :
Info :
This pattern shows how to crochet rnds 1 - 6 (in order for you to understand the principle of crocheting of the upper part of the shell). Use the chart to understand the placement of bo and sc stitches. Rnds 1-6 diagram shown on pattern page.
— Toy assembly :
Info :
Sew the head to the shell having fixed it with pins. Pic. 31-33
Info :
Your Turtle is now complete! Finish by weaving in all ends and trimming any excess thread.
This delightful Turtle amigurumi is perfect for gifting or displaying as a handmade keepsake. Follow the full rounds, stitches, and assembly steps to create a toy full of character and charm. Enjoy the shaping, textured shell, and tiny embroidered details that make this toy special. 🧶🐢