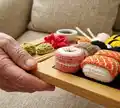
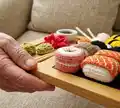
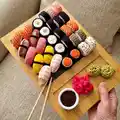
🧶 Beautiful ✨ Detailed 💝 Adorable

Sushi Set Amigurumi Pattern

Sushi Set Amigurumi Pattern
4.0★ Rating
5-7 Hours Time Needed
3.7K Made This
✂️

Intermediate Level

Ideal for those with basic crochet experience, featuring slightly more advanced stitches and techniques to expand your skills.

⏱️

Weekend Treat

Takes 5-7 hours, making it an enjoyable project to finish over a couple of days.

🎁

Tiny Treasure

Small, sweet, and gift-worthy creations that fit perfectly in the palm of your hand with detailed charm.

About This Sushi Set Amigurumi Pattern

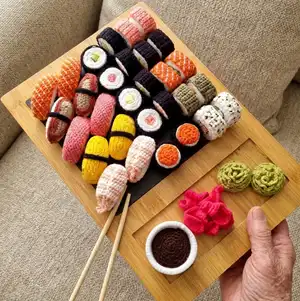
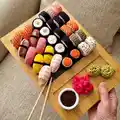
This pattern creates a charming set of mini crochet sushi pieces including round maki, caviar, square rolls, California, tempura and Philadelphia styles. Each piece uses a small rice base, embroidered fillings and optional nori wraps to achieve realistic tiny details. Techniques include working in the round, back loop rounds, embroidered fillings, French knots and small turning-row wraps. The pattern is organized step-by-step so you can make a variety of rolls and customize colors or fillings.

Sushi Set Amigurumi Pattern crochet pattern - detailed view of completed project

Perfect for makers who enjoy small, detailed projects and embroidery on crochet. You can mix and match fillings and yarn colors to create your own sushi set.

Why You'll Love This Sushi Set Amigurumi Pattern

I absolutely love this pattern because it combines small-scale amigurumi construction with playful embroidery details that really bring each roll to life. The variety of rolls lets me experiment with colors and textures while staying in one cohesive set. I enjoy how quick each individual piece is to make, yet how satisfying the final arrangement looks when grouped together. Making this set is a relaxing creative exercise and gives me adorable handmade items to gift or display.

Sushi Set Amigurumi Pattern step 1 - construction progress Sushi Set Amigurumi Pattern step 2 - assembly progress Sushi Set Amigurumi Pattern step 3 - details and accessories Sushi Set Amigurumi Pattern step 4 - final assembly and finishing

Switch Things Up

I love how easy it is to customize this sushi set: you can change yarn colors to make playful versions like pastel or neon sushi for a modern look.

I sometimes make tiny keychain versions by using thinner yarn and a smaller hook — just add a small loop before finishing and attach a split ring.

I also experiment with embroidery: try felt or small beads for alternative textures if you want a different finish on the fillings.

To make larger display pieces, choose a bulkier yarn and a larger hook; the pattern scales predictably but adjust the number of nori rows to fit the rice base.

I like adding wire to square rolls' walls for a slightly poseable effect in decorative displays — use thin craft wire wrapped inside the seam while sewing.

For a realistic sushi box set, vary fillings across rolls: use peach yarn for salmon stripes, olive green for avocado, and coral/pink for crab — mix them for visual interest.

I often swap glue for small whipstitches when making toys for kids, because sewn seams hold up better to handling and washing.

Try combining different embroidery stitches: satin stitch for cream cheese, French knots for tobiko, and little back stitches for cucumber edges — it creates tactile contrast.

I like to create a matching tray or small felt plate to display my sushi set, which makes a lovely gift presentation.

Finally, mix multicolor yarn for the tobiko or tempura batter for unique speckled textures — it’s an easy way to personalize each roll and make a truly one-of-a-kind set.

Common Mistakes & How to Fix Them

✗ Skipping stitch markers during rounds can lead to losing the start of a round; place a marker at the first stitch of each round to keep an accurate count. ✗ Failing to stuff while sewing causes an uneven shape in the roll; stuff gradually as you sew and adjust stuffing to maintain a flat, even surface. ✗ Using the wrong yarn thickness for the nori strips makes wrapping awkward; use the recommended Baby Cotton or triple-thin thread as suggested to match the rice base thickness. ✗ Embroidering without stepping back from the edge can crowd the border; step back two rows from the edge when embroidering fillings for a neat border. ✗ Cutting yarn too early on the second base disc loses the joining tail; do not cut the yarn on the second disc when instructed so you can sew walls and details together.

Sushi Set Amigurumi Pattern

Make a delightful, pocket-sized sushi set for fun play or charming decor. This pattern walks you through crochet rice bases, nori wraps, embroidered fillings and tiny details that bring each roll to life. You will love the variety—round maki, caviar, square rolls and more—each with clear step-by-step rounds and finishing tips. Perfect for gifting, display, or a cute collection on your shelf.

Intermediate 5-7 Hours

Materials Needed for Sushi Set Amigurumi Pattern

— Main Fabric

  • 01
    Yarn Art Baby Cotton (50% cotton 50% acrylic, 165 m/50 g) - 401 warm white: 3 skeins
  • 02
    Yarn Art Baby Cotton (other shades by 1 skein each): 400 snow-white, 460 black, 431 light yellow, 432 yellow, 436 olive green, 440 green, 421 bright orange, 412 peach, 420 coral, 423 pink coral, 405 beige, 402 cream, 429 terracotta, 408 brown
  • 03
    Yarn Art Baby Cotton Multicolor (50% cotton 50% acrylic, 165 m/50 g) - 5216 (mix of white+bright orange+red): 1 skein
  • 04
    Yarn Art Baby Cotton Multicolor - 5219 (mix of light yellow+olive green+black): 1 skein
  • 05
    Optional very thin threads twisted three together if multicolor yarn unavailable (make triple thread same thickness as main yarn)

— Tools Required

  • 01
    Crochet hook size 2.0 mm (for all details) - PDF lists 2 mm
  • 02
    Crochet hook size 1.75 mm (for soy sauce only)
  • 03
    Synthetic fiberfill (polyester stuffing)
  • 04
    Scissors
  • 05
    Big-eyed tapestry needle for sewing and embroidery
  • 06
    Hot glue gun (optional) for attaching nori wraps
  • 07
    Piece of hard plastic (paper folder or table placemat) for shaping
  • 08
    Stitch markers
  • 09
    Pins for assembly (optional)

Progress Tracker

0% Complete

— Simple sushi rolls with 1 ingredient (Maki) :

Info :

Crochet all rice bases with warm white. Use a marker for easier rounds counting.

Round 1 :

6 sc in AR

Round 2 :

inc*6=12 sc

Round 3 :

(1 sc, inc)*6=18 sc

Round 4 :

1 sc, inc, (2 sc, inc)*5, 1 sc=24 sc

Round 5 :

(3 sc, inc)*6=30 sc. Crochet 1 more sc after the last inc and finish with a sl st. Cut the yarn.

Info :

Make another circle in the same way, but do not cut the yarn.

Round 6 :

sc 30 through the back loops only.

Round 7-10 :

Crochet 4 rounds of 30 sc through the both loops. Finish with a sl st, leave a long end.

Info :

To make avocado roll thread the light yellow yarn into the needle and embroider a square with satin stitches.

Info :

Add an olive green line.

Info :

Embroider the same piece of avocado on the second circle with walls.

Info :

Sew both details together through the both loops of the last round of the walls and through the back loops of the flat circle. Stuff not too firmly while sewing.

Info :

Thread the light yellow yarn into the needle and make a few stitches through the roll in the center. Do not tighten, but just fix the flat shape of the round parts.

— Nori wrap (round rolls) :

Info :

Crochet nori wrap with black yarn. Work turning rows with a turning ch in the beginning of every row. Chain 6+1, sc 6 in every row.

Info :

Crochet total 33 rows (or as many as needed to wrap the rice base). Leave a long end.

Info :

You can sew or glue the nori wrap to the rice base. I liked to glue, then sew the short sides. With glue, the shape of the rolls is more even and clear. If sewing on nori, first sew the short sides of the nori, and then sew along the long sides with small stitches.

Info :

Such rolls can be made with any fillings to your taste: cucumber (436+440), salmon (5216), tuna (420).

— Roll with caviar :

Info :

Crochet a round roll with any filling, for example, with a cucumber. Moreover, the filling can be done only on one side.

Round 1 :

6 sc in AR (use bright orange for caviar)

Round 2 :

inc*6=12 sc

Round 3 :

(1 sc, inc)*6=18 sc

Round 4 :

1 sc, inc, (2 sc, inc)*5, 1 sc=24 sc. Finish with a sl st, leave a long end.

Info :

Embroider caviar with a French knot, making 3-4 turns around the needle.

Info :

Fill the entire surface of the circle with such knots.

Info :

Glue on the side of the roll where there is no filling.

— Nori wrapped square roll :

Round 1 :

8 sc in AR

Round 2 :

(3 sc in 1 st, 1 sc)*4=16 sc

Round 3 :

1 sc, (3 sc in 1 st, 3 sc)*3, 3 sc in 1 st, 2 sc=24 sc

Round 4 :

2 sc, (3 sc in 1 st, 5 sc)*3, 3 sc in 1 st, 3 sc=32 sc

Round 5 :

3 sc, (3 sc in 1 st, 7 sc)*3, 3 sc in 1 st, 4 sc=40 sc. Finish with a sl st, cut the yarn.

Info :

Make the same square, but do not cut the yarn.

Round 6 :

40 sc through the back loops

Round 7-10 :

Make 4 rounds of 40 sc through both loops. Finish with a sl st, leave a long end.

Info :

Embroider the filling, stepping back 2 rows from the edge on all sides. First, embroider a piece of avocado.

Info :

Add a piece of cucumber.

Info :

Then add a fish.

Info :

On the second part with sides, you need to embroider in a mirror image.

Info :

Sew both parts together: through the back loops of the square and through the both loops of the walls. Stuff while sewing not too tight.

Info :

Sew several stitches through the center so that the square surfaces remain flat.

Info :

Crochet nori in the same way as for round rolls, but 38 rows.

Info :

Glue or sew the nori to the rice base.

— California roll :

Info :

Crochet the rice base as in the previous description. Embroider nori with black yarn, stepping back 2 rows from the edge on all sides.

Info :

Embroider a slice of avocado in one corner.

Info :

In the other two add cucumber.

Info :

Fill the remaining space with crab: embroider small stitches with coral and pink-coral yarn.

Info :

On the detail with the sides embroider the filling in a mirror image.

Info :

Sew both pieces together as usually.

Info :

To imitate tobiko caviar, use multicolor yarn 5216 and crochet a strip like nori: 6 sc in width and 38 rows in height.

Info :

Sew or glue around the rice base.

— Tempura roll :

Info :

Crochet the base as in the previous version. Embroider the filling: a piece of cucumber.

Info :

Embroider cream cheese with snow-white yarn.

Info :

And a bigger piece of salmon.

Info :

Sew and stuff.

Info :

For tempura batter use multicolor yarn 5219. Crochet a strip 6 sc wide and 38 rows high.

Info :

Glue or sew around the rice base.

— Philadelphia roll :

Info :

Crochet the base as in the previous version. Embroider nori with black yarn, stepping back 2 rows from the edge of the square.

Info :

In the corners embroider pieces of avocado and cucumber.

Info :

Fill the remaining space with cream cheese.

Info :

Repeat the filling on the second part in a mirror image.

Info :

Sew and stuff.

Round 1 :

3 sc in AR. Pull the ring and crochet turning rows with a turning ch in the beginning of every new row.

Round 2 :

inc, 1 sc, inc = 5 sc

Round 3 :

inc, 3 sc, inc = 7 sc

Round 4 :

inc, 4 sc, dec = 7 sc

Round 5 :

dec, 4 sc, inc = 7 sc

Info :

Crochet all even rows as the fourth, all odd ones as the fifth up to 23 rows.

Round 24 :

dec, 3 sc, dec = 5 sc

Round 25 :

dec, 1 sc, dec = 3 sc

Round 26 :

3 sc together (dec). Cut the yarn.

Info :

Back stitch with peach yarn every 2 rows.

Info :

Glue the slice of salmon on 3 sides.

— Sesame roll :

Info :

Crochet the base as in the previous version. Embroider the nori with black yarn, stepping back 2 rows from the edge of the square.

Info :

Embroider a piece of avocado and salmon.

Info :

In the other corner embroider a piece of cucumber.

— Final assembly & finishing :

Info :

Sew both pieces together through back loops and walls as instructed, stuff while sewing not too tight, and fix flat surfaces with several stitches in the center.

Info :

Glue or sew nori strips around rice bases as preferred; glue gives an even shape, sewing secures long-term durability.

Info :

Use French knots for caviar and satin stitch embroidery for avocado and other fillings. Mirror embroidery on second halves where required.

Assembly Instructions

  • Sew two flat rice discs and the wall together: align the back-loop round of the flat circle with the last round of the walls, then stitch through both loops of the wall and the back loops of the flat circle, stuffing gradually while closing.
  • Attach nori wrap by gluing the long side to the rice base for a neat finish, then sew the short sides and small stitches along the long edges for durability if desired.
  • Place embroidered filling pieces on the flat face before joining halves; for square rolls embroider fillings on both halves in mirror image and then sew together through back loops and walls.
  • Glue or sew caviar or salmon slices to the outside edge where there is no filling, and add several center stitches to keep flat surfaces aligned.
  • When wrapping square or round rolls, check fit before securing and adjust the number of nori rows so the wrap meets neatly without overlapping.
  • For tempura or tobiko strips, glue around the rice base first for shape, then sew short sides to finish and secure the strip.

Important Notes

  • 💡Use stitch markers to keep track of the beginning of rounds and when working back loop rounds to avoid miscounts.
  • 💡Stuff gently and evenly while sewing pieces together to avoid bulging or flat spots in the sushi shapes.
  • 💡When embroidering fillings, step back two rows from the edge so the border remains clean and the filling does not crowd the seam.
  • 💡If using glue to attach nori, allow adequate drying time and then reinforce short sides with small hand stitches for lasting hold.

This adorable mini sushi set brings tiny handmade joy to any shelf or gift box. Customize fillings and colors for a playful collection of round and square rolls that look good enough to eat. 🧶🍣 Treat yourself or surprise a friend with a unique handmade set—happy crocheting! ✨
You ask,

we answer.

FAQs

What size will the finished pieces be?

Finished sushi pieces are small and palm-sized; size varies with yarn and hook but typically measures around 2-4 cm across for each roll using the recommended yarn and hook sizes.

Can I use different yarn weights for this pattern?

Yes, you can substitute yarn but the final size and texture will change; choose a hook appropriate to your yarn and be prepared to adjust nori strip rows to fit the rice base.

Do I need prior crochet experience for this pattern?

This pattern is rated intermediate; you should be comfortable with working in the round, increases/decreases, back loop rounds, and basic embroidery stitches.

How long does this project typically take to complete?

Most crocheters complete a small set of several rolls in about 5-7 hours, though time will vary depending on the number of pieces and embroidery detail you include.

Can I make these as keychains or toys for children?

Yes, for keychains you can add an eyelet or small loop; if giving to small children, avoid hot-glued parts and secure all pieces with stitching rather than small embellishments that could come loose.