🧢 Beautiful ✨ Detailed πŸ’ Adorable

Sun Star Snowflake Pattern

Sun Star Snowflake Pattern
3.9β˜… Rating
2-4 Hours Time Needed
3.8K Made This
βœ‚οΈ

Intermediate Level

Ideal for those with basic crochet experience, featuring slightly more advanced stitches and techniques to expand your skills.

⏱️

Bite-Sized Project

Finishes in 2-4 hoursβ€”perfect for an afternoon of creative relaxation.

πŸŽ„

Holiday Cheer

Festive fun for the season, bringing handmade magic to celebrations and creating new family traditions.

About This Sun Star Snowflake Pattern

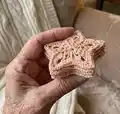
This pattern creates a pretty Sun Star snowflake ornament worked in thread with a small hook for a crisp, lace-like finish. It includes a stitch legend, photo tutorial for the BPhdc 2tog, and written instructions in US terms. The finished star blocks flat and can be stiffened lightly for hanging or display.
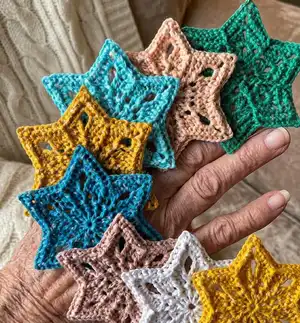
Sun Star Snowflake Pattern crochet pattern - detailed view of completed project

Perfect for holiday decorations, garlands or gift tags, the star measures about 10 cm after blocking with the recommended thread and hook. The pattern uses common post stitches to create textured relief on the star points.

Why You'll Love This Sun Star Snowflake Pattern

I absolutely love this pattern because it transforms simple thread and a tiny hook into a delicate, star-shaped ornament that looks much more intricate than it is. I enjoy the combination of front-post and back-post stitches that give the snowflake a beautiful relief and texture. The pattern includes a clear photo-tutorial for the BPhdc 2tog, which makes the trickiest part approachable and satisfying to learn. It's a lovely, quick project I like to make in different colors for a festive garland or to gift as special handmade decorations.

Sun Star Snowflake Pattern step 1 - construction progress Sun Star Snowflake Pattern step 2 - assembly progress Sun Star Snowflake Pattern step 3 - details and accessories Sun Star Snowflake Pattern step 4 - final assembly and finishing

Switch Things Up

I love customizing this snowflake by changing yarn color and texture; try metallic or variegated thread for festive sparkle.

To make a larger star use a thicker thread or a larger hook and consider adding an extra round of stitches for size.

I sometimes add tiny beads in the ch2 spaces or at star points for a beaded, decorative look.

Try combining two or three stars together to create a layered ornament or a decorative garland for the tree.

If you prefer a softer look, do not stiffen after blocking and use a softer cotton thread for a delicate drape.

For a rustic style use natural twine or hemp for hanging loops instead of shiny ribbon.

I often stitch a small sequin or button to the center for a special finishing touch on gift ornaments.

Experiment with holding two threads together (one glitter, one plain) to create a subtle shimmer while maintaining stitch definition.

If you want a pendant, add a small jump ring and a chain or ribbon to turn it into a holiday necklace.

Make a set in different sizes and colors and attach them to gift tags, creating a coordinated and handmade presentation for holiday gifts.

Common Mistakes & How to Fix Them

βœ— Working with a hook that is too small for your tension can make post stitches difficult and the lace too tight; try going up one hook size to loosen tension and preserve stitch definition. βœ— Skipping the stitch count check after rounds leads to misaligned star points and uneven shapes; count stitches at the end of every round and correct immediately if the numbers do not match. βœ— Not blocking and stiffening the snowflake will leave the star looking floppy and uneven; soak in liquid starch or water, pin to shape on a blocking board and let fully dry before removing pins. βœ— Rushing the BPhdc 2tog without following the photo-tutorial can create a messy cluster of loops; follow the written steps slowly and refer to the photos to make sure you have the correct number of loops before finishing the stitch.
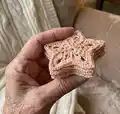
Sun Star Snowflake Pattern

Make a delicate star-shaped snowflake ornament perfect for your holiday decorations or gift-giving. This pattern teaches back-post and front-post stitches plus a small 6-round star motif that blocks beautifully. You will enjoy a clear photo-tutorial for the tricky BPhdc 2tog stitch and step-by-step written instructions in US terms.

Intermediate 2-4 Hours

Materials Needed for Sun Star Snowflake Pattern

β€” Main Fabric

  • 01
    Scheepjes Maxi Sweet Treat (BonBon) - 140 meters / 25 g (main thread option)
  • 02
    Drops Glitter Silver - 700 meters / 10 g (glitter thread / accent)
  • 03
    Approximately 20 meters of thread + glitter yarn used per snowflake (approximate amount used by designer)

β€” Tools Required

  • 01
    Crochet hook size 1.75 mm (recommended) or 2.0 mm (depending on your tension)
  • 02
    Scissors
  • 03
    Tapestry needle for weaving in ends
  • 04
    Blocking board and rustproof pins for shaping
  • 05
    Liquid starch or fabric stiffener (optional) for finishing
  • 06
    Small pieces of thread, ribbon or invisible thread to hang the snowflake

Progress Tracker

0% Complete

β€” Sun Star Snowflake :

Infos :

Materials: Scheepjes Maxi Sweet Treat (BonBon) 140 meters 25g; Drops Glitter Silver 700 meters 10g. Hook: 1.75 mm or 2 mm (depending from your tension). Scissors, tapestry needle to weave in ends. You can use any similar yarn and suitable hook. The size of the finished snowflake depends on the yarn and hook you use. My snowflake is approx. 10 cm in diameter after blocking using thread 140m/25g and 2 mm hook. I used approximately 20 m thread and glitter yarn.

Infos :

Blocking and Finishing: It is optional but most snowflakes need to be blocked and (lightly) stiffened. Blocking will make your snowflake flat, neat and symmetrical. You can use laundry starch. Soak the snowflake with some liquid starch or just water (which ever do you prefer). Gently squeeze out any excess liquid and press the snowflake approximately to shape. Lay the snowflake flat on the blocking board and pin the snowflake from the center out to the edges. Let it dry completely before removing the pins. This starflake is only blocked and slightly stretched out. To hang the snowflake, attach a piece of thread, yarn, ribbon, invisible thread or wire.

Infos :

Note: You may need to go up a hook size for best results if your tension is tight; otherwise you can have a problem with so much back and post stitches in this pattern. If you have problems where you should place stitches, please take a look at the chart (diagram).

Info :

BPhdc 2tog: Yarn over the crochet hook, insert the hook around the next BPhdc, yarn over the hook again. Pull the yarn through the stitch on your crochet hook. You should now have three loops on your hook. Skip the next FPhdc. Insert the hook around the next BPhdc; yarn over the hook again. Pull the yarn through the loop on your hook. You should now have five loops on your hook. Yarn over the hook one last time. Pull the yarn through all five loops on your crochet hook.

Info :

Written instructions & photo-tutorial BPhdc 2tog (written in US terms).

Round 1 :

Foundation ring: ch6; join with sl st in 1st chain. Ch3 (counts as 1st dc), 11 dc in ring. Join with a sl st in 3rd chain of initial ch3. (12 dc)

Round 2 :

sl st between two dc, ch3 (counting as 1st dc), FPdc around 1st dc. *dc in space between two dc, FPdc around next dc* Repeat from * around; sl st in 3rd chain of initial ch3. (12 dc, 12 FPdc)

Round 3 :

BPsc ch2 (counting as BPdc) around 1st dc (initial ch3), ch1, FPdc around FPdc, ch1. *BPdc around dc, ch1, FPdc around FPdc, ch1* Repeat from * around; sl st into the 2nd chain of initial BPsc ch2. (12 BPdc, 12 FPdc, 24 ch1 spaces)

Round 4 :

Ch2 (counting as hdc), dc in ch1 space, [FPtr, ch4, FPtr] around next FPdc; dc in ch1 space, hdc in BPdc, hdc in ch1 space, FPhdc around FPdc. *hdc in ch1 space, hdc in BPdc, dc in ch1 space, [FPtr, ch4, FPtr] around next FPdc; dc in ch1 space, hdc in BPdc, hdc in ch1 space, FPhdc around FPdc* Repeat from * around; hdc in ch1 space, sl st into the 2nd chain initial ch2. (24 hdc, 12 dc, 12 FPtr, 6 ch4 spaces, 6 FPhdc)

Round 5 :

Ch2 (counting as hdc), hdc in dc, dc in FPtr; [3dc, ch2, 3dc] in ch4 space, dc in FPtr, hdc in dc, hdc in hdc, skip hdc, FPhdc around FPhdc. *skip next hdc, hdc in hdc, hdc in dc, dc in FPtr; [3dc, ch2, 3dc] in ch4 space, dc in FPtr, hdc in dc, hdc in hdc, skip hdc, FPhdc around FPhdc* Repeat from * around; skip hdc and join with a sl st into the 2nd ch of initial ch2. (36 hdc, 36 dc, 6 ch2 spaces, 6 FPhdc)

Round 6 :

(check the phototutorial BPhdc 2tog on page 4) Ch1 (doesn't count as a stitch), BPhdc around next 5 stitches (hdc and 4dc); [2hdc, ch2, 2 hdc] in ch2 space; BPhdc around next 5 stitches (4dc and hdc); work BPhdc 2tog around the next 2 hdc (skip the FPhdc between 2hdc sts). * BPhdc around next 5 stitches (hdc and 4dc); [2hdc, ch2, 2 hdc] in ch2 space; BPhdc around next 5 stitches (4dc and hdc); work BPhdc 2tog around the next 2 hdc (skip the FPhdc between 2hdc sts)* Repeat from * around; sl st in initial ch1. Finish off, weave in the ends. (60 BPhdc, 24 hdc, 6 ch2 spaces, 6 BPhdc 2tog)

Assembly Instructions

  • Block the finished snowflake: soak in liquid starch or water, gently squeeze out excess, pin the snowflake to a blocking board from the center out to the edges, and let dry completely before removing pins.
  • To hang the snowflake attach a piece of thread, yarn, ribbon, invisible thread or thin wire to one star point and tie securely; hide the knot behind the star if desired.
  • Weave in all ends neatly with a tapestry needle and trim close to the work so the joins are unobtrusive.
  • If using glitter yarn or two strands, secure both yarn tails when finishing off and weave them into the back of the star before blocking for a clean finish.
  • Optionally stiffen with laundry starch or fabric stiffener after blocking for a firmer ornament that holds its shape better.

Important Notes

  • πŸ’‘Use a slightly larger hook if your tension is tight to allow the post stitches to sit correctly and to avoid a puckered star.
  • πŸ’‘Count your stitches at the end of every round to ensure the correct number of dc, hdc and post stitches are present before proceeding.
  • πŸ’‘Pin the snowflake evenly while blocking, working from the centre outwards, to get a symmetrical and flat result.

This Sun Star Snowflake pattern is a joyful way to add handmade charm to your holiday season. Try different threads and glitter yarns for unique effects and give them as thoughtful, handcrafted gifts. Happy crocheting and may your holidays sparkle with handmade magic! 🎁✨

You ask,

we answer.

FAQs

What size will the finished piece be?

The size of the finished snowflake depends on yarn and hook, but the designer's sample is approximately 10 cm in diameter after blocking using thread 140m/25g and a 2.0 mm hook.

Can I use different yarn weights for this pattern?

Yes, you can use different yarn weights, but this will change the final size and drape; adjust your hook accordingly and remember to block after finishing for best results.

Do I need prior crochet experience for this pattern?

This pattern is rated intermediate because it uses front-post and back-post stitches and the BPhdc 2tog technique; familiarity with post stitches is recommended.

How long does this project typically take to complete?

Most makers finish a single snowflake in 2-4 hours depending on experience and whether you block and stiffen the star.

How do I stiffen the snowflake for hanging?

Soak the snowflake in liquid starch or water, gently squeeze out excess, pin to shape on a blocking board and let dry completely; you can also spray with fabric stiffener if preferred.