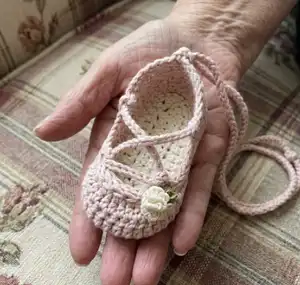
Create adorable hand-crocheted baby ballet flats with this clear, photo-assisted pattern. You will make sweet strappy flats with optional flower and ribbon accents — perfect for newborns through 12 months. The pattern includes multiple size variations, step-by-step rounds, and finishing instructions so you can customize each pair.
Progress Tracker
0% Complete
— Materials :
Info :
Sole (Color A) - 30 yards worsted weight Yarn. Upper (Color B) - 45 yards worsted weight yarn for largest size shoe. Flower - 6 yards fingering weight. Hook - F (3.75mm) for shoe and D (3.25mm) for flower and lace. Stitch Markers. Ribbon option - 2 - one yard lengths of 1.5 inch ribbon. Pictured shoes made with "I love this cotton" from Hobby Lobby.
— Abbreviations :
Info :
ch Chain. lp Loop. st Stich. sk Skip. sc Single crochet. hdc Half double crochet. dc Double crochet. sl st Slip stitch. bl Back loop. 2tog Decrease.
— Gauge :
Info :
4.5 hdc to one inch using F hook. Adjust your hook or yarn to obtain gauge.
— How to read pattern :
Info :
When there is a number followed by a stitch, that stitch needs to be worked over that number of stitches. All steps are separated with a comma. Everything in Brackets [ ] should be worked together as a group and worked as many times TOTAL as the number following.
— Example :
Info :
Ch 1, 5 sc, 2 hdc in each of the next 4 stitches, 6 dc2tog, [1 sc, 1 dc] 4 times. 1. Ch 1 (does not count as stitch) 2. 1 sc in each of the first 5 stitches 3. 2 hdc in each of the next 4 stitches 4. 6 double crochet decreases 5. 1 sc in next stitch 6. 1 double crochet in next stitch 7. Repeat steps 5 and 6, 3 more times (27 total stitches-)
— Blocking :
Round 1 :
1. Mist shoes with water. 2. Shape them to desired shape by pulling out wrinkles and ripples. 3. Let dry.
— Spike Stitch :
Info :
Spike sts are worked the same as a single crochet but instead of working into the current row, you drop down and work into the previous row right below. Insert hook in the next stitch one row below the current row, yarn over, pull a loop through, yarn over and pull loop through both loops on hook.
— Flower :
Info :
Flower - tiniest (tiny) D (3.25mm) hook. 1. With flower color, make a magic ring about six inches from the end. With thumb and forefinger hold yarn where it crosses. 2. Pull a lp through the ring you just made and crochet over 2 strands. 3. [Chain 3 (4), sl st back to ring] 10 (12) times. Bind off, 4. With leaf color pull a lp through ring, ch 4 (5), sl st back to ring 2 times, bind off. 5. Pull ends to center and then pull beginning tail you started with tightly, to close ring. 6. Arrange pedals and leaves to your liking. Tie ends in knot behind flower and attach to shoe.
— Newborn :
Info :
F (3.75mm) - 3.75 inches long. Do not count the ch st as a st at the beginning of a round. Join at end of round to the top of the first st (aka marked st). Joining st (marked st) is the first st of the next round.
Round 1 :
With color A, ch 11, mark lp on hk, 2 hdc in 2nd ch from hook, 8 hdc, 4 hdc in last ch, 8 hdc down the other side of foundation ch, 2 hdc in last ch, join with sl st to marked st. 24 total sts
Round 2 :
Ch 1, mark lp on hk, skip first st, 2 sc in each of the next two sts, 8 sc, 2 sc in each of the next 4 sts, 8 sc, 2 sc in each of the last two sts, join with sl st to marked st. 32 total sts
Round 3 :
Ch 1, mark lp on hk, 2 sc in each of the first 2 sts, 8 sc, 2 hdc, 2 hdc in each of the next 8 sts, 2 hdc, 8 sc, 2 sc in each of the last 2 sts, join with sl st to marked st. Cut yarn, leaving loop on hook and tail long enough to weave in. 44 total sts
Round 4 :
With color B, yarn over and pull lp through lp on hk, mark lp on hk, 44 bl sl st, join with sl st to marked st. 44 total sts. Pictures B and C.
Round 5 :
This round is worked over the stitches of the last round. Insert hk between sl sts and line of unworked loops from previous round. Hk should easily slip through. Ch 1, mark lp on hk, 5 hdc, 1 sc, 5 sl st, 3 sc, 1 hdc, 14 dc, 1 hdc, 3 sc, 5 sl st, 1 sc, 5 hdc, join with sl st to marked st. 44 total sts
Round 6 :
Ch 2, mark lp on hk, 3 dc, 3 hdc, 5 spike st, 7 sc, 8 hdc, 7 sc, 5 spike st, 3 hdc, 3 dc, join with sl st to marked st. 44 total sts See page 1 for how to do spike st.
Round 7 :
Ch 1, mark lp on hk, skip first st, 4 hdc, 4 sc, [skip next st, 1 sl st] 4 times, 6 sc2tog, [1 sl st, sk next st] 4 times, 4 sc, 2 hdc, 2 hdc in last st, join with sl st to marked st. 30 total sts
Round 8 :
Round 8 for option 1 - Picture J. Options 2 and 3 are on page 5. Ch 1, mark lp on hk, 3 bl sc, 3 bl sl st, ch 3, 1 bl sl st back in same st, 6 bl sl st, ch 3, 1 bl sl st back in same st, 7 bl sl st, ch 3, 1 bl sl st back in same st, 6 bl sl st, ch 3, 1 bl sl st back in same st, 3 bl sl st, 2 bl sc, join with sl st to marked st, ch 4, sl st back in same st, bind off.
— Strap :
Info :
Using D size hk, make a ch that measures 36 inches long, bind off, tie loose ends in knots, and trim. Pull strap through loops made in round 8, as indicated below in picture J.
— 3-6Months :
Info :
F (3.75mm) - 4.25 inches long. Do not count the ch st as a st at the beginning of a round. Join at end of round to the top of the first st (aka marked st). Joining st (marked st) is the first st of the next round.
Round 1 :
With color A, ch 13, mark lp on hk, 2 hdc in 2nd ch from hook, 10 hdc, 4 hdc in last ch, 10 hdc down the other side of foundation ch, 2 hdc in last ch, join with sl st to marked st. 28 total sts
Round 2 :
Ch 1, mark lp on hk, skip first st, 2 sc in each of the next two sts, 7 sc, 3 hdc, 2 hdc in each of the next 4 sts, 3 hdc, 7 sc, 2 sc in each of the last two sts, join with sl st to marked st. 36 total sts
Round 3 :
Ch 1, mark lp on hk, 2 hdc in each of the first 2 sts, 12 hdc, 2 hdc in each of the next 8 sts, 12 hdc, 2 hdc in each of the last 2 sts, join with sl st to marked st. Cut yarn, leaving loop on hook and tail long enough to weave in. 48 total sts
Round 4 :
With color B, yarn over and pull lp through lp on hk, mark lp on hk, 48 bl sl st, join with sl st to marked st. 48 total sts. Pictures B and C.
Round 5 :
This round is worked over the stitches of the last round. Insert hk between sl sts and line of unworked loops from previous round. Hk should easily slip through. Ch 1, mark lp on hk, skip first st, 6 hdc, 1 sc, 6 sl st, 1 sc, 6 hdc, 1 sc, 2 sc, 2 hdc, 14 dc, 2 hdc, 2 sc, 6 sl st, 1 sc, 4 hdc, 2 hdc in last st, join with sl st to marked st. 48 total sts
Round 6 :
Ch 2, mark lp on hk, 4 dc, 3 hdc, 6 spike st, 5 sc, 12 hdc, 5 sc, 6 spike st, 3 hdc, 4 dc, join with sl st to marked st. 48 total sts. See page 1 for how to do spike st.
Round 7 :
Ch 1, mark lp on hk, skip first st, 6 hdc, 1 sc, 6 sl st, [skip next st, 1 sl st] 4 times, 8 sc, 1 hdc, 2 hdc in last st, join with sl st to marked st. 35 total sts
— 6-12 months :
Info :
F (3.75mm) - 4.75 inches long. Do not count the ch st as a st at the beginning of a round. Join at end of round to the top of the first st (aka marked st). Joining st (marked st) is the first st of the next round.
Round 1 :
With color A, ch 15, mark lp on hk, 2 hdc in 2nd ch from hook, 12 hdc, 4 hdc in last ch, 12 hdc down the other side of foundation ch, 2 hdc in last ch, join with sl st to marked st. 32 total sts
Round 2 :
Ch 1, mark lp on hk, skip first st, 2 sc in each of the next two sts, 7 sc, 5 hdc, 2 hdc in each of the next 4 sts, 5 hdc, 7 sc, 2 sc in each of the last two sts, join with sl st to marked st. 40 total sts
Round 3 :
Ch 1, mark lp on hk, 2 hdc in each of the first 2 sts, 14 hdc, 2 hdc in each of the next 8 sts, 14 hdc, 2 hdc in each of the last 2 sts, join with sl st to marked st. Cut yarn, leaving loop on hook and tail long enough to weave in. 52 total sts
Round 4 :
With color B, yarn over and pull lp through lp on hk, mark lp on hk, 52 bl sl st, join with sl st to marked st. 52 total sts.
Round 5 :
This round is worked over the stitches of the last round. Insert hk between sl sts and line of unworked loops from previous round. Hk should easily slip through. Ch 1, mark lp on hk, skip first st, 6 hdc, 1 sc, 6 sl st, 1 sc, 6 hdc, 1 sc, 7 sl st, 1 sc, 7 sc, 1 hdc, 2 hdc in last st, join with sl st to marked st. 52 total sts
Round 6 :
Ch 2, mark lp on hk, 4 dc, 3 hdc, 7 spike st, 4 sc, 3 hdc, 10 dc, 3 hdc, 4 sc, 7 spike st, 3 hdc, 4 dc, join with sl st to marked st. 52 total sts. See page 1 for how to do a spike st.
Round 7 :
Ch 1, mark lp on hk, skip first st, 4 hdc, 7 sc, [skip next st, 1 sl st] 4 times, 1 sc2tog, 5 hdc2tog, 1 sc2tog, [1 sl st, skip next st] 4 times, 7 sc, 2 hdc, 2 hdc in last st, join with sl st to marked st. 37 total sts
— Round 8 Variations & Options :
Round 8 - Newborn size Right Shoe :
Ch 1, mark lp on hk, 3 bl sc, 3 bl sl st, ch 3, 1 bl sl st back in same st, 6 bl sl st, ch 3, 1 bl sl st back in same st, 13 bl sl st, ch 3, 1 bl sl st back in same st, 3 bl sl st, 2 bl sc, join with sl st to marked st, ch 4, sl st back in same st, bind off.
Round 8 - 3-6 months size Left Shoe :
Ch 1, mark lp on hk, 4 bl sc, 3 bl sl st, ch 3, 1 bl sl st back in same st, 16 bl sl st, ch 3, 1 bl sl st back in same st, 6 bl sl st, ch 3, 1 bl sl st back in same st, 3 bl sl st, 3 bl sc, join with sl st to marked st, ch 4, sl st back in same st, bind off and weave in ends.
Round 8 - 3-6 months size Right Shoe :
Ch 1, mark lp on hk, 4 bl sc, 3 bl sl st, ch 3, 1 bl sl st back in same st, 6 bl sl st, ch 3, 1 bl sl st back in same st, 16 bl sl st, ch 3, 1 bl sl st back in same st, 3 bl sl st, 3 bl sc, join with sl st to marked st, ch 4, sl st back in same st, bind off and weave in ends.
Round 8 - 6-12 months size Left shoe :
Ch 1, mark lp on hk, 4 bl sc, 3 bl sl st, ch 3, 1 bl sl st back in same st, 17 bl sl st, ch 3, 1 bl sl st back in same st, 7 bl sl st, ch 3, 1 bl sl st back in same st, 3 bl sl st, 3 bl sc, join with sl st to marked st, ch 4, sl st back in same st, bind off.
Round 8 - 6-12 months size Right shoe :
Ch 1, mark lp on hk, 4 bl sc, 3 bl sl st, ch 3, 1 bl sl st back in same st, 7 bl sl st, ch 3, 1 bl sl st back in same st, 17 bl sl st, ch 3, 1 bl sl st back in same st, 3 bl sl st, 3 bl sc, join with sl st to marked st, ch 4, sl st back in same st, bind off.
Option #2 Side Tie - Round 8 Newborn Left Shoe :
Ch 1, mark lp on hk, 3 bl sc, 3 bl sl st, ch 3, 1 bl sl st back in same st, 13 bl sl st, ch 3, 1 bl sl st back in same st, 6 bl sl st, ch 3, 1 bl sl st back in same st, 3 bl sl st, 2 bl sc, join with sl st to marked st, ch 4, sl st back in same st, bind off.
Option #3 Center Loop - Round 8 Newborn size :
Ch 1, mark lp on hk, 3 bl sc, 3 bl sl st, ch 3, 1 bl sl st back in same st, 9 bl sl st, ch 3, 1 bl sl st back in same st, 9 bl sl st, ch 3, 1 bl sl st back in same st, 3 bl sl st, 2 bl sc, join with sl st to marked st, ch 4, sl st back in same st, bind off.
Option #3 - 3-6 months :
Ch 1, mark lp on hk, 4 bl sc, 3 bl sl st, ch 3, 1 bl sl st back in same st, 10 bl sl st, bl sl st2tog, ch 3, 1 bl sl st back in same 2 sts that you just decreased together, 10 bl sl st, ch 3, 1 bl sl st back in same st, 3 bl sl st, 3 bl sc, join with sl st to marked st, ch 4, sl st back in same st, bind off and weave in ends.
— Strap / Lace Finishing :
Info :
Using D size hk, make a chain that measures the specified length for your option (Newborn 36 inches, 3-6 months 42 inches, 6-12 months 48 inches as indicated in the pattern text), bind off, tie ends in knot and trim. Pull lace or strap through loops made in round 8 in the pattern direction shown in pictures and tie or wrap as desired.
These little strappy ballet flats are a delightful handmade gift that adds instant charm to any baby outfit. Whether you use ribbon, lace, or a simple crochet strap, each pair can be customized for a unique finish. Happy stitching and enjoy creating something sweet and wearable for a special little one! 🧶 👶