🧢 Beautiful ✨ Detailed πŸ’ Adorable

Starfish Amigurumi Pattern

Starfish Amigurumi Pattern
4.3β˜… Rating
1-2 Hours Time Needed
3.7K Made This
βœ‚οΈ

Beginner Friendly Level

Perfect for those just starting their crochet journey, with clear instructions and simple techniques

⏱️

Quick Make

Complete in under 2 hoursβ€”lightning fast fun for instant gratification and quick gifts.

πŸ₯

Charming Critter

Delightful animal designs with sweet details that capture the essence of your favorite woodland and farmyard friends.

About This Starfish Amigurumi Pattern

This pattern teaches you how to crochet small starfish in two styles: thin and large. Each version uses simple rounds and a short chain-and-shape technique to form the arms. The pattern includes materials, abbreviations, full round-by-round instructions and shaping tips to finish your starfish beautifully.
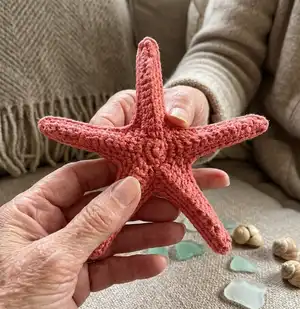
Starfish Amigurumi Pattern crochet pattern - detailed view of completed project

Perfect for quick decor, keychains, or a set of seaside toys, the starfish are made with 100% cotton yarn and a very small hook for tight stitches. Complete with glue-shaping instructions for a firm, sculpted look.

Why You'll Love This Starfish Amigurumi Pattern

I absolutely love this pattern because it turns basic crochet stitches into a charming, sculptural sea creature with very little effort. I enjoy how quickly a single starfish comes together β€” it's a satisfying project that finishes fast. The shaping step using a glue-water mix is one of my favorite tricks because it gives the arms a crisp, defined look. I also love that you can make a whole collection in different colors and sizes to decorate shelves or package as small handmade gifts.

Starfish Amigurumi Pattern step 1 - construction progress Starfish Amigurumi Pattern step 2 - assembly progress Starfish Amigurumi Pattern step 3 - details and accessories Starfish Amigurumi Pattern step 4 - final assembly and finishing

Switch Things Up

I love how easily this pattern adapts β€” try using brighter or pastel cottons to change the mood entirely.

You can switch yarn weight and hook size to make a mini keychain version or a larger decorative cushion-friendly starfish.

I often add embroidery or small seed beads to the center before shaping for added texture and sparkle.

If you prefer a softer, un-stiffened starfish, skip the glue step and wet-shape with water only instead.

Try combining two colors by changing yarn at the center and working the arms in a contrasting shade for a striped effect.

Use metallic or variegated cotton for a subtle shimmery finish that looks amazing with diluted paint washes.

Make a mobile or garland by stitching small loops to a few arms and stringing several starfish together.

I sometimes stuff a tiny amount of polyfill into the center for a slightly puffier look before stitching closed and shaping.

For a rustic finish, lightly brush on watered-down acrylic paint after shaping to accent ridges and texture.

Experiment with different glue-to-water ratios to find the stiffness you like; 2:1 water-to-glue is a great starting point and softer than a 1:1 mix.

Common Mistakes & How to Fix Them

βœ— Using a large hook as recommended on the yarn label will create loose, open stitches; use a much smaller hook (author uses 1.5 mm) to achieve tight fabric suitable for shaping. βœ— Skipping stitch markers or forgetting which stitch is the beginning of the round causes misaligned arms; place a stitch marker at the start of each round to keep track of rounds and repeats. βœ— Not wetting the piece evenly before shaping will give uneven stiffness and shape; immerse the entire starfish in the glue-water mixture until fully wet and squeeze out excess evenly before shaping. βœ— Overstiffening by using too much glue will make the starfish feel plasticky and brittle; mix 2 parts water to 1 part glue or 1:1 for stiffer result and experiment to find your preferred firmness. βœ— Pulling the arms too hard while shaping can distort the central spiral; gently pinch and ease the legs into shape and work gradually until you are satisfied.
Starfish Amigurumi Pattern

Make charming crocheted starfish using simple stitches and a short shaping technique. This pattern gives step-by-step instructions for two sizes (thin and large) so you can make the perfect sea-inspired decoration or small toy. With clear rounds and shaping tips, you will enjoy a quick, satisfying project you can customize by color and size.

Beginner Friendly 1-2 Hours

Materials Needed for Starfish Amigurumi Pattern

β€” Main Fabric

  • 01
    100% cotton yarn (recommended for small crochet work; common weight with 125 m per 50 g)
  • 02
    Madame Tricote "Camilla" (100% cotton, 50 g = 125 m) - used by author
  • 03
    Alternative cotton examples listed: Kartopu "Organica", Anchor "Creativa Fino", Schachenmayr "Catania"
  • 04
    Small amounts of yarn needed per starfish (approximately 10-25 g depending on size and hook)

β€” Tools Required

  • 01
    Crochet hook size 1.5 mm (author uses this for tight stitches)
  • 02
    Optional larger hooks if preferred: 1.75 mm or 2.00 mm
  • 03
    Scissors
  • 04
    Needle to weave in ends (yarn needle)
  • 05
    Stitch markers (optional, recommended to mark beginning of rounds)
  • 06
    White glue (for shaping)
  • 07
    Water (to mix with glue for shaping)
  • 08
    Rubber gloves (optional, for handling glue mix)

Progress Tracker

0% Complete

β€” Abbreviations :

Infos :

CH - CHAIN. SL ST - SLIP STITCH. SC - SINGLE CROCHET. HDC - HALF DOUBLE CROCHET. DC - DOUBLE CROCHET. ST(S) - STITCH(ES). (6) - NUMBER OF STITCHES YOU SHOULD HAVE AT THE END OF THE ROUND.

β€” Materials :

Info :

For crocheting: 100% cotton yarn. Crochet hook. Scissors. (Needle to weave in ends). I used: Madame Tricote "Camilla", (100% cotton, 50g=125m). 1,5 mm hook. For shaping: White glue. Water. Rubber gloves (optional).

β€” Thin starfish :

Rnd 1 :

5 sc in a magic ring (5)

Rnd 2 :

2 sc in each st (10)

Rnd 3 :

* ch 15, sl st in 2nd ch from hook, sl st in next, sc in next 3 sts, hdc in next 4 sts, dc in last 5 sts; skip next sc of rnd 2 and sl st in next; repeat from * 4 more times;

Rnd 4 :

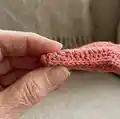
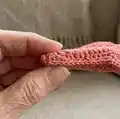
sc in each st all around skipping only last and first sts of each arm (see photos below)

Rnd 5 :

sl st in each st all around.

Info :

Fasten off and weave in yarn ends.

β€” Large starfish :

Rnd 1 :

5 sc in a magic ring (5)

Rnd 2 :

2 sc in each st (10)

Rnd 3 :

* ch 15, sl st in 2nd ch from hook, sl st in next, sc in next 3 sts, hdc in next 4 sts, dc in last 5 sts; skip next sc of rnd 2 and sl st in next; repeat from *4 more times;

Rnd 4 :

sc in each st all around skipping only last and first sts of each arm

Rnd 5 :

sc in each st all around

Rnd 6 :

sl st in each st all around.

Info :

Fasten off and weave in yarn ends.

β€” Shaping :

Info :

In a cup mix 2 parts of water with 1 part of glue.

Info :

Immerse the crocheted starfish into the glue and water mixture (wear rubber gloves if necessary) until it’s fully wet.

Info :

Carefully squeeze out excess glue-water mix.

Info :

Start shaping it by gently pulling at legs of the starfish and pinching them slightly together and giving it a desired shape.

Info :

For thin starfish I used the "wrong" side of crochet as an outside of the fish. For large starfish use "right" side.

Info :

Continue until you are satisfied with the shape.

Info :

Leave it to dry on a towel.

β€” Tips and finishing :

Info :

For nice and tight stitches use crochet hook couple of sizes smaller than indicated on yarn label. You might want to use stitch marker and place it in the first stitch of each round or row to mark the beginning of it. If you prefer no stiffness, wet in water only and leave to dry. For stiffer result try a 1:1 glue-water mix. Embellish with watercolors, diluted acrylics, or hand-stitched beads before shaping with glue.

Assembly Instructions

  • Fasten off each piece after final round and weave in yarn ends securely with a yarn needle so there are no loose tails on the starfish surface.
  • If making multiple pieces, pin them into the desired pose on a towel while shaping so all arms are evenly spaced and symmetrically arranged.
  • After immersing in glue-water mix and squeezing out excess, shape each arm by gently pulling and pinching the legs to create the raised ridge and desired contour, working one arm at a time.
  • Leave the shaped starfish to dry flat on a towel overnight or until completely dry to maintain the shape; avoid moving while drying to prevent distortion.

Important Notes

  • πŸ’‘Use a very small hook (the author uses 1.5 mm) to achieve tight, neat stitches that hold shape well when stiffened.
  • πŸ’‘Place a stitch marker at the start of each round to keep track of rounds and avoid miscounting when forming arms.
  • πŸ’‘When mixing glue and water, test a small ratio first (2:1 water to glue or 1:1 for stiffer) to find the firmness you prefer before soaking your final piece.
  • πŸ’‘Weave in ends before shaping and drying to avoid loose tails being hidden and becoming a problem after the piece is stiffened.

This starfish pattern brings a little bit of the sea to your crochet basket, perfect for small gifts and coastal decor. Try different cotton colors to create a full tidepool of friends and accents. Finish and shape them with the simple glue method for a lasting, sculpted look. 🧢🌊

You ask,

we answer.

FAQs

What size will the finished piece be?

Size depends on yarn and hook; using 100% cotton (50 g = 125 m) and a 1.5 mm hook the starfish will be small β€” suitable for decoration or a small toy. Exact dimensions vary with tension.

Can I use a different yarn weight for this pattern?

Yes, but changing yarn weight and hook size will change the final size and drape. If you choose a thicker yarn, use a larger hook and expect a bigger, fluffier starfish. For crisp shaping use tight stitches with a small hook.

Do I need special skills to make the starfish?

No advanced skills required β€” this is a beginner friendly pattern using basic stitches (sc, hdc, dc, sl st). Shaping requires working with a glue-water mix but is easy to follow using the provided instructions.

How long does it take to complete one starfish?

Most crocheters complete a single starfish in about 1-2 hours, depending on experience and the chosen size.