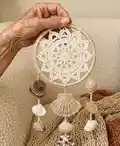
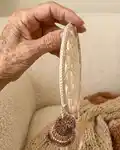
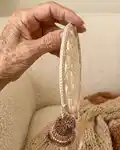
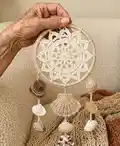
About This Star Dreamcatcher Pattern
This pattern creates a star-shaped double-sided mandala perfect for dreamcatchers and wall hangings. It includes a chart, written instructions in US terms, and a detailed photo tutorial for rounds 1–8. The mandala is designed to be sewn into wooden or wire rings to make a charming boho wall hanging.
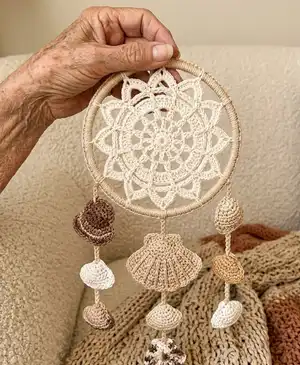
You can decorate the finished dreamcatcher with beads, shells, ribbon or handmade tassels for a personalized look. The pattern gives options for three ring sizes and recommended yarn/hook combinations for each.
Why You'll Love This Star Dreamcatcher Pattern
I absolutely love this pattern because it creates a delicate, star-shaped mandala that looks stunning from both sides. I enjoy the way the double-sided texture gives the mandala depth and interest when placed in a hoop. I designed it to be versatile so you can use different yarns, hoops and decorations to match your space. I always find it relaxing to work the front-post stitches and watch the star emerge round by round. Making this dreamcatcher is a satisfying project that finishes quickly and makes a lovely handmade gift.
Switch Things Up
I love how easy it is to customise this mandala by changing yarn weight and hook size; try a fine cotton for a delicate look or a bulkier yarn for a chunky, textured piece.
You can experiment with colorwork by changing colors between rounds to make the star pop or create subtle ombre effects through the mandala.
Swap the wooden hoop for an embroidery hoop, metal ring, or a recycled frame to create different hanging styles and finishes.
I often add beads or shells between the hanging ribbons for an organic, beachy vibe; string them on before tying ribbons to the hoop.
Try crocheting several mandalas in graduated sizes and join them vertically to make a cascading wall hanging for a dramatic display.
For a modern twist, use metallic or variegated yarns and small wooden beads to complement the yarn sheen and add contrast.
If you want a sturdier hanging, weave thin wire into the outer edge behind the mandala when joining so it keeps a perfect circle shape.
I sometimes embroider tiny details on top of the finished mandala to add micro-accents and personality to each point.
To make a portable keyring or ornament, work the pattern with thinner yarn and a smaller hook, then attach it to a keyring or small hoop.
Play with hanging lengths and mix ribbon, yarn strands and leather cords for a boho look; tie them at different lengths for layered movement.
You can also turn the mandala into a centrepiece by mounting it in a shadow box frame or stitching it onto a larger textile panel for wall art.
I recommend testing one or two variations on scrap yarn to see how the texture and size change before committing to your final version.
Common Mistakes & How to Fix Them
✗ Starting the mandala too large for your ring; choose a mandala size slightly smaller than the ring so it stretches nicely and stays centered.
✗ Not practising front-post stitches beforehand can make round 6 and 7 confusing; try a small swatch of fptr and fphdc to get comfortable before starting the mandala.
✗ Skipping the chart and relying only on text may cause misplacement of the star points; follow the chart and mark every round's start to avoid errors.
✗ Pulling yarn too tightly when joining mandala to the hoop can distort the shape; sew gently and evenly, adjusting tension so the mandala lays flat.
✗ Failing to pin and block the mandala when needed will reduce crispness of the points; use spray blocking and pins to shape each point evenly before joining.