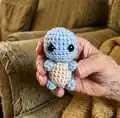
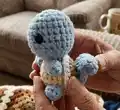
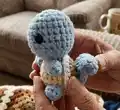
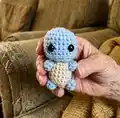
About This Squirtle Amigurumi Pattern
This pattern teaches you how to crochet a small Squirtle-inspired amigurumi using worsted weight yarn and a 3.5mm hook. You will work the head, body, shell, arms, legs and tail, then sew the pieces together for a finished toy. Clear row-by-row instructions and placement notes make assembly simple and satisfying.
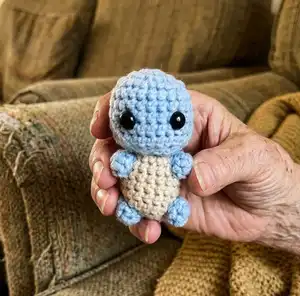
Perfect for making as a gift or for your own collection, this pattern includes safety eye placement and finishing tips. A great way to practice increases, decreases and small amigurumi shaping.
Why You'll Love This Squirtle Amigurumi Pattern
I absolutely love this pattern because it captures all the charm of a tiny turtle while staying compact and quick to make. I enjoyed designing the curled tail and layered shell because they add personality without complicated shaping. I also appreciate that the head and body are worked seamlessly, which makes construction neat and sturdy. The pattern showcases small amigurumi techniques I use often, and it always feels rewarding to see the little character come together.
Switch Things Up
I love to change up the color palette and make a family of Squirtles in pastel or neon shades for a playful set.
I sometimes use a thicker yarn and larger hook to make a chunky, huggable version; change the yarn weight and hook to scale size up or down.
I often swap safety eyes for embroidered eyes on baby-safe toys, which gives a softer look and makes the toy suitable for very young children.
I like to add tiny accessories like a crocheted scarf, small hat, or an embroidered smile to give each amigurumi its own personality.
I sometimes insert a small bell or squeaker into the stuffing for a playful sensory twist, ensuring it is securely enclosed.
I recommend experimenting with different shell color combos — try green and yellow, or brown and cream — to create vintage or stylized looks.
I have added a loop and keyring to make a keychain or bag charm version; I sew a small loop securely into the top of the head before finishing.
I occasionally add thin wire into the limbs for subtle posability, but make sure ends are well tucked and wrapped to avoid sharp points.
I like to embroider freckles or tiny spots with contrasting yarn to give an expressive face or character details.
I also design matching accessories like a tiny crocheted shell cover or mini backpack that buttons on for play variations and extra charm.
Common Mistakes & How to Fix Them
✗ Placing safety eyes too high or too close can spoil the facial expression; place eyes 5 stitches apart and 6 stitches down from the top of the head to match the pattern proportions.
✗ Forgetting to stuff as you go results in lumps or gaps later on; stuff the head gradually and finish stuffing before completing the final decreases for a smooth shape.
✗ Not switching color yarn tails correctly can leave loose ends inside the work; cut the blue yarn leaving a tail and do not fasten off before carrying on with the beige body as instructed.
✗ Rushing increases and decreases will create uneven rounds; count stitches after each round, especially after INC and DEC rows, to maintain the correct stitch counts and shape.