🧢 Beautiful ✨ Detailed πŸ’ Adorable

Squid Amigurumi Pattern

Squid Amigurumi Pattern
4.9β˜… Rating
2-3 Hours Time Needed
2.8K Made This
βœ‚οΈ

Beginner Friendly Level

Perfect for those just starting their crochet journey, with clear instructions and simple techniques

⏱️

Bite-Sized Project

Finishes in 2-4 hoursβ€”perfect for an afternoon of creative relaxation.

🧸

Cute Companion

An adorable friend to cherish, handcrafted with love to bring comfort and joy for years to come.

About This Squid Amigurumi Pattern

This pattern teaches you how to crochet a soft plush squid amigurumi using super-bulky plush yarn and simple stitches. You will shape the head-body, add curly tentacles worked from chains, and finish with embroidered eyelashes and a small smile. The design emphasizes easy rounds and fun assembly so you can enjoy making a charming toy quickly.
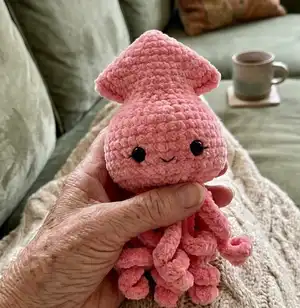
Squid Amigurumi Pattern crochet pattern - detailed view of completed project

Includes full round-by-round instructions, tentacle patterns (two types) and finishing notes. Great for beginners who want a quick, satisfying project.

Why You'll Love This Squid Amigurumi Pattern

I absolutely love this pattern because it turns a few simple stitches into a charming, squishy friend that is fun to make and cuddle. I enjoy how the curly tentacles come to life with basic chain-and-HDC shaping β€” they are playful and give the squid lots of character. The pattern is quick, so I can make one in an evening and gift it right away. I also love that it uses plush yarn for an irresistibly soft finish that children and adults both adore.

Squid Amigurumi Pattern step 1 - construction progress Squid Amigurumi Pattern step 2 - assembly progress Squid Amigurumi Pattern step 3 - details and accessories Squid Amigurumi Pattern step 4 - final assembly and finishing

Switch Things Up

I love to customize the color palette when I make this squid; try pastels, ombre yarns or even stripes by changing colors between rounds for a unique look.

If you want a larger squid, I change to a bulkier yarn and a larger hook; this increases the size and makes the toy extra squishy.

For a tiny keychain version, use a DK or sport weight yarn with a small hook to create a miniature collectible.

I sometimes embroider different expressions β€” a big smile, sleepy eyes, or a surprised O β€” to give each squid its own personality.

You can add safety or felt details like small blush circles on the cheeks for extra charm; sew or glue felt pieces carefully if making for non-child gifts.

Want wobblier tentacles? Use a thinner yarn core or add a short piece of flexible wire inside the tentacles before sealing to make them poseable.

I recommend mixing yarn textures for contrast β€” plush yarn for the body and a smooth cotton for facial embroidery gives a neat finish.

If you prefer a more realistic look, reduce the number of tentacles or lengthen them and use neutral tones for a subtle effect.

I like creating sets by making several sea creatures using the same yarn family so they coordinate as a collection for nursery decor.

Don’t be afraid to experiment with eye size and placement; moving eyes slightly up or down changes the character instantly, so place them before securing permanently.

Common Mistakes & How to Fix Them

βœ— Skipping stitch markers during rounds can make you lose the start of each round; place a marker at the beginning of every round to maintain correct stitch counts. βœ— Working tentacles into the wrong loop (not the front loop of R23) will misplace them on the body; be sure to crochet tentacles into the FRONT LOOP ONLY of R23 as directed. βœ— Understuffing the head results in a floppy shape that does not hold the eyes well; stuff firmly and evenly before closing the final rounds to maintain shape. βœ— Forgetting to close holes using the back loops after tentacle placement will leave gaps; after adding tentacles, close the hole using the BACK LOOPS of R23 then finish R24 and R25 as written. βœ— Hiding embroidery ends incorrectly can pull facial features out of position; when embroidering eyelashes and the smile, tie knots and hide ends neatly inside the body so the exterior remains smooth.
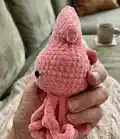
Squid Amigurumi Pattern

Make a cuddly plush squid you can finish in an afternoon. This easy amigurumi uses super-bulky plush yarn and simple shaping to create a soft, squishy toy with curly tentacles. Follow the step-by-step rounds, tentacle instructions and finishing notes to assemble a delightful handmade gift. Perfect for gifting or keeping as a whimsical home accent.

Beginner Friendly 2-3 Hours

Materials Needed for Squid Amigurumi Pattern

β€” Main Fabric

  • 01
    Super bulky plush yarn - Himalaya Dolphin Baby 120m/100g (131yds/100g), pink color 80346
  • 02
    Black fine yarn for smile - Yarnart Begonia black color 0999
  • 03
    Small amounts of extra yarn for tentacles and finishing

β€” Tools Required

  • 01
    Crochet hook size 4.5 mm (H-7 US)
  • 02
    2 black safety amigurumi eyes 12 mm (0.5 inch)
  • 03
    Scissors
  • 04
    Polyester stuffing
  • 05
    Big and small yarn needle
  • 06
    Stitch markers
  • 07
    Black fine yarn or cotton thread for embroidery (eyelashes and smile)

Progress Tracker

0% Complete

β€” Head-body :

Round 1 :

crochet a MR with 4 Sc (4)

Round 2 :

(Sc 1, Inc) x 2 (6)

Round 3 :

Inc 6 (12)

Round 4 :

(Sc 1, Inc) x 6 (18)

Round 5 :

(Sc 2, Inc) x 6 (24)

Round 6 :

(Sc 7, Inc) x 3 (27)

Round 7 :

(Sc 8, Inc) x 3 (30)

Round 8 :

(Sc 4, Inc) x 6 (36)

Round 9 :

(Sc 11, Inc) x 3 (39)

Round 10 :

(Sc 12, Inc) x 3 (42)

Round 11 :

Sc 5, SKIP Sc 10, Sc 11, SKIP Sc 10, Sc 6 (22)

Round 12 :

Sc 5, Inc 1, Sc 10, Inc 1, Sc 5 (24)

Round 13 :

(Sc 3, Inc) x 6 (30)

Round 14 :

(Sc 4, Inc) x 6 (36)

Round 15 :

(Sc 5, Inc) x 6 (42)

Round 16-21 :

Sc around (42) 6 Rnds

Round 22 :

(Sc 5, Dec) x 6 (36)

Round 23 :

(Sc 2, Dec 8) x 2 (20)

Info :

Flatten the body, mark the center and insert the eyes between the 19th and 20 th rounds with a distance of 6 Stitches (3 St from the center) and secure backings.

β€” Tentacles :

Info :

Next, we crochet the tentacles, use FRONT LOOP ONLY of R23. There are 10 pieces: 8 pieces of type A, 2 pieces of type B. We continue to crochet from the body in the following order: Type A x 3 Type B x 1 Type A x 4 Type B x 1 Type A x 1.

Tentacle Type A :

Sc, Ch 27. From 3rd chain from hook: (Inc HDC, HDC 3) x 5, HDC 4, Sc 1

Info :

Sc 1 to the next stitch of the body to finish tentacle.

Info :

Sc 1 to the next stitch and continue with Ch 27 and repeat the tentacle Type A.

Tentacle Type B :

Sc, Ch 30. From 2nd chain from hook: Sl St 5, (1) on the opposite side Sc 1, HDC 3, Sc 1, in the top Stitch (Sc 1, chain 1, Sc 1), (2) on the opposite side Sc 5, (3)

Info :

Sl St 24 to the end of the tentacle. Sc 1 to the next stitch of the body to finish tantacle B.

Info :

After crocheting all the tentacles leave the body for a while and close the holes on the head with the Sc.

Info :

Fill with stuffing and hide the ends of the threads inside.

Info :

We finish crocheting the body.

Info :

We crocheted the tentacles only on the front loops of the R23, and we will close the hole using the back loops of the same R23. (Indicated in blue in the picture)

Round 24 :

Dec 10 (10)

Info :

Stuff firmly.

Info :

Next, we crochet as usual, using both loops

Round 25 :

Dec 5, Sl St (5)

Info :

Fasten off and sew the hole closed. Hide the end of the thread inside.

β€” Eyelashes and smile :

Info :

Take a black cotton thread and tie it in a knot around the eye. Embroider the eyelashes and bring out the threads to the bottom under the tentacles. Tie a knot and hide the ends of the threads inside. With the second eye, repeat the same thing, only keep the thread longer and do not hide the ends.

Info :

With a longer end, embroider a smile in a V-shape, bring it to the other end, tie it again in a knot, hide the ends of the threads inside.

Info :

Our squid is ready!

Assembly Instructions

  • Insert and secure the safety eyes between R19 and R20, spacing them 6 stitches apart (3 stitches from center) and fasten the backings firmly.
  • Crochet tentacles into the FRONT LOOP ONLY of R23 following the order: Type A x3, Type B x1, Type A x4, Type B x1, Type A x1 so placement matches the photos and maintains balance.
  • After placing all tentacles, use the BACK LOOPS of R23 to close the hole around the tentacles, then continue to R24 and R25 to close the body.
  • Stuff the head firmly before finishing R24 and R25, then fasten off and sew the hole closed, hiding the yarn tail inside the body.
  • Embroider eyelashes by tying a knot around each eye, bringing threads to the underside and hiding ends; embroider a V-shaped smile and knot the ends inside.

Important Notes

  • πŸ’‘Use stitch markers to mark the beginning of each round so you do not lose track during increases and shaping.
  • πŸ’‘Work tentacles into the FRONT LOOP ONLY of R23 as instructed, then use the BACK LOOPS to close the hole afterward.
  • πŸ’‘Stuff the head firmly but evenly before completing the final decreases to keep the shape smooth and stable.
  • πŸ’‘Hide and secure all embroidery and yarn ends inside the body to prevent unraveling and keep the exterior tidy.

This lovable plush squid is perfect for quick handmade gifts and playful decor. It combines soft plush yarn with simple shaping for a cuddly finish. Make one in your favorite color and watch it bring smiles! 🧢😊

You ask,

we answer.

FAQs

What size will the finished piece be?

The finished amigurumi measures approximately 9.8 inches (25 cm) tall when using the recommended super-bulky plush yarn and 4.5 mm hook.

Can I use different yarn weights for this pattern?

Yes, you can change yarn weight but this will affect the final size and texture; adjust the hook accordingly and expect a different result if you use lighter or heavier yarns.

Do I need prior crochet experience for this pattern?

This pattern is rated beginner friendly and uses basic stitches like single crochet, increases and decreases; familiarity with working in rounds and reading stitch counts is helpful.

How long does this project typically take to complete?

Most crocheters complete this project in 2-3 hours, though time may vary based on experience level and how much time you spend on tentacle styling and finishing.