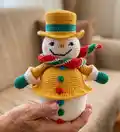
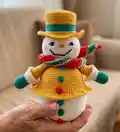
About This Snowman Gingerbread Amigurumi Pattern
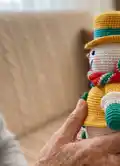
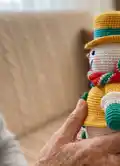
This pattern teaches you how to crochet a charming snowman with removable hat and colorful buttons using cotton yarn. It includes round-by-round instructions for every piece plus color placement and embroidery guidance. You will use basic amigurumi shaping, BLO/FLO techniques and simple assembly steps to complete the toy.
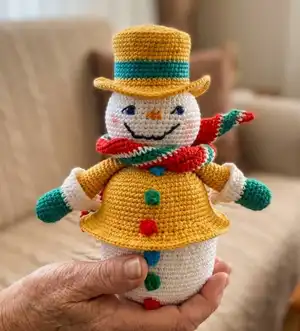
Perfect for gifting or seasonal decor, the finished toy measures approximately 22 cm tall. Photos and picture references are included to help with placement and finishing.
Why You'll Love This Snowman Gingerbread Amigurumi Pattern
I absolutely love this pattern because it combines classic amigurumi shaping with playful seasonal details like a jaunty hat and colorful buttons. I enjoy how the removable hat and two-piece body add a neat construction step that makes assembly satisfying. The pattern uses simple stitches but teaches back-loop/front-loop techniques that elevate the final look. I'm excited to share a project that is both decorative and a joy to stitch, especially for holiday crafting.
Switch Things Up
I love how easy it is to customize this snowman: change the hat color, swap button colors, or embroider a different expression to change personality.
I often make a mini keychain version by using thinner yarn and a smaller hook to create tiny pocket-sized snowmen.
Try bulky cotton or acrylic with a larger hook to create a chunky, plush version that feels extra cuddly and quick to make.
I sometimes add wire inside the arms for a posable effect, or sew tiny accessories like a crochet broom or a little bag for seasonal display.
Embroider different eyes (open, sleepy or mischievous) to give each snowman a unique look; experiment on scrap yarn before committing to the face.
You can replace the cardboard base with a felt circle for a softer bottom, or use decorative sequins and beads for festive sparkle on the coat.
I like to personalize with initials or small applique on the coat—use contrasting yarn and a simple chain stitch to add monograms.
Swap color palettes for a pastel nursery version or rich jewel tones for a sophisticated holiday ornament set.
For gifting, package with a small matching crochet mug cozy or a crocheted mini ornament to create a themed handmade present.
If you want to speed up, omit the two-piece body step and crochet a single rounded body, though the removable hat and internal insert give the best finished shape.
Common Mistakes & How to Fix Them
✗ Skipping stitch markers during rounds can cause lost stitch counts and uneven shaping; place a marker at the start of each round and move it after each round to stay on track.
✗ Understuffing the head and body makes parts collapse and look flat; stuff gradually and firmly, shaping with small amounts of filling until the piece is round and even.
✗ Changing colors without securing tails can create loose ends and uneven color joins; use the invisible color change method and weave in ends as you go to keep edges neat.
✗ Forgetting to count increases and decreases can result in incorrect stitch totals; count after each increase/decrease round to confirm the correct number of stitches and correct mistakes immediately.
✗ Pulling yarn too tightly on BLO or FLO rounds can distort the edge and make sewing difficult; work consistent tension and practice front/back loop stitches to maintain even edges.