🧶 Beautiful ✨ Detailed 💝 Adorable

Cherry Babies Amigurumi Pattern

Cherry Babies Amigurumi Pattern
4.2★ Rating
5-7 Hours Time Needed
2.0K Made This
✂️

Intermediate Level

Ideal for those with basic crochet experience, featuring slightly more advanced stitches and techniques to expand your skills.

⏱️

Weekend Treat

Takes 5-7 hours, making it an enjoyable project to finish over a couple of days.

🎁

Tiny Treasure

Small, sweet, and gift-worthy creations that fit perfectly in the palm of your hand with detailed charm.

About This Cherry Babies Amigurumi Pattern

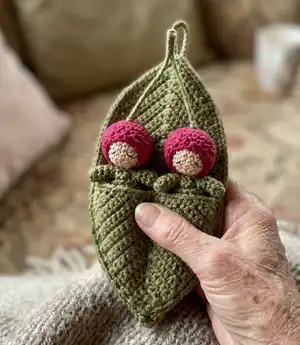
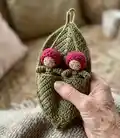
This pattern creates two tiny cherry babies—mini amigurumi dolls with tiny caps—presented in a crocheted leaf cradle. You will crochet heads, caps, small bodies with arms, make a realistic leaf cradle using a chart, and assemble everything into a sweet duo. The design uses fine cotton yarn and a small hook to achieve delicate details and a neat finish.

Cherry Babies Amigurumi Pattern crochet pattern - detailed view of completed project

The dolls are worked in continuous rounds and the leaves are worked back-and-forth using a charted sequence. Complete instructions, finishing tips and photos are included for each step to help you get professional results.

Why You'll Love This Cherry Babies Amigurumi Pattern

I absolutely love this pattern because it captures a tiny whimsical scene with very few materials and lots of charm. I enjoy how the leaf cradle is shaped using a clear chart — it creates a beautiful backdrop for the little dolls. I also love that the dolls are small and portable, making them perfect for gifts, keychains or decorations. The step-by-step photos and finishing tips make assembly satisfying and the final pieces are delightful to display.

Cherry Babies Amigurumi Pattern step 1 - construction progress Cherry Babies Amigurumi Pattern step 2 - assembly progress Cherry Babies Amigurumi Pattern step 3 - details and accessories Cherry Babies Amigurumi Pattern step 4 - final assembly and finishing

Switch Things Up

I love how easy it is to customize these Cherry Babies by changing yarn color—try pastel pinks or deep burgundy for different looks.

You can make them larger or smaller by switching yarn weight and adjusting the hook size; bulky yarn with a larger hook gives a chunky charm.

I often swap the cotton yarn for a soft acrylic if the dolls will be loved by little hands, just be mindful of the finish when using safety eyes.

I sometimes add tiny felt or embroidered cheeks for extra personality—just use matching thread and a small stitch.

Want a keychain? Add a metal jump ring to the petiole top before finishing to make a portable charm.

I like to experiment with different leaf colors—autumn tones look lovely if you want a seasonal decoration.

If you want posability, thread a very thin wire through the body and arms while assembling for slight movement.

I also enjoy creating a garland by making many tiny cherries and joining their petioles to a long cord for party decor.

Try swapping the cap color to create a coordinated set or make hats with tiny embellishments like embroidered dots or a French knot flower.

For gifting, I sometimes attach a small tag or hang them from a present—these little touches make the project feel extra special.

Common Mistakes & How to Fix Them

✗ Skipping the instruction to pull the initial thread end out between rounds 2 and 3 can make counting rounds confusing; pull that tail out early and use it as a marker for round counting. ✗ Not stuffing the head firmly before closing can leave the head too loose and shapeless; stuff gradually and firmly before finishing R9 to keep the shape compact. ✗ Forgetting to leave tails for stitching means you will struggle to sew parts together neatly; always leave the indicated long or short tail when instructed for sewing and finishing. ✗ Not making the clean fastening off as shown for the cap can leave a bulky finish; follow the clean fastening off method by inserting the yarn into the first stitch after your last stitch and repeating to hide and secure the yarn. ✗ Pulling yarn too tightly while wrapping the petiole around the wire can snap the yarn or create lumps; wrap gently and tightly coil by coil while adjusting tension as you approach the cap.

Cherry Babies Amigurumi Pattern

Make two tiny cherry baby dolls nestled in a crocheted leaf cradle. This pattern walks you through crocheting small amigurumi heads, caps, little bodies with arms, and a detailed leaf cradle chart so you can create a charming gift-ready decoration. You will enjoy clear step-by-step rounds, finishing tips and assembly instructions to create a polished result.

Intermediate 5-7 Hours

Materials Needed for Cherry Babies Amigurumi Pattern

— Main Fabric

  • 01
    Cotton yarn Alpina Lily (50 g/175 m) - Beige - approximately one 50g ball for faces/details
  • 02
    Cotton yarn Alpina Lily (50 g/175 m) - Crimson - approximately one 50g ball for caps/bodies details
  • 03
    Cotton yarn NAKO Mia (50 g/170 m) - Green - approximately one 50g ball for leaf cradle and bodies/arms
  • 04
    Small amounts of yarn for wrapping petiole - about 80 cm green yarn per petiole
  • 05
    Any synthetic or organic filler for stuffing - small amount for two tiny dolls

— Tools Required

  • 01
    Crochet hook size 2.0 mm
  • 02
    Wire 0.5 mm (thin wire for petiole)
  • 03
    Thin black thread for embroidery (eyes)
  • 04
    Sewing needles and pins
  • 05
    Tapestry needle (yarn needle) for weaving and assembly
  • 06
    Scissors
  • 07
    Thick needle for pulling petiole yarn tails through the doll (as described)
  • 08
    Any small amount of filler or stuffing

Progress Tracker

0% Complete

— Head :

Round 1 :

6 sc into magic ring (6 sts)

Round 2 :

(inc) X 6 (12 sts)

Round 3 :

(1 sc, inc) X 6 (18 sts)

Round 4-7 :

(4 rounds): sc around (18 sts)

Round 8 :

(1 sc, dec) X 6 (12 sts)

Round 9 :

(dec) X 6 (12 sts)

Info :

After R9 stuff the head tightly. Leave a tail.

Info :

In remaining 6 sc sew 6 stitches from inside to outside in sequence, pull the yarn, secure and hide it.

— Cap :

Round 1 :

6 sc into magic ring (6 sts)

Round 2 :

(inc) X 6 (12 sts)

Round 3 :

(1 sc, inc) X 6 (18 sts)

Round 4-8 :

(5 rounds): sc around (18 sts)

Info :

Put the cap on the doll's head and work

Round 10 :

(1 sc, dec) X 6 (12 sts)

Info :

Make 1 sc and 1 sl st more. Leave a tail.

Info :

Make clean fastening off.

Info :

How to do clean fastening off: insert the yarn into the first stitch after your last stitch. Insert the yarn back into this last stitch and repeat. Secure the yarn and hide inside.

— Body&Arms :

Info :

Green yarn. First make 2 arms:

Round 1 :

6 sc into magic ring (6 sts)

Round 2-4 :

(3 rounds): sc around (6 sts)

Info :

Make 1 sl st more and leave short tail.

Info :

Body:

Round 1 :

6 sc into magic ring (6 sts)

Round 2 :

(inc) X 6 (12 sts)

Round 3 :

(inc, 5 sc) X 2 (14 sts)

Round 4 :

(inc, 6 sc) X 2 (16 sts)

Round 5 :

(inc, 7 sc) X 2 (18 sts)

Round 6-7 :

(2 rounds): sc around (18 sts)

Round 8 :

(dec, 7 sc) X 2 (16 sts)

Round 9 :

(dec, 6 sc) X 2 (14 sts)

Round 10 :

(dec, 5 sc) X 2 (12 sts)

Info :

Now place the one arm closely the body and join them together with 2 sc (these inner connecting sc will not be used in the next round). For the arm use its last stitch and the next following stitch. Work 4 sc and join the second arm with 2 sc, when 4 sc again. Now you have round 11.

Round 11 :

4 sc (arm), 4 sc (body), 4 sc (arm), 4 sc (body) (16 sts)

Round 12 :

(dec) X 8 (8 sts)

Info :

Make 1 sl st more and leave long tail for stitching.

Info :

Make clean fastening off.

Info :

Lightly stuff the body (not the arms).

— Doll Assembly :

Info :

Place the head onto the body, pin it. It is comfortably to fix the head with a large thick needle, piercing the head and body through.

Info :

Carefully sew on the head with small stitches.

— Face :

Info :

Embroider the eyes a few stitches with thin black thread, as shown further in the photos.

— LEAF-CRADLE :

Info :

consist of 2 leaves - big and small worked back-and-forth in rows. Be sure to check the chart as you work, as some rows start and end differently! Green yarn

Info :

Big leaf:

Round 1 :

2 ch, 1 dc, 1 sc into magic ring (4 sts), turn...

Round 2 :

2 ch, (1 sc,1 dc,1 sc in one loop – hereafter I refer to this set as "sds" for convenience, but it counts as three stitches! ), 1 sc (6 sts)

Round 3 :

2 ch, 1 sc, sds, 2 sc (8 sts)

Round 4 :

2 ch, 2 sc, sds, 3 sc (10 sts)

Round 5 :

2 ch, 3 sc, sds, 4 sc (12 sts)

Round 6 :

2 ch, 4 sc, sds, 5 sc (14 sts)

Round 7 :

2 ch, 5 sc, sds, 6 sc (16 sts)

Round 8 :

2 ch, 6 sc, sds, 7 sc (18 sts)

Round 9 :

2 ch, 7 sc, sds, 8 sc (20 sts)

Round 10 :

2 ch, 8 sc, sds, 9 sc (22 sts)

Round 11 :

2 ch, 9 sc, sds, 10 sc (24 sts)

Round 12 :

2 ch, 10 sc, sds, 10 sc (25 sts)

Round 13 :

2 ch, 10 sc, sds, 11 sc (26 sts)

Round 14 :

2 ch, 11 sc, sds, 11 sc (27 sts)

Round 15 :

2 ch, 11 sc, sds, 12 sc (28 sts)

Round 16 :

2 ch, 12 sc, sds, 12 sc (29 sts)

Round 17 :

2 ch, 12 sc, sds, 13 sc (30 sts)

Round 18 :

2 ch, 13 sc, sds, 13 sc (31 sts)

Round 19-26 :

(8 rows): 2 ch, 13 sc, sds, 12 sc, 1 dec (31 sts)

Round 27 :

2 ch, 13 sc, sds, 10 sc, 2 dec (30 sts)

Round 28 :

2 ch, 12 sc, sds, 10 sc, 2 dec (29 sts)

Round 29 :

2 ch, 12 sc, sds, 7 sc, 3 dec (27 sts)

Round 30 :

2 ch, 10 sc, sds, 7 sc, 3 dec (25 sts)

Round 31 :

2 ch, 10 sc, sds, 3 sc, 4 dec (22 sts)

Round 32 :

2 ch, 7 sc, sds, 3 sc, 4 dec (19 sts)

Info :

Make 1 ch more and leave short tail.

Info :

At the finish end of the leaf attach a new yarn (blue arrow in the photo) and work the leaf in a round with a edging of sc. To keep the edge of the leaf from pulling down, sometimes make increases. At the sharp end of the leaf make a prong - in one loop: sc, ch, dc, ch, sc.

Info :

I got 100 sc -50 sc on one side of leaf and 50 sc on the other. Then work chain of 15, connect the round with sl st and make 2 sl st more. Leave a tail and make clean fastening off, hide the tail inside.

Info :

Small leaf:

Round 1 :

2 ch, 1 sc, 1 dc, 2 sc into magic ring (6 sts), turn...

Round 2 :

2 ch, 1 sc, sds, 2 sc (8 sts)

Round 3 :

2 ch, 2 sc, sds, 3 sc (10 sts)

Round 4 :

2 ch, 3 sc, sds, 4 sc (12 sts)

Round 5 :

2 ch, 4 sc, sds, 5 sc (14 sts)

Round 6 :

2 ch, 5 sc, sds, 6 sc (16 sts)

Round 7 :

2 ch, 6 sc, sds, 7 sc (18 sts)

Round 8 :

2 ch, 7 sc, sds, 8 sc (20 sts)

Round 9 :

2 ch, 8 sc, sds, 9 sc (22 sts)

Round 10 :

2 ch, 9 sc, sds, 10 sc (24 sts)

Round 11 :

2 ch, 10 sc, sds, 11 sc (26 sts)

Round 12 :

2 ch, 11 sc, sds, 12 sc (28 sts)

Round 13 :

2 ch, 10 sc, dec (13 sts)

Round 14 :

2 ch, 11 sc (13 sts)

Round 15 :

2 ch, 8 sc, dec (11 sts)

Round 16 :

2 ch, 8 sc (10 sts)

Round 17 :

2 ch, 5 sc, dec (8 sts)

Round 18 :

2 ch, 5 sc (7 sts)

Round 19 :

2 ch, 2 sc, dec (5 sts)

Round 20 :

2 ch, dec (3 sts)

Info :

Make 1 ch more and leave short tail.

Info :

Now attach a new yarn according to the chart (blue arrow) and work second side:

Round 13 :

2 ch, 11 sc (13 sts)

Round 14 :

2 ch, 11 sc (13 sts)

Round 15 :

2 ch, dec, 8 sc (11 sts)

Round 16 :

2 ch, 8 sc (10 sts)

Round 17 :

2 ch, dec, 5 sc (8 sts)

Round 18 :

2 ch, 5 sc (7 sts)

Round 19 :

2 ch, dec, 2 sc (5 sts)

Round 20 :

2 ch, dec (3 sts)

Info :

Make 1 ch more and leave short tail.

Info :

Work the leaf in a round with a edging of sc (I got 72 sc). Leave long tail for stitching.

Info :

Iron the leaves gently through a damp cloth.

— Cradly Assembly :

Info :

Put a smaller leaf on top of a large, pin it. Carefully sew them together with small stitches over the edge. At the very beginning and finish, sew firmly, making several stitches on top of each other. Then make a neat seam exactly in the middle of the leaf.

Info :

Now make a petiole for the cherry berry. Take a 15 cm long piece of thin wire. Hook the wire on one sc on the top of the doll, twist it tightly. Bend the tail of the wire to the necessary distance (I made a 5 cm long petiole). Cut off the excess from the wire tail, so that there was 5 mm. Take a piece of green yarn 80 cm long, pull it along the wire, hook on the wire tail and start wrapping the petiole, very tightly, gently, coil by coil. (As you get closer to the cap, it will become harder to wrap, you have to try) After wrapping the entire petiole, tie both tails of yarn together very tightly.

Info :

Insert the tails into a thick needle, stick it near the petiole and pull it out the doll's neck. Pull the yarn. To be sure, once again pull the needle out near the petiole and back - at the doll's neck. Cut the end of the yarn.

Info :

When both dolls are ready, connect their petioles in the same way, wrapping them together at a distance of 5 mm. Insert the tails of the yarn into the needle and pull it through the winding, cut it off.

Assembly Instructions

  • Place the head onto the body, pin it in position and fix it by piercing through head and body with a large thick needle before sewing.
  • Carefully sew the head to the body using small, even stitches, using the long tail left from the body to secure the join.
  • Embroider the eyes with thin black thread using a few small stitches as shown in the photos, shaping the expression before securing the thread.
  • Place the small leaf on top of the large leaf, pin it, and sew them together with small stitches around the edge, then make a neat seam exactly in the middle of the leaf.
  • Create the petiole by twisting a 15 cm thin wire into the doll top stitch, wrap the wire tightly with green yarn coil-by-coil, tie tails, then insert tails with a thick needle through the neck to hide and secure them.
  • When both dolls have petioles, connect the petioles together by wrapping them at a distance of 5 mm, then insert the yarn tails into a needle and pull through the winding to secure and cut off excess.

Important Notes

  • 💡NOTE#1 explains how decrease is worked: insert the hook into the next stitch and thread over, pull a loop through so that there are now 2 loops on the hook; insert the hook into the next stitch and thread over, pull a loop through so that there are now 3 loops on the hook and then thread over to pull through all 3 loops.
  • 💡NOTE#2 For crocheting circles - pull the initial thread end out between rounds 2 and 3, it would serve as the marker and help you to count the rounds.
  • 💡Make the clean fastening off for caps and leaf seams as described by inserting the yarn into the first stitch after your last stitch and repeating to secure and hide the tail.

These tiny Cherry Babies make a delightful handmade gift and a sweet seasonal decoration. They sit snugly in their crochet leaf cradle and bring a touch of whimsy to any shelf or keyring. Make a pair to give as a present or keep them as a charming little keepsake. 🧶🌿
You ask,

we answer.

FAQs

What size will the finished piece be?

If you use the recommended yarns and a 2.0 mm hook, each doll measures approximately 5.4 cm (2.1 in) tall and the leaf cradle is about 13 cm (5.1 in) high.

Can I use different yarn weights for this pattern?

Yes, you can adapt the pattern to other yarn weights, but the final size will change; use an appropriate hook size and expect a bulkier or smaller doll depending on yarn and hook.

Do I need prior crochet experience for this pattern?

This pattern is rated intermediate, so basic knowledge of single crochet, increases, decreases, working in rounds and reading simple charts is recommended.

How long does this project typically take to complete?

Most crocheters finish both dolls and the leaf cradle in about 5-7 hours, though time varies by experience and attention to finishing details.

How do I make the petiole and secure it to the doll?

Use a 15 cm piece of thin wire, hook and twist it into one sc on the top, wrap with green yarn very tightly coil-by-coil, tie tails and thread them through the doll’s neck with a thick needle to hide and secure.