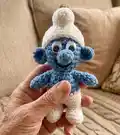
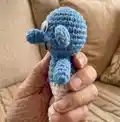
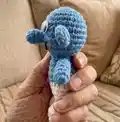
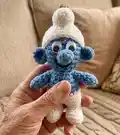
About This Smurf Amigurumi Pattern
This pattern creates a small Smurf amigurumi approximately 10 cm high using Light Blue and White acrylic yarn. It includes full round-by-round instructions for head, body, arms, legs, ears, nose and hat. The pattern uses standard amigurumi techniques like magic ring, single crochet, increases and decreases.
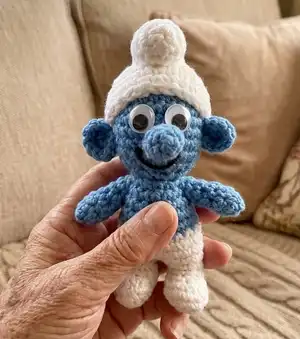
Perfect for intermediate crocheters who enjoy small projects and detailed shaping. You will find clear rounds and finishing tips to assemble and finish your Smurf neatly.
Why You'll Love This Smurf Amigurumi Pattern
I absolutely love this pattern because it captures the classic Smurf look in a tiny, satisfying project that you can finish in an afternoon. I enjoy the compact shaping challenges it offers — the legs and feet shaping are a fun little puzzle. Making the hat and little nose gives great practice with small-detail crochet work. It is very giftable and makes a cheerful handmade present that always brings smiles.
Switch Things Up
I love how easy it is to customize this Smurf by changing yarn colors and textures.
I often use softer acrylic for a plush feel or cotton for a firmer, more defined finish.
You can make a tiny family by varying hook sizes and yarn weight to create mini, small and large versions.
I like to embroider different facial expressions to give each Smurf a unique personality.
Try adding small accessories like a scarf, tiny crochet bag, or embroidered patches for character.
I sometimes swap the plain hat for a striped hat by alternating white and a second color every two rounds.
For durable toys, consider securely sewing on felt eyes or safety eyes rather than gluing them.
If you want a poseable figure, add thin wire in the arms before stuffing for light posability.
I also recommend experimenting with eyelash yarn or fluffy yarn to create soft hair or a fuzzy hat pompom.
Finally, I enjoy making matching outfits by crocheting tiny removable hats or pants to change the look easily.
Common Mistakes & How to Fix Them
✗ Skipping stitch counts during rounds leads to uneven shaping; count your stitches at the end of each round to ensure accuracy and correct any mistakes immediately.
✗ Stuffing too early or too much can distort the shape of the body; stuff gradually as you progress and check shape frequently to keep the proportions correct.
✗ Joining colors or yarns without securing the previous end may cause loose stitches later; weave in or secure ends before continuing to the next color.
✗ Not marking the start of rounds results in lost position when decreasing; use a stitch marker to mark the first stitch of each round and move it up as you work.
✗ Sewing parts loosely will make them unstable on the finished doll; pin pieces in place and sew firmly with small, neat stitches for a secure finish.