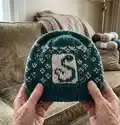
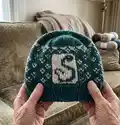
About This Slytherin Knit Hat Pattern
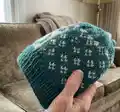
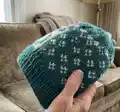
This pattern produces a worsted-weight, colorwork knit hat featuring a bold S within a rectangular panel and scattered motif background. It uses stranded colorwork/chart reading and simple decrease rounds to shape the crown. The pattern includes gauge, materials, chart instructions and explicit crown decrease rounds.
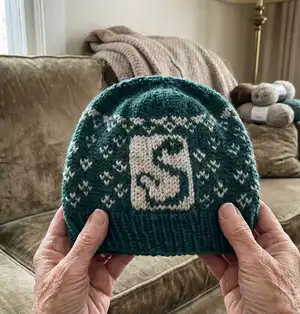
Worked in the round on DPNs or a short circular needle, the hat is sized by stitch count and uses a K1,P1 brim. The included chart shows the color layout for rows 1–25.
Why You'll Love This Slytherin Knit Hat Pattern
I absolutely love this pattern because it combines classic colorwork with a clean, recognizable S panel that looks impressive on a finished hat. The charted body lets you see the motif come to life row by row, which is really satisfying to knit. I also appreciate that the crown decreases are written out clearly, so shaping the top is predictable and neat. This hat knits up quickly with worsted yarn and makes a thoughtful handmade gift for fans of the house.
Switch Things Up
I love how easy it is to customize this hat by changing colors; swap the green and silver for any two-color combination to make a unique hat.
You can make a slouchier or tighter hat by adding or subtracting repeat rows in the body chart before starting the crown decreases.
If you want a chunkier hat, use a heavier yarn and larger needles and adjust the cast-on to keep stitch proportions; swatching is important.
Try working the brim longer or shorter: a 1x1 rib for 10 rows gives a standard fit, but 14 rows creates a fold-over cuff for extra warmth.
I sometimes add a pompom in contrast color at the top after finishing the crown for a playful finish.
For a more secure fit, consider lining the brim with a soft fleece band sewn inside the hat.
Want earflaps? Pick up and knit additional sections at the brim edges and add ties to turn this into a cozy earflap hat.
Try duplicating the S panel: move the chart placement or reduce surrounding motifs to create a smaller version of the S on both sides of the hat.
I also experiment with sewn-on patches or embroidered details over the finished colorwork to add texture and personalization.
For an advanced switch, convert the stranded chart into intarsia panels on worsted yarn for a different float look; be mindful of float management.
Common Mistakes & How to Fix Them
✗ Not checking gauge before starting will change the hat size noticeably; swatch and measure 16 sts and 24 rows = 4 inches in stockinette stitch to match the pattern.
✗ Neglecting to increase to 90 stitches after the brim will distort the chart placement; make 1 (m1) every 12 stitches on Row 1 as instructed to reach 90 stitches total.
✗ Allowing floats to get too tight in stranded colorwork causes puckering; catch floats loosely and spread tension across the wrong side to preserve elasticity.
✗ Forgetting to count stitches each chart row can produce misaligned motifs; count stitches after each charted row and use stitch markers to mark panel edges.
✗ Cutting yarn too early when finishing the crown may leave a messy top; follow the final instruction to cut yarn, pull through remaining loops, and tie in all loose ends securely.