About This Mini Seal Amigurumi Pattern
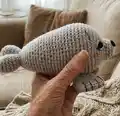
This pattern creates a charming mini seal amigurumi crocheted from the front of the head towards the back. The design includes clear shaping for the head, body and tail fins, plus separate fins to sew on for realistic detail. Youll get instructions for eye placement, sunken eye technique, and simple embroidery for sleepy eyebrows.
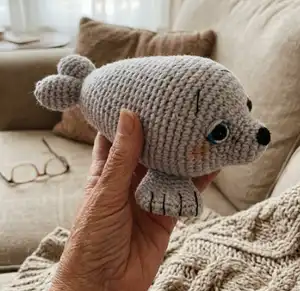
Includes full round-by-round stitch counts and photo-assisted assembly tips. Ideal for intermediate crocheters who enjoy detailed finishing and small stuffed toys.
Why You'll Love This Mini Seal Amigurumi Pattern
I absolutely love this pattern because it turns simple stitches into a character full of personality. I enjoy the shaping process — from the snout to the tapered body — it feels like sculpting with yarn. The eye-placement technique gives the seal a gentle, expressive look that I find really satisfying to create. Sewing on the fins and adding tiny embroidered details is relaxing and makes the finished piece look so polished.
Switch Things Up
I love how easy it is to customize this pattern to create unique seals: try different yarn colors like speckled or variegated yarns for a playful look.
Want a tiny keychain? Make the seal smaller by using fingering weight yarn and a smaller hook to create a mini version perfect for bags and keys.
For a chunkier, cuddlier seal use a bulky yarn and a larger hook — youll get a soft, squishy result thats great for little hands.
I often add felt accessories like tiny scarves or crowns to give character to my seals; these simple additions make great gifts.
Try embroidering different eyebrow shapes to change the expression — happy, sleepy, surprised — it really transforms the personality.
If youd like a posable seal, carefully insert wire into the fins before final sewing to create slight movement and easier posing.
Experiment with eye sizes: smaller eyes create a cuter, more delicate look while larger eyes give a cartoonish, expressive appearance.
For a vintage vibe, use natural, slightly textured yarns and a muted color palette to create a classic handmade toy.
I sometimes stitch a small loop at the tail to hang the seal as an ornament — a quick change that makes it holiday-ready.
Dont be afraid to combine techniques: add a little surface crochet or embroidery on the back to mimic spots or patterns and make each seal one-of-a-kind.
Common Mistakes & How to Fix Them
✗ Skipping a stitch marker at the beginning of rounds will make it very hard to track rounds; always place a marker at the start of each round to stay aligned with increases and decreases.
✗ Not stuffing as you go leads to lumps or flat spots in the body; stuff gradually while working shaping rounds for smooth results.
✗ Placing eye backs too early can ruin the sunken eye effect; follow the instructions and only secure eye backs when instructed (round 21) or remove stuffing as required to place washers.
✗ Ignoring tension differences when switching hooks or yarn weights will change size drastically; test gauge and adjust hook size to maintain the recommended measurements.
✗ Forgetting to fold and stitch the fins properly will leave gaps when sewn; fold fins as instructed and sc the opening closed leaving a long tail for sewing.