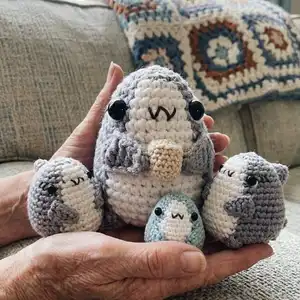
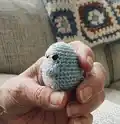
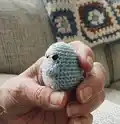
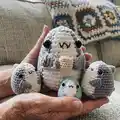
Make a tiny, charming Sharkito with this color-coded amigurumi pattern. Youll get step-by-step rounds, clear assembly instructions, and helpful tips to finish a neat little shark. The pattern includes both a mini Sharkito and a larger Sharkito Mama version, plus a cute bonus cup accessory. Perfect for gifting or adding to your amigurumi collection.
Progress Tracker
0% Complete
— Head/Body :
R3 :
(inc, 2sc) x2, inc, 2sc, inc, 2sc (16)
R4 :
(inc, 3sc) x2, sc, sc in same st, 4sc, sc in same st, 3sc (20)
R5 :
3sc, inc, 4sc, inc, 2sc, 2sc, inc, 2sc, 2sc, inc, sc (24)
R6 :
sc, (inc, 5sc) x2, sc, sc in same st, 6sc, sc in same st, 4sc (28)
R8 :
2sc, (inc, 6sc) x2, inc, 6sc, inc, 4sc (32)
R9 :
2sc, (inc, 7sc) x2, sc, sc in same st, 8sc, sc in same st, 5sc (36)
R11 :
inc, 12sc, inc, 7sc, 9sc, 6sc (38)
R12 :
8sc, inc, 9sc, inc, 4sc, 4sc, inc, 4sc, 5sc, inc (42)
R13 :
25sc, 10sc, 7sc (42)
R14 :
inc, 19sc, inc, 4sc, 10sc, 7sc (44)
Info :
Insert the eyes between rounds 6 & 7 around 2 stitches from the white belly.
R15 :
27sc, 10sc, 7sc (44)
R16 :
dec, 19sc, dec, 4sc, 10sc, 7sc (42)
R17 :
(dec, 5sc) x3, dec, 2sc, 3sc, dec, 5sc, dec, 5sc (36) cut off white yarn.
R20 :
(dec, 2sc) x6 (18) Stuff amigurumi well.
R22 :
(dec) x6 (6) Finish off and sew close.
— Dorsal fin :
Info :
Cut thread leave long tail for sewing.
— Fins :
Item Name (P1) :
Make 2 in grey. Leave long tail before you start your chain. Ch 7, sk 2nd ch from hook, hdc, dc, dc, tc, tc. Cut thread leave long tail for sewing.
— Feet :
Info :
Cut thread leave long tail for sewing.
— Tail :
1st piece :
R1 – ch2, 4sc in 2nd ch from hook (4). R2 – (inc, sc) x2 (6). Cut thread and fasten off, then start on the 2nd piece.
2nd piece :
R1 – ch2, 4sc in 2nd ch from hook (4). You will now have 2 pieces of the tail. Join the 2nd piece that's on the hook to the 1st piece we made by crocheting the next round with the combined pieces [img A] [Watch video demo: Joining the tail]. Joined round – (inc, 2sc) x2, to the 1st piece, (inc, sc) x2, to the 2nd piece (14) [img B]. Cut thread and leave long tail for sewing. Do not stuff tail.
— Bonus: Cup of green tea :
Start in ecru or tan yarn R1 :
6sc in MR (6)
R4-6 :
sc around [3 rounds] (12)
Info :
Stuff cup with polyfill
R5 :
s2green BLO sc around (12)
Info :
Cut green yarn and sew hole shut, insert needle through center of the tea and exit through the center MR on the other side. Pull down yarn tail hard. With the yarn used for the cup, cut long tail to sew on to the belly later.
— Assembly :
Info :
Note: Pin the parts before sewing to see if you're happy with the placement.
Step 1 :
Sew the fins slightly slanted facing the belly laying flat on Rounds 9-11. If you will be letting them hold the cup of tea, sew on the cup to the belly first and then attach the fins to the cup to let him hold it.
Step 2 :
Pin the dorsal fin at the back of the shark's body (between rounds 5 & 9) then sew it in place straight. Attach the tail at the back of the base of the body where it starts to curve. The larger tail fin is above the lower tail fin. [Watch video demo: Sewing dorsal fin]
Step 3 :
Sew the feet on the junction of the shark's belly where the grey and white yarns switches on Round 17. [Watch video demo: Sewing feet]
Step 4 :
Face details: Embroider a "w" mouth on the belly part on Round 6 in line with the eyes and add 2 white stitches on either side. With black yarn, embroider the gills beside the eyes on round 7 by making 2 slanting lines. (Optional) Embroider eye details with white yarn/felt. [Watch video demo: Face details]
This adorable Sharkito pattern is perfect for making a tiny, polite shark to treasure or gift. Its color-coded instructions make color changes and shaping simple so you can focus on the fun details. Enjoy stitching little personalities into every Sharkito you make! 🦈🧶