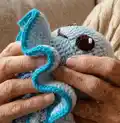
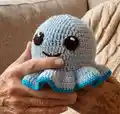
🧶 Beautiful ✨ Detailed 💝 Adorable

Reversible Octo Mood Hat Pattern

Reversible Octo Mood Hat Pattern
4.1★ Rating
5-7 Hours Time Needed
3.7K Made This
✂️

Intermediate Level

Ideal for those with basic crochet experience, featuring slightly more advanced stitches and techniques to expand your skills.

⏱️

Weekend Treat

Takes 5-7 hours, making it an enjoyable project to finish over a couple of days.

🧣

Snug Essential

Everyday comfort with practical charm, designed for both functionality and style through changing seasons.

About This Reversible Octo Mood Hat Pattern

This pattern teaches you how to crochet a reversible octopus mood hat by making two separate hat bases and joining them together. The design features a ruffled brim and simple embroidered face details to create different expressions. It uses worsted/8ply yarn, a 4mm hook, and requires minimal sewing for finishing. Perfect for creating playful wearable gifts or a fun personal accessory.
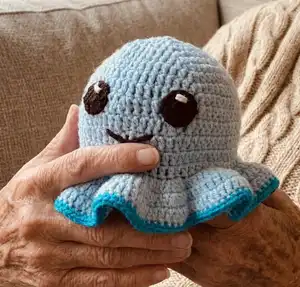
Reversible Octo Mood Hat Pattern crochet pattern - detailed view of completed project

Two contrasting hat bases are worked from the top down, then joined with a third colour for the brim edge. Face details are embroidered before joining to keep construction neat.

Why You'll Love This Reversible Octo Mood Hat Pattern

I absolutely love this pattern because it turns a simple hat into a playful reversible character that can change mood with a quick flip. I enjoy how the ruffled brim adds personality while staying easy to crochet. The construction is clever — you make two identical bases and join them to create a finished, no-sew reversible hat. I also love that the pattern encourages creativity with colours and facial expressions, so each hat feels unique and handmade.

Reversible Octo Mood Hat Pattern step 1 - construction progress Reversible Octo Mood Hat Pattern step 2 - assembly progress Reversible Octo Mood Hat Pattern step 3 - details and accessories Reversible Octo Mood Hat Pattern step 4 - final assembly and finishing

Switch Things Up

I love how easily you can customise this pattern by changing colours — try neon and pastel combinations for a bold statement or soft muted tones for a subtle look.

You can make the hat larger or smaller by changing yarn weight and hook size; a bulky yarn with a bigger hook gives a chunkier, warmer hat while a finer yarn and smaller hook creates a delicate mini version.

I sometimes add little felt accessories or tiny crochet bows to the brim for extra personality — these are stitched on after joining the hats.

Experiment with eye placement and mouth shapes to create totally different moods; moving pupils slightly changes the expression dramatically.

I recommend trying a yarn with a bit of halo or texture for a fluffier finish, or a smooth acrylic for crisp stitches and embroidery contrast.

For a child-sized hat, omit increases between rounds 6-8 and check fit as you go; you can always add or remove increases to tweak circumference.

I also like adding a lining by crocheting a simple band and sewing it inside for extra warmth and structure.

To create a keyring or mini ornament, use fingering yarn and a 2.5mm hook to make a tiny octo mood charm instead of a hat.

Play with the joining colour: using a contrasting third colour for the brim edge really makes the ruffles pop and gives a professional finish.

I often embroider eyelashes or freckles around the eyes for more character — just use a few small stitches to keep it subtle and secure.

Common Mistakes & How to Fix Them

✗ Skipping stitch markers when joining the two brims can cause misaligned edges; place a stitch marker to join the brims and check alignment before crocheting the joining row. ✗ Forgetting that each row starts with ch2 can change the stitch count unexpectedly; always chain 2 at the start of each row and count it as your first dc stitch. ✗ Working with loose tension makes the hat floppy and uneven; maintain medium to tight tension throughout to keep the brim and ruffles defined. ✗ Not embroidering the face before joining can make placement difficult; stitch eyes and mouth onto one hat base before joining the two bases together for accurate placement.
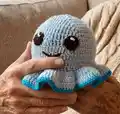
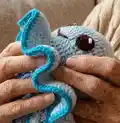
Reversible Octo Mood Hat Pattern

Make a whimsical reversible octopus hat that flips between two moods — happy and grumpy — using basic crochet techniques and simple embroidery. This pattern is designed for adult head sizes and creates a soft, wearable hat with a playful ruffled brim. You'll love making two contrasting hats and joining them to create a reversible, no-sew finished piece.

Intermediate 5-7 Hours

Materials Needed for Reversible Octo Mood Hat Pattern

— Main Fabric

  • 01
    8 ply / worsted weight yarn - I use (Australian) Marvel 8ply acrylic in these images
  • 02
    Two contrasting colours for the hat bases (Colour A and Colour B) - one skein each recommended
  • 03
    Third matching colour for the brim edge (accent colour) - small amount for joining row
  • 04
    Black yarn for face embroidery and pupils - small amount
  • 05
    White yarn for eye highlights - small amount

— Tools Required

  • 01
    Crochet hook size 4mm
  • 02
    Darning needle / yarn needle for sewing and embroidery
  • 03
    Stitch markers
  • 04
    Scissors
  • 05
    Pins for assembly (optional)

Progress Tracker

0% Complete

— Skills :

Info :

You will need a basic understanding of crochet and intermediate embroidery skills. This is a minimal sewing project - all construction of the reversible hat is NO SEW and you can leave all your ends inside the two hats - only sewing is face embroidery. This is a pattern only - not a tutorial.

— Materials :

Info :

8 ply/worsted weight yarn - I use (Australian) Marvel 8ply acrylic in these images. You will want 2 contrasting colours for the hats as well as a 3rd matching colour for the brim edge. Black and white yarn for face details. 4mm crochet hook. Darning needle.

— Notes :

Infos :

Hat is worked from the top down working in separate rows. Each row starts with ch2 which counts as your first stitch Eg. (inc, 2dc) = chain 2, dc into the same space, 1dc into the next 2 spaces. This is an adult sized hat - smaller sizes can be achieved by eliminating increase rows between row 6-8. This pattern is in US crochet terms. Use medium to tight tension.

— Abbreviations :

Info :

dc - double crochet. hdc - half double crochet. sl st - slip stitch. ch - chain. mc - magic circle. inc - increase (2 dc into the same stitch). flo - front loop only (work into the front loop of the stitch).

— Hat Base :

Info :

Make x2 in contrasting colours. Sl st into end of each row. Each row starts with ch2 which counts as your first dc stitch.

Round 1 :

Mc dc 12 (12)

Round 2 :

2 dc into each st (24)

Round 3 :

(2 dc into first stitch, 2 dc) x 8 (32)

Round 4 :

(2 dc into first st, 3 dc) x 8 (40)

Round 5 :

(2 dc into first st, 4 dc) x 8 (48)

Round 6 :

(2 dc into first st, 5 dc) x 8 (56)

Round 7 :

(2 dc into first st, 6 dc) x 8 (64)

Round 8 :

(2 dc into first st, 7 dc) x 8 (72)

Round 9 :

dc around (72)

Round 10-13 :

dc around (72)

Round 14 :

working in flo, 2 x dc in each st (144)

Round 15 :

(2 dc in first st, 1 dc) x 72 (216)

Round 16 :

(2 dc in first st, 7 dc) x 27 (243)

Round 17 :

Sew in tail

— Face Details :

Info :

Make sure to do this before joining the two hat bases together.

Item Name (Eyes) :

mc(dc) x 12 leaving a long tail for stitching on. Contrast colour embroider pupil - double strand stitch twice. Stitch on eyes and embroider mouth - see images for placement.

Info :

Happy face = eye pupils pointing up and smiley mouth. Grumpy face = eye pupils facing down and frowny mouth.

— Joining hats to make reversible :

Info :

Tie the tails from the crown of each hat together with a triple knot, insides touching. Place stitch marker to join the brims of each hat making sure face details are in line. Using your third chosen colour HDC both brim edges together working through both stitches on each hat base (see photos). HDC in each st all the way around, sl st into first hdc and sew in tail.

Info :

Shape the completed hat by shoving that beauty on your head and making sure everything is in line!

Assembly Instructions

  • Tie the tails from the crown of each hat together with a triple knot, insides touching to secure the two bases prior to joining.
  • Place a stitch marker to join the brims of each hat and align the face details so both faces are straight before crocheting the joining row.
  • Using the third chosen colour, work HDC through both brim edge stitches of each hat base all the way around to join them together.
  • Slip stitch into the first HDC when you reach the end of the joining row and sew in the tail securely.
  • Embroider eyes and mouth onto one hat base before joining to ensure correct placement and neat finishing.
  • After joining, shape the hat on a head form or your head to make sure ruffles and faces are aligned.

Important Notes

  • 💡Use stitch markers to keep track of your rounds and to mark the point where you will join the brims of the two hats.
  • 💡Work with medium to tight tension to achieve a firm brim and neat ruffles for the reversible effect.
  • 💡Each row starts with ch2 which counts as your first dc stitch; always count your chains to maintain stitch counts.
  • 💡This pattern is written in US crochet terms; adjust if you follow UK terminology.
  • 💡Smaller hat sizes can be achieved by eliminating increase rows between rounds 6-8.

Thanks for purchasing my Reversible Octo Mood Hat pattern — I hope you have so much fun making your own playful hats! Mix and match colours to create unique moods and personalities for each octopus. Share your finished hats with me on Instagram and Tiktok — I love to see your creations! 🧶✨

You ask,

we answer.

FAQs

What size will the finished piece be?

The finished hat is an adult sized hat worked with worsted / 8ply yarn and a 4mm hook; exact fit may vary with tension and yarn choice.

Can I make a smaller or larger size?

Yes — to make smaller sizes, eliminate increase rows between rows 6-8; to make larger heads, use a thicker yarn and larger hook or add extra increase rounds.

Do I need advanced sewing skills to finish this hat?

No — this is a minimal sewing project. The only sewing required is face embroidery; the two hat bases are joined by crocheting the brims together.

Can I use a different yarn weight?

You can use a different yarn weight but the final size will change. Adjust hook size accordingly and expect a different drape for the brim and ruffles.