🧢 Beautiful ✨ Detailed πŸ’ Adorable

Ninja Turtle Amigurumi Pattern

Ninja Turtle Amigurumi Pattern
4.8β˜… Rating
5-7 Hours Time Needed
3.5K Made This
βœ‚οΈ

Beginner Friendly Level

Perfect for those just starting their crochet journey, with clear instructions and simple techniques

⏱️

Weekend Treat

Takes 5-7 hours, making it an enjoyable project to finish over a couple of days.

🧸

Cute Companion

An adorable friend to cherish, handcrafted with love to bring comfort and joy for years to come.

About This Ninja Turtle Amigurumi Pattern

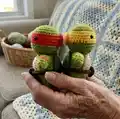
This pattern creates a soft, huggable Ninja Turtle amigurumi approximately 28cm (11 inches) tall when made with blanket chenille yarn. You can choose your turtle mask colour to make each character unique and fun. The pattern uses basic amigurumi techniques like magic circle, increases, decreases and color changes for simple shaping.

Ninja Turtle Amigurumi Pattern crochet pattern - detailed view of completed project

Detailed round-by-round instructions guide you through making the head, body, arms, legs, shell and belly. Clear assembly instructions explain how to attach parts securely for a professional finish.

Why You'll Love This Ninja Turtle Amigurumi Pattern

I absolutely love this pattern because it turns simple stitches into a delightful, squeezable toy that kids and adults both adore. I love how the blanket chenille yarn gives a super soft, plush texture that feels amazing to hold. I enjoy that you can personalize each turtle by changing the mask color, making it a fun series to collect. I also appreciate that the pattern is approachable β€” it uses basic stitches but creates an impressive finished toy.

Ninja Turtle Amigurumi Pattern step 1 - construction progress Ninja Turtle Amigurumi Pattern step 2 - assembly progress Ninja Turtle Amigurumi Pattern step 3 - details and accessories Ninja Turtle Amigurumi Pattern step 4 - final assembly and finishing

Switch Things Up

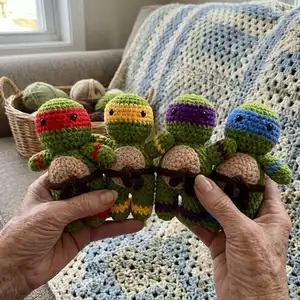
I love how easy it is to customize this pattern by changing the mask color β€” try pastels for a soft, whimsical set or neon for a playful look.

You can make it larger or smaller by switching yarn weight and hook size; use bulky yarn and a larger hook for a chunky plush, or thinner yarn and a smaller hook for a mini keychain version.

I often add embroidered mouths or tiny felt smiles to give each turtle a different expression β€” experiment with placement and thread colors to vary personality.

Try using safety eyes of different sizes or embroidered eyes for a child-safe version; this small change drastically affects the final expression.

Mix and match yarn textures: use a smoother yarn for the belly or shell contrast to add subtle texture differences and visual interest.

You can create a whole family by adjusting height and proportion: lengthen the legs or shorten the body to produce babies, adults, or giant friend versions.

Consider adding tiny crocheted accessories like a mask tie, a small weapon prop, or a tiny scarf for seasonal variations and gift-ready presentation.

If you want posable arms, insert thin wire inside the arm tubes before stuffing to allow gentle posing for display purposes.

Play with stitch patterns on the shell: try adding slip-stitch details or a contrasting round of surface crochet to make a decorative shell pattern.

I also like using a coordinating pillow or mini scene as a backdrop for gifting β€” create a tiny city rooftop or sewer lid to display your turtle in character.

Common Mistakes & How to Fix Them

βœ— Placing safety eyes too low or too high will change the expression; place safety eyes between rounds 7-8 and measure 5 stitches apart before securing. βœ— Overstuffing the head or body makes sewing parts together difficult and distorts shaping; stuff gradually and evenly, checking shape as you go. βœ— Skipping stitch counts at the end of rounds causes uneven shaping and misaligned decreases; count your stitches after each round to stay accurate. βœ— Pulling your tension too tight will make the belly and shell sit oddly; use lighter motions for chenille yarn and gently stretch the belly to help it lay flat. βœ— Not changing colour cleanly can leave messy joins on the mask or stripes; carry yarn neatly and change color on the last yarn-over of the stitch to hide joins. βœ— Failing to pin pieces before sewing can lead to lopsided placement; use knitting needles or pins to position parts and check symmetry before stitching.

Ninja Turtle Amigurumi Pattern

Make your own cuddly Ninja Turtle amigurumi using soft blanket chenille yarn and a 7mm hook. This pattern walks you through the head, body, arms, legs, shell and assembly with clear step-by-step rounds. Perfect for gifting or keeping as a squishy collectible β€” personalize the mask color to create each turtle.

Beginner Friendly 5-7 Hours

Materials Needed for Ninja Turtle Amigurumi Pattern

β€” Main Fabric

  • 01
    Blanket Chenille Yarn (Porta craft) - Forest Green: 1 x 80m skein (main body)
  • 02
    Blanket Chenille Yarn (Porta craft) - Chocolate Brown: small amount for shell and waist strap
  • 03
    Blanket Chenille Yarn (Porta craft) - Beige: small amount for belly
  • 04
    Accent colours (Blanket Chenille Yarn) - Red, Purple, Orange, Blue: small amounts depending on chosen mask and stripes
  • 05
    Note: yarn is chenille/blanket style; quantities are approximate based on a 28cm (11 inch) finished plush

β€” Tools Required

  • 01
    Crochet hook size 7mm
  • 02
    Safety eyes 15mm (2 pieces)
  • 03
    Fiberfill / Hobbyfill stuffing
  • 04
    Yarn needle for sewing and weaving ends
  • 05
    Scissors
  • 06
    Stitch markers
  • 07
    4mm knitting needles (optional, for holding pieces while sewing)
  • 08
    Pins for assembly (optional)

Progress Tracker

0% Complete

β€” Materials Required :

Info :

Yarn Colours: Forest green, Chocolate Brown, Beige. Mask depending on the Ninja Turtle: Red, Purple, Orange, Blue. Hook: 7mm. Safety Eyes: 15mm. Fiberfill/Hobbyfill. Yarn Needle. Scissors. Stitch Markers. In this pattern I have used Blanket Chenille Yarn, Brand: Porta craft. Green- 1-80m skein. Height: 28cm-11inches.

β€” Abbreviations :

Infos :

R: Round. MC: Magic Circle. Sc: Single Crochet. Inc: Increase. Dec: Decrease. CC: Change Colour. Ch: Chain. FLO: Front loops only. BLO: Back loops only. Slst: Slip Stitch. Hdc: Half double crochet.

β€” Pattern Notes :

Infos :

-Measurements of plush will be different depending on the size hook and yarn used. -Stitch count is at the end of row (..). -If you have any questions, please feel free to message at any time.

β€” Head :

Round 1 :

6 sc in MC (6)

Round 2 :

inc x6 (12)

Round 3 :

sc, inc x6 (18)

Round 4 :

2 sc, inc x6 (24)

Round 5 :

3 sc, inc x6 (30)

Info :

This is where you choose your Ninja turtle mask colour

Round 6-9 :

CC sc around (30) (4 rounds)

Round 10-11 :

CC sc around (30) (2 rounds)

Info :

Attach safety eyes in between rounds 7-8, 5 stitches apart.

Round 12 :

3 sc, dec x6 (24)

Round 13 :

sc around (24) STUFF AS YOU GO!

Round 14 :

2 sc, dec x6 (18)

Round 15 :

sc, dec x6 (12)

Round 16 :

6 DEC (6)

Info :

Use your needle now to weave in and out the FLO to close the circle and fasten off.

β€” Arms make 2 :

Info :

Green

Round 1 :

6 sc in MC (6)

Round 2 :

sc, inc x6 (9)

Round 3 :

sc around (9)

Round 4 :

CC sc around (9)

Round 5-7 :

CC sc around (9) (3 rounds)

Info :

Lightly stuff the arm

Info :

2 ARM OPTIONS: READ CAREFULLY!

Round 8 :

Fold the top in half a SC closed (4)

Round 8 :

Do NOT sc closed if you would like your arms to stick out of the body.

Info :

Fasten off and leave tail for sewing

β€” Legs make 2 :

Info :

Green

Round 1 :

sc 6 in MC (6)

Round 2 :

inc x6 (12)

Round 3 :

sc around (12)

Info :

Changing colour to same as mask colour

Round 4-5 :

CC sc around (12) (2 rounds)

Round 6-7 :

CC sc around (12) (2 rounds)

Info :

Fasten off first leg.

Info :

CH 2 after finishing second leg but DO NOT cut the yarn. Insert you crochet hook into any stitch on first leg and continue with BODY instructions.

β€” Body :

Info :

Green

Round 7 :

sc around (12 in first leg, 2 sc in the ch, 12 sc second leg, 2 sc in ch) (28)

Round 8 :

6 sc, inc x3, 6 sc (30)

Round 9-15 :

sc around (30) (7 rounds) Stuff firmly

Round 16 :

3 sc, dec x6 (24)

Round 17 :

sc around (24)

Round 18 :

2 sc, dec x6 (18)

Round 19 :

sc around (18)

Round 20 :

sc, dec x6 (12)

Info :

Slst and leave a tail for sewing. DO NOT close circle

β€” Shell :

Info :

Brown

Round 1 :

sc 8 in MC (8)

Round 2 :

inc x8 (16)

Round 3 :

sc, inc x8 (24)

Round 4 :

3 sc, inc x8 (30)

Round 5-6 :

sc around (30)

Round 7 :

FLO hdc around (30)

Info :

Slst and leave a long tail for sewing. Roll up the last row of HDC to create a lip of the shell.

β€” Belly :

Info :

Beige

Round 1 :

6 sc in MC (6)

Round 2 :

inc x6 (12)

Round 3 :

sc, inc x6 (18)

Round 4 :

2 sc, inc x6 (24)

Round 5 :

sc around (24)

Info :

Slst and leave a long tail for sewing.

Info :

If you crochet tightly: using light motions loosen up the belly by stretching it out, this will help it lay flat against your turtle when it comes to sewing.

β€” Waist Strap :

Info :

Brown

Round 1 :

ch 46

Round 2 :

turn chain and sc into 2nd stitch from hook, all the way down.

Info :

Fasten off and weave in ends.

β€” Assembly :

Info :

Head to the body: Using the tail from the body we are going to attach the head of the ninja turtle to the body. TIP: I use 4mm knitting needles to help keep my attachments in place whilst I sewing them on. Sticking a needle through the head into the body. Sew all around the head until you are happy and it's secured.

Info :

Arms to the body: OPTION 1: Using the same method with the knitting needles I position my arms in place on ROW 2 under the neck. Sewing the top half of the arms until secured.

Info :

Arms to the body: OPTION 2: Using the same method with the knitting needles, I position my arms on ROW 2 under the neck. Sew all the way around the arm until secured.

Info :

Shell to the body: Using the same method, secure your shell onto the body with knitting needle. Using the back loops of the last row sew half way around the shell. Stuff lightly and continue sewing around until secured.

Info :

Belly to the body: Once again using knitting needles to hold into place, sew the belly onto the body of the turtle until secured. Then tie your waist band around the turtle and you are finished.

Assembly Instructions

  • Attach head to the body using the tail from the body; use knitting needles (4mm) to hold pieces in place and sew all around the head until secure.
  • Position arms on either side at ROW 2 under the neck; OPTION 1: sew the top half of the arms for a tucked look, OPTION 2: sew all the way around the arm for a fixed-out position.
  • Secure shell to the body by sewing into the back loops of the last shell row, sew halfway around, stuff lightly and continue sewing until shell is fully attached and secure.
  • Sew the belly to the front of the body using knitting needles or pins to hold it in place; use a long tail to stitch and make sure the belly lays flat before finishing.
  • Tie the waist strap around the turtle and weave in any remaining ends to finish the toy neatly.

Important Notes

  • πŸ’‘Use stitch markers to keep track of rounds, especially during color changes and shaping sections.
  • πŸ’‘Stuff firmly but not too tightly for the best shape and structure - overstuffing can distort your work when sewing parts together.
  • πŸ’‘Pin all parts in place before sewing to ensure correct positioning and symmetry; knitting needles are suggested to hold pieces while attaching.
  • πŸ’‘Weave in ends and leave long tails where indicated for sewing to make attachments secure and neat.

This Ninja Turtle amigurumi pattern is a fun and squishy project you can personalize with mask colors for each turtle. Create a full set or just one special friend to gift and treasure. Soft chenille yarn gives a luxurious plush finish that feels wonderful to hug. 🧢✨

You ask,

we answer.

FAQs

What size will the finished piece be?

The finished amigurumi measures approximately 28 cm (11 inches) tall when using the recommended blanket chenille yarn and a 7mm hook.

Can I use different yarn weights for this pattern?

Yes, you can use different yarn weights, but this will affect the final size. Use an appropriate hook for your chosen yarn and expect changes in finished dimensions.

Do I need prior crochet experience for this pattern?

This pattern is rated beginner friendly, so basic knowledge of crochet stitches like single crochet, increases and decreases is helpful for the best results.

How long does this project typically take to complete?

Most crocheters complete this project in 5-7 hours, though time may vary based on experience level, yarn used and how much detailing or assembly you do.

What size safety eyes should I use?

The pattern uses 15mm safety eyes; place them between rounds 7-8, approximately 5 stitches apart for the recommended look.