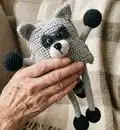
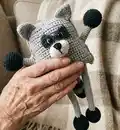
About This Rac the Raccoon Amigurumi Pattern
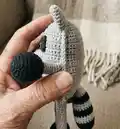
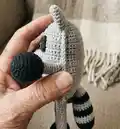
This pattern teaches you how to crochet Rac the Raccoon — a square-bodied, stretchy-limbed toy with a striped tail and embroidered facial details. It uses small hooks and lightweight cotton-blend yarns to achieve neat stitches and defined shaping. The limbs are worked in one piece for stretch functionality and the pattern includes clear assembly guidance for accurate placement.
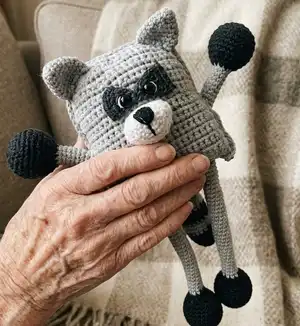
Perfect for making a special handmade toy for kids or as a gift, the finished size is about 27 cm from ears to feet. You should be comfortable with basic amigurumi techniques to follow this pattern successfully.
Why You'll Love This Rac the Raccoon Amigurumi Pattern
I absolutely love this pattern because it combines simple shapes with clever assembly to create a character full of personality. I enjoy how the long, stretchy limbs give the raccoon a playful, interactive quality that children adore. The pattern also lets me practice precise stitch counts and color changes, which makes each finished piece feel very satisfying. I get excited about the little embroidered nose and the striped tail — small details that really bring the raccoon to life.
Switch Things Up
I love to change the color palette to give each raccoon its own personality; try soft pastels for a nursery-friendly version or warm browns for a realistic look.
You can easily make the raccoon larger or smaller by changing yarn weight and hook size — bulky yarn with a larger hook makes a chunkier plush, while finer yarn and a smaller hook create a tiny pocket-sized toy.
I sometimes add embroidered eyebrows or a smile to adjust the expression and mood of the raccoon; small changes to the mouth or eye placement can make it cheeky, sleepy, or surprised.
To create a posable version, consider inserting a thin craft wire inside limb cores before final stuffing, but ensure ends are safely wrapped and secured for toys intended for children.
Switch up the tail stripes by varying stripe width or adding more colors for a whimsical touch — stripes every two rounds instead of three changes the look noticeably.
For a more tactile toy, use textured or boucle yarn for the body while keeping the limbs and details in smooth cotton for contrast.
I often make matching small accessories like a crocheted scarf or a tiny hat to personalize each raccoon and make it a ready gift.
Try embroidering freckles or little paw pads on the feet for extra character and detail that stand out in photos.
If you prefer safety without plastic eyes, embroider the eyes with black and white yarn; that also makes the toy safer for very young children.
I recommend practicing any color change transitions on a scrap swatch first so your stripe tension stays even and consistent when you work the tail and limbs.
Common Mistakes & How to Fix Them
✗ Skipping stitch markers when joining body pieces can cause misaligned seams; use markers at key corners and reference rows to keep edges matched correctly.
✗ Overstuffing limbs and body makes shaping awkward and may stretch seams; stuff gradually and only as firm as needed to keep the shape stable.
✗ Changing colors without securing yarn tails can create loose ends inside the limbs; weave in or secure color changes as you go to prevent unraveling.
✗ Forgetting to count after increases or decreases causes uneven rounds and fitting issues; count stitches regularly, especially after shaping rounds and before assembly.