About This Mr. Buckwheat Amigurumi Pattern
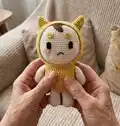
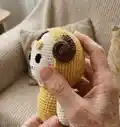
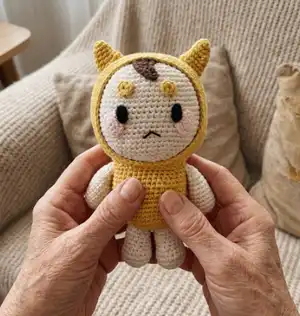
This pattern creates a sweet little amigurumi character named Mr. Buckwheat, complete with a hood, horns, facial details and a cuddly body. The design uses 12-ply cotton yarn and a 3.0 mm hook for a compact, well-shaped finish. Detailed round-by-round instructions and assembly notes guide you through shaping and attaching each piece.
You will work simple increases and decreases, stuff as you go, and sew features in place for a polished result. Perfect for intermediate crocheters who enjoy character design.
Why You'll Love This Mr. Buckwheat Amigurumi Pattern
I absolutely love this pattern because it balances simplicity with charming details that bring the character to life. I enjoyed designing the hood and tiny horns—they add so much personality with only a few extra rounds. I appreciate how the pattern encourages stuffing as you go, which makes shaping much easier. The facial pieces are quick to make and fasten, giving instant character to your finished toy.
Switch Things Up
I love customizing this pattern by changing colors to match seasons or themes; for example, try soft pastels for a baby gift or jewel tones for a more dramatic look.
I often switch yarn weight and hook size to create different sizes — using a bulkier yarn and a larger hook will make a chunkier, cuddlier version.
I sometimes embroider tiny details like freckles or a little scarf to add personality and uniqueness to each doll.
For the eyes, instead of felt you can embroider small eyes or use safety eyes if the toy is for older children; each choice changes the character's expression.
I like adding removable accessories like a tiny crocheted hat or a mini cape so the doll can be dressed up for play or display.
If you want a more poseable toy, I add a small craft wire inside the limbs, making sure to secure and cover the wire safely inside the stuffing.
Try different stitch patterns on the hood or body (like alternating rounds of HDC) to create textured effects that change the overall look.
To make matching sets, vary only one or two colors so they clearly belong together while still having distinct personalities.
I also enjoy making keychain or mini versions by using thinner yarn and a smaller hook; these small treasures are great gifts and fast to make.
Don't be afraid to experiment with facial placement — moving the eyes or mouth slightly can make your character look happy, shy, or curious, so try different positions before attaching permanently.
Common Mistakes & How to Fix Them
✗ Skipping stuffing while crocheting the head can cause poor shaping later; stuff gradually as you crochet to maintain an even round shape.
✗ Forgetting to leave long tails when fastening off prevents neat sewing later; always leave a sufficient yarn tail for assembly and finishing.
✗ Not marking the beginning of rounds leads to incorrect stitch counts after increases; use a stitch marker and move it each round to track your place.
✗ Pulling decreases too tight can distort shaping and create gaps; perform decreases with consistent tension and adjust stuffing when shaping.
✗ Attaching facial pieces without checking placement can look off-center; pin or hold pieces in place and check against round numbers before sewing.