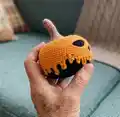
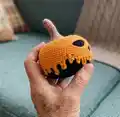
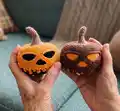
🧶 Beautiful ✨ Detailed 💝 Adorable

Pumpkin for Halloween Amigurumi Pattern

Pumpkin for Halloween Amigurumi Pattern
4.0★ Rating
2-3 Hours Time Needed
2.2K Made This
✂️

Intermediate Level

Ideal for those with basic crochet experience, featuring slightly more advanced stitches and techniques to expand your skills.

⏱️

Bite-Sized Project

Finishes in 2-4 hours—perfect for an afternoon of creative relaxation.

🧸

Cute Companion

An adorable friend to cherish, handcrafted with love to bring comfort and joy for years to come.

About This Pumpkin for Halloween Amigurumi Pattern

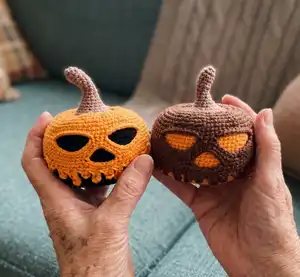
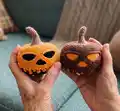
This pattern teaches you how to crochet a small Halloween pumpkin amigurumi with carved-eye details and a decorative drip edge. It includes full round-by-round instructions, color-change tips, and photo references to guide you. You'll create a compact, 10 cm tall pumpkin using sport/4-ply yarn and a tiny hook.

Pumpkin for Halloween Amigurumi Pattern crochet pattern - detailed view of completed project

The pattern highlights shaping techniques like BLO/FLO work and a stitched pulley (pumpkin lift) for a neat finish. It also shows how to make and attach a small stalk and decorative drips for personality.

Why You'll Love This Pumpkin for Halloween Amigurumi Pattern

I absolutely love this pattern because it combines simple amigurumi construction with playful Halloween details that make each pumpkin unique. I enjoy the clever use of color change and FLO/BLO stitches to create carved eyes without extra embroidery. The project is quick to make but still feels special — perfect for seasonal gifting. I always appreciate patterns that include photos at key steps; they make the process more confident and enjoyable.

Pumpkin for Halloween Amigurumi Pattern step 1 - construction progress Pumpkin for Halloween Amigurumi Pattern step 2 - assembly progress Pumpkin for Halloween Amigurumi Pattern step 3 - details and accessories Pumpkin for Halloween Amigurumi Pattern step 4 - final assembly and finishing

Switch Things Up

I love changing the color palette to create different moods: try soft pastels for a cute spring pumpkin or deep jewel tones for a dramatic Halloween piece.

I often change yarn weight and hook size to make mini keychains or larger decorative pumpkins; just adjust stuffing and proportions as needed.

I sometimes embroider eyebrows or mouths instead of sewing on a cover to vary facial expressions and give each pumpkin a unique personality.

You can swap the drip detail for a scalloped edge or leave it plain for a cleaner look depending on your style and skill level.

For a set, make three pumpkins in graduated sizes by switching to DK or bulky yarn with larger hooks to create a pumpkin trio display.

I like adding tiny beads or sequins to the drip edge for a subtle sparkle—sew them on carefully so they stay secure.

If you want posability, try inserting a small wire core in the stalk to make it stand or bend slightly for expressive results.

Try combining two-tone drips (a darker brown and a lighter brown) to mimic melting chocolate for a playful effect.

I recommend experimenting with felt or embroidered inner eyes instead of crocheted inserts for a faster finish with a slightly different texture.

Finally, personalize each pumpkin with initial tags, tiny hats, or removable accessories to turn them into seasonal gifts that feel extra special.

Common Mistakes & How to Fix Them

✗ Skipping the stitch marker at the start of rounds can cause miscounts and uneven shaping; place a marker at the first stitch of each round to stay on track. ✗ Not stuffing gradually will create lumps or flat spots; stuff little by little from the center to the sides for an even, round shape. ✗ Forgetting to change color at the correct round will misalign facial openings; change to orange exactly after round 12 as instructed and check placement against photos. ✗ Cutting the thread before crocheting the drip will make finishing harder; do not cut the thread—crochet drips while the thread is still attached and finish off after sewing them in place.

Pumpkin for Halloween Amigurumi Pattern

Make a spooky, handcrafted mini pumpkin amigurumi for Halloween with clear step-by-step instructions and photos. This pattern guides you through shaping, color changes, and simple decorative details. Perfect for gifting or seasonal decor, you will enjoy the satisfying process and charming results.

Intermediate 2-3 Hours

Materials Needed for Pumpkin for Halloween Amigurumi Pattern

— Main Fabric

  • 01
    Sport weight / 4-ply yarn (Yarn Art Jeans 50g/160m) - Orange (main color for pumpkin body)
  • 02
    Sport weight / 4-ply yarn (Yarn Art Jeans 50g/160m) - Brown (top/cover color)
  • 03
    Sport weight / 4-ply yarn (Yarn Art Jeans 50g/160m) - Light brown (stalk color)

— Tools Required

  • 01
    Crochet hook 1.75 mm (or any small hook you prefer)
  • 02
    Fiberfill stuffing
  • 03
    Scissors
  • 04
    Needle for embroidery and sewing pieces (tapestry needle)
  • 05
    Pins for attaching details
  • 06
    Stitch markers
  • 07
    Yarn needle for finishing

Progress Tracker

0% Complete

— Pumpkin :

Info :

Start crocheting with brown thread.

Round 1 :

8 sc in MR

Round 2 :

8 inc (16)

Round 3 :

(1 sc, inc) * 8 (24)

Round 4 :

1 sc, inc, (2 sc, inc) * 7, 1 sc (32)

Round 5 :

(3 sc, inc) * 8 (40)

Round 6 :

2 sc, inc, (4 sc, inc) * 7, 2 sc (48)

Round 7 :

(5 sc, inc) * 8 (56)

Round 8 :

3 sc, inc, (6 sc, inc) * 7, 3 sc (64)

Round 9 :

(7 sc, inc) * 8 (72)

Round 10-12 :

72 sc (3 rounds) (photo 1)

Info :

Change color to orange.

Round 13 :

BLO: 72 sc (photo 2, 3)

Round 14-27 :

72 sc (14 rounds) (photo 4)

Round 28 :

(7 sc, dec) * 8 (64)

Round 29 :

3 sc, dec, (6 sc, dec) * 7, 3 sc (56)

Round 30 :

(5 sc, dec) * 8 (48)

Round 31 :

2 sc, dec, (4 sc, dec) * 7, 2 sc (40)

Round 32 :

(3 sc, dec) * 8 (32)

Info :

Stuff the toy, spread the fiberfill inside from the center to the sides. Then add fiberfill if you need.

Round 33 :

1 sc, dec, (2 sc, dec) * 7, 1 sc (24)

Round 34 :

(1 sc, dec) * 8 (16)

Round 35 :

8 dec (8)

Info :

Fasten off, leaving a long thread for the pumpkin lift. (photo 5, 6)

Info :

Insert the thread into the needle. Insert the needle into the base of the pumpkin and exit from the opposite side, tighten the thread. (photo 7, 8)

Info :

Again insert the needle into the base of the pumpkin and exit from the opposite side, tighten the thread. (photo 9-12) Repeat twice. Fasten off, hide the yarn tail. (photo 13)

Info :

Go back to the 12th round, continue to sc on FLO using the brown thread (the tip of the hook is pointing down):

Round 1 :

72 sc (photo 14, 15)

Round 2 :

26 sc, make chain 12, skip 8 sc, 4 sc, make chain 12, skip 8 sc, 26 sc (80) (photo 16-18)

Round 3 :

26 sc, 12 sc on the chain, 4 sc, 12 sc on the chain, 26 sc (80) (photo 19)

Round 4 :

80 sc

Round 5 :

37 sc, make chain 7, skip 8 sc, 35 sc (79)

Round 6 :

37 sc, 7 sc on the chain, 35 sc (79) (photo 20)

Info :

Do not cut the thread. Next, we will crochet the drip on the pumpkin. Make chain 5, start to crochet on the second chain from the hook: 4 hdc, sl st to the next one, 2 sc. (photo 21, 22)

Info :

Make chain 6, start to crochet on the second chain from the hook: 5 hdc, sl st to the next one, 2 sc. (photo 23)

Info :

Continue crocheting in a circle, alternating chains of different lengths from 3 to 7 ch. Fasten off, leaving a long thread for sewing. (photo 24, 25)

Info :

Use pins to secure the eyes, the nose and the drips on the pumpkin and sew. (photo 26-29)

— Pumpkin stalk :

Info :

Start crocheting with light brown thread.

Round 1 :

6 sc in MR

Round 2 :

(1 sc, inc) * 3 (9)

Round 3-6 :

9 sc (4 rounds)

Round 7 :

4 sl st, 5 sc (9)

Round 8 :

9 sc

Round 9 :

4 sl st, 5 sc (9)

Round 10 :

9 sc

Round 11 :

(2 sc, inc) * 3 (12)

Round 12 :

12 sc

Round 13 :

(1 sc, inc) * 6 (18)

Round 14 :

18 sc

Round 15 :

(2 sc, inc) * 6 (24)

Round 16 :

24 sc (photo 30)

Info :

Fill in the stalk with fiberfill.

Info :

Fasten off, leaving a long thread for sewing.

Info :

Sew the stalk to the pumpkin. (photo 31, 32)

Assembly Instructions

  • Stuff the pumpkin firmly and evenly, spreading fiberfill from the center outwards before closing so the shape remains smooth and round.
  • Use the long thread left at the top to perform the pumpkin lift: insert the needle through the base, exit the opposite side, tighten and repeat as shown to shape the top before fastening off.
  • Pin the orange inner eye and nose pieces in place from the inside, secure with pins for symmetry, then sew the brown cover over them to create carved-eye details.
  • Crochet the drips with the attached thread around the edge, fasten off leaving a long tail and sew the drips securely around the pumpkin bottom edge.
  • Sew the stalk to the center top of the pumpkin with the long sewing tail, reinforcing with several passes for a secure attachment.

Important Notes

  • 💡Work in continuous rounds and use a stitch marker to mark the first stitch of each round for accurate stitch counts.
  • 💡Keep consistent tension; using a too-loose gauge will make facial openings sloppy and stuffing may show.
  • 💡Do not cut the yarn before crocheting the drips—complete the drip row while the thread is still attached for an easier finish.
  • 💡Change colors at the exact rounds indicated (after round 12) to align face shapes and decorative sections with photos.

This adorable pumpkin pattern is perfect for quick Halloween decor or sweet handmade gifts. 🎃 Make a whole patch by changing colors and details to suit your style. Each mini pumpkin is fun to make and irresistible to display. 🧶✨
You ask,

we answer.

FAQs

What size will the finished piece be?

The finished amigurumi measures approximately 3.94 inches (10 cm) in height when made with sport/4-ply yarn and a 1.75 mm hook as suggested.

Can I use different yarn weights for this pattern?

Yes, you can use different yarn weights, but the final size will change; choose a hook appropriate for your yarn and expect a larger or smaller pumpkin accordingly.

Do I need prior crochet experience for this pattern?

This pattern is rated intermediate, so basic knowledge of single crochet, half double crochet, increases and decreases is recommended for best results.

How long does this project typically take to complete?

Most crocheters complete this project in 2-4 hours depending on experience and finishing details like sewing and drips.