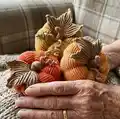
🧢 Beautiful ✨ Detailed πŸ’ Adorable

Pumpkin Amigurumi Pattern

Pumpkin Amigurumi Pattern
4.3β˜… Rating
2-4 Hours Time Needed
3.5K Made This
βœ‚οΈ

Intermediate Level

Ideal for those with basic crochet experience, featuring slightly more advanced stitches and techniques to expand your skills.

⏱️

Bite-Sized Project

Finishes in 2-4 hoursβ€”perfect for an afternoon of creative relaxation.

πŸ‚

Autumn Vibes

Earthy tones with cozy textures inspired by falling leaves and the rich, warm colors of harvest season.

About This Pumpkin Amigurumi Pattern

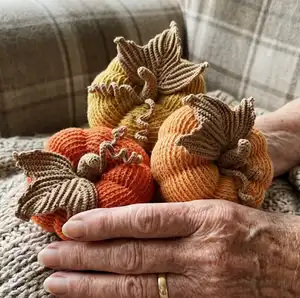
This pattern teaches you to crochet a small, sculpted pumpkin with curly moustaches, a textured tail and a decorative leaf. It includes row-by-row instructions for the pumpkin body plus step-by-step shaping and finishing techniques. The finished pumpkin measures about 12 cm tall when using the recommended materials.

Pumpkin Amigurumi Pattern crochet pattern - detailed view of completed project

You'll work mainly in back loops to create the ribbed texture and use simple sculpting techniques to form the pumpkin segments. Leaves and moustaches are crocheted separately and finished with a PVA glue solution for shaping.

Why You'll Love This Pumpkin Amigurumi Pattern

I absolutely love this pattern because it turns simple stitches into a cozy seasonal decoration with a lot of character. The sculpting technique is quick but transforms a round ball into a realistic pumpkin, which always feels like magic. I enjoy adding the curly moustaches and a textured leaf β€” they give each pumpkin a unique personality. This design is satisfying to make and looks delightful grouped together on a table or as part of a Halloween display.

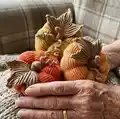
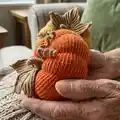
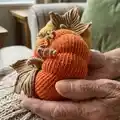
Pumpkin Amigurumi Pattern step 1 - construction progress Pumpkin Amigurumi Pattern step 2 - assembly progress Pumpkin Amigurumi Pattern step 3 - details and accessories Pumpkin Amigurumi Pattern step 4 - final assembly and finishing

Switch Things Up

I love how easy it is to customize this pattern by changing yarn colors; try pale creams and greens for a vintage pumpkin set.

You can make a chunky version by using a bulkier yarn and larger hook for a much larger, cuddly pumpkin.

For mini keychain pumpkins use thinner yarn and a smaller hook to create tiny versions perfect for gifts.

I often experiment with embroidery details on the leaf to add veins and texture for a more realistic look.

Try adding a tiny crocheted stem in contrasting yarn or wrap a little twine around the top for a rustic accent.

If you want more pronounced ribs, make additional sculpting passes and pull slightly tighter to deepen the segments.

Make a set of three pumpkins in graduated sizes and colors to create a festive centerpiece for fall.

Replace the moustaches with a simple crocheted vine or bead embellishment for a different aesthetic.

I sometimes stuff a pinch of lavender or cinnamon sachet into the stuffing for a scented decoration during autumn.

To make the leaf stiffer, use a slightly stronger PVA mix or add a tiny bit of fabric stiffener after shaping; always test on a scrap first.

Common Mistakes & How to Fix Them

βœ— Skipping the 'work in back loops only' instruction will remove the ribbed texture; always work in the back loops as specified to get the pumpkin ribs. βœ— Overstuffing the pumpkin creates a misshapen form and prevents proper sculpting; stuff moderately and adjust while sculpting for even segments. βœ— Not tightening the sculpting yarn enough results in shallow segments; tighten slightly and repeat the sculpting pass 1-2 times to define the ribs. βœ— Using leaves yarn that is the same thickness as the pumpkin yarn makes leaves bulky and heavy; use the recommended thinner yarn for crisp leaf shaping.

Pumpkin Amigurumi Pattern

Create a charming crochet pumpkin to decorate your home this autumn. This pattern guides you through making a 12 cm pumpkin body, curly moustaches, a textured tail and a sculpted leaf with clear step-by-step instructions. You will enjoy shaping and finishing details that give each pumpkin a handmade, rustic character. Perfect for seasonal decor, gifts, or a cozy Halloween accent.

Intermediate 2-4 Hours

Materials Needed for Pumpkin Amigurumi Pattern

β€” Main Fabric

  • 01
    Yarn GAZZAL BABY COTTON 50g/165m, orange - for a pumpkin (approx. 1 skein per small pumpkin)
  • 02
    Yarn ALIZE FOREVER 50g/300m, brown - for leaves; this yarn should be twice thinner than for the pumpkin (use small amount for several leaves)
  • 03
    Filler (polyester stuffing) - small amount per pumpkin
  • 04
    Sewing thread of brown color - for assembly and finishing
  • 05
    PVA glue - for shaping moustaches (diluted with water 1:1)

β€” Tools Required

  • 01
    Crochet hook matching your yarn (use size recommended for chosen yarn)
  • 02
    Yarn needle for sculpting and sewing parts
  • 03
    Scissors
  • 04
    Stitch markers (optional)
  • 05
    Pencil or thin dowel - for shaping moustaches
  • 06
    Measuring tape or ruler to measure chain length
  • 07
    Pins for positioning parts while sewing (optional)

Progress Tracker

0% Complete

β€” Pumpkin :

Round 1 :

8 sc in a magic ring.

Round 2 :

inc*8 (16).

Round 3 :

(1 sc, inc)*8 (24).

Round 4 :

(2 sc, inc)*8 (32).

Round 5 :

(3 sc, inc)*8 (40).

Round 6 :

(4 sc, inc)*8 (48).

Round 7 :

(5 sc, inc)*8 (56).

Round 8 :

(6 sc, inc)*8 (64).

Round 9 :

(7 sc, inc)*8 (72).

Round 10 :

72 sc.

Round 11 :

(8 sc, inc)*8 (80).

Round 12 - 13 :

80 sc.

Round 14 :

(9 sc, inc)*8 (88).

Round 15 - 25 :

88 sc (11 rounds).

Round 26 :

(dec, 9 sc)*8 (80).

Round 27 - 28 :

80 sc.

Round 29 :

(dec, 8 sc)*8 (72).

Round 30 :

72 sc.

Round 31 :

(dec, 7 sc)*8 (64).

Round 32 :

(dec, 6 sc)*8 (56).

Round 33 :

(dec, 5 sc)*8 (48).

Round 34 :

(dec, 4 sc)*8 (40).

Round 35 :

(dec, 3 sc)*8 (32).

Info :

Stuff the part well, but not firmly.

Round 36 :

(dec, 2 sc)*8 (24).

Round 37 :

(dec, 1 sc)*8 (16).

Round 38 :

dec*8 (8).

Info :

FO, cut the yarn, leave a long tail.

β€” Sculpting :

Step 1 :

Make sculpting to turn this ball to a pumpkin. First make sculpting at the center: use a yarn needle and the finishing tail. Insert your needle inside the ball through the finishing hole. Pull the needle out through the magic ring.

Step 2 :

Insert the needle in the stitch close to the magic ring and pull it out through the stitch close to the finishing hole. Tighten the yarn slightly, repeat that process 1-2 times, fasten the sculpting yarn thread.

Info :

Now make 8 sculptings around the ball in the same way, but do the 2nd step along the surface of the ball, passing the needle under the front loops of the rounds. Don't try to get absolutely symmetrical part, so that your pumpkin will look as real one.

β€” Moustache (2 pcs) :

Info :

Make 2 pieces that have different length.

Round 1 :

Make a chain of 7 cm length. You can resize the chain fitting to your pumpkin size.

Round 2 :

Crochet sc-row along the chain.

Info :

Moisten the moustaches with water solution of PVA glue (in proportion 1:1). Wrap the moustaches on a pencil (for example) and let them dry completely.

β€” Tail :

Round 1 :

make 8 sc in a magic ring.

Round 2 - 5 :

8 sc (4 rounds).

Round 6 :

3 sl st, 5 sc.

Round 7 :

8 sc.

Round 8 :

3 sl st, 5 sc.

Round 9 :

8 sc.

Round 10 :

3 sl st, 5 sc.

Round 11 :

8 sc.

Round 12 :

(3 sc, inc)*2 (10).

Round 13 - 14 :

10 sc.

Round 15 :

(4 sc, inc)*2 (12).

Round 16 :

12 sc.

Round 17 :

(2 sc, inc)*4 (16).

Round 18 :

(1 sc, inc)*8 (24).

Round 19 :

24 sc.

β€” Leef :

Round 1 :

make 16 ch.

Round 2 :

starting in the 3rd stitch from the hook: 14 sc (photo β„– 1), 4 ch (photo β„– 2), in the back direction 14 sc, 1 ch (photo β„– 3, β„– 4).

Info :

work in back-and-forth rows. work in the back loops only.

Round 3 :

skip 1 st, 13 sc (photo β„– 1); make in the arch of the chains (of the previous row): 2 sc+ 4 ch+ 2 sc (photo β„– 2, β„– 3); 11 sc, 1 ch (photo β„– 4, β„– 5).

Round 4 :

skip 1 st, 12 sc; in the arch of the chains: 2 sc+ 4 ch+ 2 sc; 12 sc, 1 ch.

Round 5 :

skip 1 st, 13 sc; in the arch of the chains: 2 sc+ 4 ch+ 2 sc; 11 sc, 1 ch.

Round 6 :

skip 1 st, 12 sc; in the arch of the chains: 2 sc+ 4 ch+ 2 sc; 12 sc, 1 ch.

Round 7 :

skip 1 st, 13 sc; in the arch of the chains: 2 sc+ 4 ch+ 2 sc; 12 sc, 1 ch.

Round 8 :

skip 1 st, 13 sc; in the arch of the chains: 2 sc+ 4 ch+ 2 sc; 12 sc, 1 ch.

Round 9 :

skip 1 st, 13 sc; in the arch of the chains: 2 sc+ 4 ch+ 2 sc; 12 sc, 1 ch.

Round 10 :

skip 1 st, 13 sc; in the arch of the chains: 5 sc; 12 sc.

Round 11 :

5 ch; starting in the 3rd from the hook (= skip 2 sts): 8 sc, 1 ch, skip 1 st, 1 sc in both loops of the next stitch, 1 ch.

Round 12 :

turn, 1 sc in the chain of the previous row, 9 sc.

Round 13 :

5 ch, skip 2 sts, 14 sc, 1 ch, skip 1 st, 1 sc in both loops of the next stitch, 1 ch.

Round 14 :

turn, 1 sc in the chain of the previous row, 15 sc.

Round 15 :

4 ch, skip 2 sts, 19 sc, 1 ch, skip 1 st, 1 sc in both loops of the next stitch, 1 ch.

Round 16 :

turn, 1 sc in the chain of the previous row, 17 sc, 1 ch.

Round 17 :

skip 1 st, 18 sc, 1 ch, skip 1 st, 1 sc in both loops of the next stitch, 1 ch.

Round 18 :

turn, 1 sc in the chain of the previous row, 15 sc, 1 ch.

Round 19 :

skip 1 st, 16 sc, skip 1 st, 3 sc in both loops of the next stitch, 14 sc.

Round 20 :

5 ch, skip 2 sts, 8 sc, 1 ch, skip 1 st, 1 sc in both loops of the next stitch, 1 ch.

Round 21 :

turn, 1 sc in the chain of the previous row, 9 sc.

Round 22 :

5 ch, skip 2 sts, 14 sc, 1 ch, skip 1 st, 1 sc in both loops of the next stitch, 1 ch.

Round 23 :

turn, 1 sc in the chain of the previous row, 15 sc.

Round 24 :

4 ch, skip 2 sts, 19 sc, 1 ch, skip 1 st, 1 sc in both loops of the next stitch, 1 ch.

Round 25 :

turn, 1 sc in the chain of the previous row, 17 sc, 1 ch.

Round 26 :

skip 1 st, 18 sc, 1 ch, skip 1 st, 1 sc in both loops of the next stitch, 1 ch.

Round 27 :

turn, 1 sc in the chain of the previous row, 15 sc, 1 ch.

Round 28 :

skip 1 st, 16 sc, 1 ch, skip 1 st, 1 sc in both loops of the next stitch, 1 sl st, FO.

β€” Assembling :

Step 1 :

Sew the moustaches at the center of the pumpkin.

Step 2 :

Stuff slightly the lower part of the tail and sew it to the pumpkin upon the point of sewing the moustaches.

Step 3 :

Sew the leef.

Info :

Final adjustments: arrange sculptings, trim and weave in all ends and position pieces until you are happy with the overall look.

Assembly Instructions

  • Sew the moustaches at the center of the pumpkin using the long tail and a yarn needle, positioning them so the curly ends cascade over the pumpkin.
  • Stuff slightly the lower part of the tail and sew it to the pumpkin at the same point where the moustaches are attached, securing firmly with a whipstitch.
  • Sew the leaf (leef) to the top of the pumpkin above the tail using matching brown thread, arranging the leaf points for a natural look.
  • Finish by arranging sculptings, trimming and weaving in all ends, and checking symmetry so the pumpkin looks natural rather than perfectly uniform.

Important Notes

  • πŸ’‘Work in back loops only for the pumpkin body to create the ribbed texture required for realistic sculpting.
  • πŸ’‘Stuff moderately: overstuffing prevents proper sculpting while under-stuffing will collapse the formβ€”adjust while sculpting.
  • πŸ’‘Moisten the moustaches with a 1:1 water-PVA glue solution and wrap on a pencil to shape spirals, letting them dry completely.
  • πŸ’‘Leave a long tail when finishing the pumpkin so you can use it for initial sculpting passes with a yarn needle.

This pumpkin amigurumi brings autumn charm to any shelf or table with handcrafted ribs, curly moustaches and a textured leaf. πŸπŸ‚ Perfect for Halloween displays, fall gifts, or cozy seasonal decor β€” make a set in different colors for a warm harvest arrangement. 🧢✨

You ask,

we answer.

FAQs

What size will the finished piece be?

When using the recommended materials the finished pumpkin measures approximately 12 cm tall.

Can I use different yarn weights for this pattern?

Yes, you can, but yarn weight will change the final size; use a correspondingly larger or smaller hook and expect changes in texture and finished dimensions.

Do I need prior crochet experience for this pattern?

This pattern is rated intermediate and requires comfort with single crochet, increases, decreases and working in back loops; basic experience is recommended.

How long does this project typically take to complete?

Most crafters complete a single pumpkin in about 2-4 hours, depending on experience and how many finishing details you add.