🧢 Beautiful ✨ Detailed πŸ’ Adorable

Proud Peacock Amigurumi Pattern

Proud Peacock Amigurumi Pattern
4.6β˜… Rating
5-7 Hours Time Needed
1.6K Made This
βœ‚οΈ

Intermediate Level

Ideal for those with basic crochet experience, featuring slightly more advanced stitches and techniques to expand your skills.

⏱️

Weekend Treat

Takes 5-7 hours, making it an enjoyable project to finish over a couple of days.

πŸ₯

Charming Critter

Delightful animal designs with sweet details that capture the essence of your favorite woodland and farmyard friends.

About This Proud Peacock Amigurumi Pattern

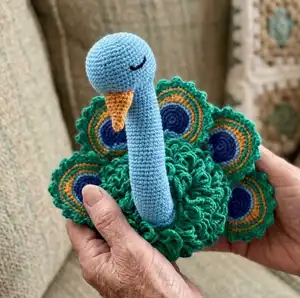
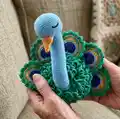
This pattern creates a whimsical crocheted peacock featuring a loop-stitch textured body and layered circular feather motifs. You will work in the round for the body and head and use a simple beak and needlework for facial details. The design uses contrasting colors and a bit of wire to make the neck poseable for a lively display.

Proud Peacock Amigurumi Pattern crochet pattern - detailed view of completed project

Step-by-step rounds and clear finishing instructions make assembly straightforward, even with the more decorative feathers. The finished peacock is a decorative toy perfect for gifting or display.

Why You'll Love This Proud Peacock Amigurumi Pattern

I absolutely love this pattern because it combines playful texture with elegant colorwork; the loop stitch tail is so satisfying to crochet and creates amazing volume. I enjoy how the layered feathers let you experiment with color pairing to make each peacock unique. The design balances simple amigurumi construction with a few advanced touches like the loop stitches and wired neck, which keeps the make interesting but not overwhelming. Creating this peacock always feels rewarding β€” the final result looks way more complex than the steps you follow.

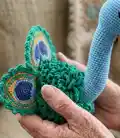
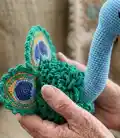
Proud Peacock Amigurumi Pattern step 1 - construction progress Proud Peacock Amigurumi Pattern step 2 - assembly progress Proud Peacock Amigurumi Pattern step 3 - details and accessories Proud Peacock Amigurumi Pattern step 4 - final assembly and finishing

Switch Things Up

I love how versatile this peacock is for customization; you can change yarn colors to create a tropical or pastel bird.

Try making the feathers in gradient blues and greens for a realistic look, or use contrasting brights for a whimsical toy.

If you want a smaller version, switch to a finer yarn and smaller hook to make mini feathers and a dainty peacock.

For a larger, plush version, choose a bulkier yarn and larger hook; the loop stitches will become even more dramatic and voluminous.

I sometimes add metallic or variegated yarn for a few feather rounds to give subtle shimmer and depth.

You can embroider different eye shapes or add tiny safety eyes for varied personalities on the head.

Consider leaving out the internal wire for a floppy neck version that makes a softer, child-friendly toy.

For home decor, mount the finished peacock on a small wooden base or inside a shadow box to display the feather fan.

I also like to add tiny crocheted accessories like a crown or scarf to personalize each peacock I make.

Experiment with combining loop stitch sizes by wrapping a thicker loop for the inner tail layer and thinner loops for outer layers to create layered texture.

Common Mistakes & How to Fix Them

βœ— Skipping the instruction to work the loop stitch into the back loops only at Rnd 3 of the body can flatten the tail; follow the note exactly and insert the hook into the back loop for that round. βœ— Understuffing the head or neck will make shaping and joining difficult; stuff firmly as you go and continue to add stuffing while crocheting to maintain a smooth silhouette. βœ— Forgetting to secure or tape the ends of the wire will cause it to poke through the neck; bend the ends, cover them with masking tape, and slide the wire fully into the neck before continuing. βœ— Not counting stitches after increases or decreases will quickly throw off feather placement; count at the end of each round and mark key rounds to keep symmetry while attaching feathers.

Proud Peacock Amigurumi Pattern

Make a charming and colorful peacock amigurumi with this detailed crochet pattern. You will learn loop-stitch techniques to create the plush tail and stitch together layered feather motifs for a striking finish. Clear step-by-step rounds guide you through the body, head, beak and feathers so you can create a show-stopping handmade gift. Perfect for crafters who love texture and playful details.

Intermediate 5-7 Hours

Materials Needed for Proud Peacock Amigurumi Pattern

β€” Main Fabric

  • 01
    Scheepjes Catona yarn: 100 g green (515)
  • 02
    Scheepjes Catona yarn: 50 g dark blue (527)
  • 03
    Scheepjes Catona yarn: 50 g light blue (384)
  • 04
    Scheepjes Catona yarn: 50 g golden brown (383)

β€” Tools Required

  • 01
    2.5 mm crochet hook
  • 02
    Fiberfill stuffing
  • 03
    Bodkin
  • 04
    Wire (approx 18 cm piece)
  • 05
    Masking tape
  • 06
    Yarn needle (for sewing and drawing threads)

Progress Tracker

0% Complete

β€” This is how you make it :

Info :

Crochet the peacock in the round; don't join the rounds unless otherwise indicated.

β€” Loop Stitch :

Infos :

An additional stitch in this design is the loop stitch, abbreviated here to ls. Crochet the loop stitch as follows: insert the hook into the stitch (1), yarn over hook (2). Wrap the yarn around your middle finger to form a loop. Draw the yarn back (3) and behind the loop on your finger (4). Now, draw the yarn through the stitch (5). Draw the yarn once more through both loops on your hook, as if you're making a single crochet (6). Now you have a loop stitch (7 and 8).

Info :

STITCHING LOOP STITCHES TOGETHER: Crochet a loop stitch, but don't finish the stitch. Keep 2 loops on the hook. Crochet the next loop stitch. Draw the yarn through the 3 remaining loops on the hook.

β€” Body :

Info :

Make a MR with green and work 6 sc into the MR.

Round 1 :

2 sc in each stitch (= 12).

Round 2 :

2 sc in every 2nd stitch (= 18).

Round 3 :

work into the back loops: 6 x (1 sc, 2 sc in next stitch, 1 sc) (= 24). Fasten off and turn. Attach the yarn and continue with the ls.

Round 4 :

2 ls in every 4th stitch (= 30).

Round 5 :

crochet 6 x (2 ls, 2 ls in next stitch, 2 ls) (= 36).

Round 6 :

2 ls in every 6th stitch (= 42).

Round 7 :

1 ls in each stitch (= 42).

Round 8 :

6 x (3 ls, 2 ls in next stitch, 3 ls) (= 48).

Round 9 :

1 ls in each stitch (= 48).

Round 10 :

2 ls in every 8th stitch (= 54).

Round 11-17 :

1 ls in each stitch (= 54).

Round 18 :

crochet 1 sc in the front loop of each stitch (= 54).

Round 19-20 :

1 ls in each stitch (= 54).

Round 21 :

ls2tog every 8th and 9th ls (= 48).

Round 22 :

1 ls in each stitch (= 48).

Round 23 :

crochet 6 x (3 ls, ls2tog, 3 ls) (= 42).

Round 24 :

1 ls in each stitch (= 42).

Round 25 :

ls2tog every 6th and 7th ls (= 36).

Round 26 :

1 ls in each stitch (= 36).

Round 27 :

crochet 6 x (2 ls, ls2tog, 2 ls) (= 30).

Round 28 :

1 ls in each stitch (= 30).

Round 29 :

ls2tog every 4th and 5th ls (= 24). Join with 1 sl st. The work has been inside out until now. Turn the work around and stuff the body. Turn, so you're crocheting on the right side, and continue to stuff the body as you work.

Round 30 :

crochet 6 x (1 sc, sc2tog, 1 sc) (= 18).

Round 31 :

sc2tog every 2nd and 3rd sc (= 12). Fasten off. Thread a needle with the yarn and draw the needle through the outer 12 loops. Pull tight to close the hole.

β€” Head :

Info :

Make a MR with light blue and work 6 sc into the MR.

Round 1 :

2 sc in each sc (= 12).

Round 2 :

2 sc in every 2nd sc. (= 18).

Round 3 :

crochet 6 x (1 sc, 2 sc in next sc, 1 sc) (= 24).

Round 4 :

2 sc in every 4th sc (= 30).

Round 5 :

crochet 6 x (2 sc, 2 sc in next sc, 2 sc) (= 36).

Round 6 :

2 sc in every 6th sc (= 42).

Round 7 :

crochet 6 x (3 sc, 2 sc in next sc, 3 sc) (= 48).

Round 8-15 :

1 sc in each sc (= 48).

Round 16 :

17 sc, dec 3 x, 2 sc, dec 3 x, 17 sc (= 42).

Round 17 :

sc2tog every 6th and 7th sc (= 36).

Round 18 :

11 sc, dec 3 x, 2 sc, dec 3 x, 11 sc (= 30).

Round 19 :

sc2tog every 4th and 5th sc (= 24). Firmly stuff the head.

Round 20-29 :

24 sc.

Info :

Bend the ends of a piece of wire 18 cm long over and cover the ends with masking tape (9 and 10). Slide the wire into the neck and stuff the neck around the wire. Continue to crochet, stuffing the neck as you go along (11).

Round 30-39 :

24 sc.

Info :

Crochet the neck to the body with 1 round sc as follows: insert the hook through the stitch in the neck and the outer loop of the body. Draw the yarn through and continue to work to make 1 sc. Rep with the other stitches. Fasten off but leave a long tail. Draw the end through the back of the neck at Rnd 29 (12). Bend the neck backwards and insert the needle through the body (13). Tightly pull the thread to pull the neck into place. Sew a few more stitches and fasten off (14).

β€” Beak :

Info :

Make a MR with golden brown and work 6 sc into the MR.

Round 1 :

1 sc in each sc (= 6).

Round 2 :

2 sc in every 2nd sc (= 9).

Round 3 :

9 sc.

Round 4 :

crochet 3 x (1 sc, 2 sc in next sc, 1 sc) (= 12).

Round 5 :

12 sc.

Round 6 :

2 sc in every 4th sc (= 15).

Round 7 :

15 sc.

Round 8 :

crochet 3 x (2 sc, 2 sc in next sc, 2 sc) (= 18).

Round 9 :

18 sc. Fasten off and stuff the beak. Sew the beak onto the head between Rnd 16 and Rnd 23. Embroider the eyes onto the sides of the head.

β€” Feather (10 x) :

Info :

Make a MR with dark blue and work 6 sc into the MR.

Round 1 :

2 sc in each sc (= 12).

Round 2 :

1 sc, change to light blue, 1 sc, change to dark blue, 1 sc in the same stitch, crochet 5 x (1 sc, 2 sc in next sc) (= 18).

Round 3 :

change to light blue, 1 sc, 2 sc in next sc, 1 sc, change to dark blue, crochet 5 x (1 sc, 2 sc in next sc, 1 sc) (= 24).

Round 4 :

change to light blue, crochet 6 x (3 sc, 2 sc in next sc) change to gold (= 30).

Round 5 :

crochet 3 x (2 sc, 2 sc in next sc, 2 sc), 2 hdc, 1 dc, 2 dc in 1 stitch, 1 dc, 2 hdc, 2 sc in 1 stitch, 4 sc, 2 sc in next stitch, 2 sc. Change to green (= 36).

Round 6 :

2 sc in every 6th stitch. Change to gold (= 42).

Round 7 :

crochet 6 x (3 sc, 2 sc in next sc, 3 sc) (= 48). Join with 1 sl st. Crochet 9 more feathers in the same way.

β€” Finishing the Feathers :

Info :

Place two feathers with the inside facing each other and crochet them together as follows: attach the green yarn in the middle stitch at the bottom and crochet 6 sc. *1 sc, work into the next stitch: (1 dc, 1 tr, 1 dc), sc. Rep 11 x from *, 1 sc in the last 6 stitches. Join with 1 sl st and fasten off. Leave a long tail.

β€” Attaching the Feathers :

Info :

The bottom is made up of 12 sc, so each feather is divided left and right by 2 x 6 sc. Sew the feathers into the outer loops of Rnd 18 of the body. Attach the 1st feather using the 6 sc on the right side. Hold the peacock upside-down with the head facing away from you. Go to the middle of the bottom and count 9 stitches to the right. Attach the feather from the 10th to the 15th stitch. Sew the next feather on with the next 6 outer loops, so they overlap each other. Sew the feathers together at the back with a couple of stitches. Use the next 6 outer loops for the 3rd feather. Attach the 2nd and 3rd feather to each other. Sew the 4th feather onto the next 6 outer loops and attach it to the 3rd feather. For the last feather, use the 12 stitches at the bottom. Sew this feather on with the next 12 loops and attach it to the 4th feather.

Info :

TIP! ATTACH THE FEATHERS SO THEY OVERLAP AND SEW THEM TOGETHER AT THE BACK WITH A SINGLE STITCH.

Assembly Instructions

  • Slide the prepared 18 cm piece of wire into the neck, tape the ends with masking tape to cover sharp edges, and stuff the neck around the wire before continuing to crochet the neck rounds.
  • Crochet the neck to the body with 1 round of single crochet by inserting the hook through a neck stitch and the outer loop of the body, draw the yarn through and make 1 sc; repeat around and fasten off leaving a long tail for sewing.
  • Draw the long tail through the back of the neck at Rnd 29, bend the neck backwards, insert the needle through the body, and pull tightly to seat the neck; sew a few more securing stitches and fasten off.
  • Sew the stuffed beak onto the head between Rnd 16 and Rnd 23, positioning it centrally and securing with small, even stitches; embroider small eyes onto the sides of the head.
  • Arrange the feather motifs so the outer loops overlap; sew them into the outer loops of Rnd 18 of the body using the 6-sc bottom sections as attachment points and overlap adjacent feathers as instructed.
  • When attaching paired feathers, place them with insides facing, crochet 6 sc in the center to join then fasten off leaving tails to sew the cluster into the body; finish by sewing overlapping feathers together at the back.

Important Notes

  • πŸ’‘Work loop stitches consistently and practice the loop technique on a swatch to get even loops and consistent tension for the tail texture.
  • πŸ’‘Use masking tape to safely cover the ends of the internal wire before inserting into the neck to protect stuffing and yarn from damage.
  • πŸ’‘Stuff the head, neck and body gradually as you crochet so shaping is smooth and avoid overstuffing which can distort the stitches and seams.

This proud peacock pattern combines playful texture with colorful motifs to create a showpiece you will love to display. The loop-stitch tail and layered feathers bring dramatic volume and charm to every stitch. Make one for yourself or as a thoughtful handmade gift that will turn heads. 🧢✨πŸͺΆ

You ask,

we answer.

FAQs

What size will the finished piece be?

The finished amigurumi size will vary with yarn and tension, but using the recommended Scheepjes Catona and a 2.5 mm hook will yield a small decorative peacock about display size (approx. 20-30 cm tall depending on neck pose).

Can I use different yarn weights for this pattern?

Yes, you can use different yarn weights, but this will affect the final size and loop density; adjust your hook size accordingly and test with a sample feather motif before proceeding.

Do I need prior crochet experience for this pattern?

This pattern is rated intermediate; familiarity with working in the round, increases/decreases, and a willingness to learn the loop stitch will help you complete the project confidently.

How long does this project typically take to complete?

Most crocheters complete this project in 5-7 hours, though time may vary based on experience level, how many feathers you make, and assembly time.