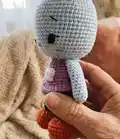
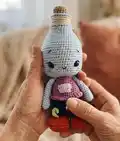
🧢 Beautiful ✨ Detailed πŸ’ Adorable

Potion Amigurumi Pattern

Potion Amigurumi Pattern
3.9β˜… Rating
5-7 Hours Time Needed
3.3K Made This
βœ‚οΈ

Intermediate Level

Ideal for those with basic crochet experience, featuring slightly more advanced stitches and techniques to expand your skills.

⏱️

Weekend Treat

Takes 5-7 hours, making it an enjoyable project to finish over a couple of days.

🐰

Whimsical Buddy

Playful characters full of personality, designed to spark imagination and become cherished playtime favorites.

About This Potion Amigurumi Pattern

This pattern guides you through crocheting a delightful potion bottle amigurumi with tiny arms, legs, a pocket and embroidered face details. The design uses simple shaping and color changes to create a charming character. Clear round-by-round instructions make it easy to follow along and assemble your toy.
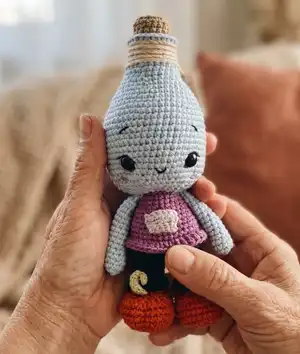
Potion Amigurumi Pattern crochet pattern - detailed view of completed project

The finished toy measures about 19 cm with the recommended materials. The pattern is intermediate and assumes familiarity with basic amigurumi stitches.

Why You'll Love This Potion Amigurumi Pattern

I absolutely love this pattern because it turns a simple bottle shape into a character full of personality. I enjoy the small details like the pocket and tiny boot veins that bring the design to life. Working the body with front and back loop techniques gives the toy a neat textured collar and neck. Sewing and needle-sculpting the face is so rewarding β€” it really defines the expression. This pattern balances easy shaping with delightful finishing touches, so I find it both fun and satisfying to make.

Potion Amigurumi Pattern step 1 - construction progress Potion Amigurumi Pattern step 2 - assembly progress Potion Amigurumi Pattern step 3 - details and accessories Potion Amigurumi Pattern step 4 - final assembly and finishing

Switch Things Up

I love customizing this pattern by swapping yarn colors to create different potion personalities β€” bright neon for playful potions or pastel tones for a soft look.

Try changing yarn weight and hook size to make a mini keychain version or a larger cuddle-sized bottle; just adjust safety eye sizes accordingly.

I often add tiny crocheted accessories like a pocket patch or a little label sewn on the neck to personalize each piece.

Experiment with different eye styles: safety eyes, embroidered eyes, or tiny felt pieces for varied expressions and safety needs.

For a magical twist, embroider metallic thread details or add a touch of glittery yarn to the bottle neck for a sparkling accent.

Make the boots more detailed by using contrasting yarn for soles or adding embroidered laces and veins as shown in the pattern.

If you want a posable toy, consider adding thin wire to the arm cores before stuffing to create bendable limbs.

I sometimes create matching sets by crocheting tiny potion companions in complementary colors for a playful collection.

To give as a gift, stuff the toy a bit firmer and add a small loop or keyring to the top so it can hang as decor or a bag charm.

Don’t be afraid to adjust facial placement slightly β€” moving eyes a row up or down changes the expression from surprised to sleepy, and that’s part of the fun!

Common Mistakes & How to Fix Them

βœ— Not installing the safety eyes at the correct rounds can make facial placement look odd; place eyes between rounds 30-31 and space them 13 SC apart as instructed. βœ— Skipping the instruction to work into back loops only when requested will change the neck and collar appearance; follow the BLO/FLO directions exactly to keep the correct shaping. βœ— Breaking yarn too early when joining legs will interrupt the continuous join; cut yarn on the second leg only when instructed and continue working across both legs as directed. βœ— Failing to stuff evenly while decreasing causes lumps and misshapen areas; stuff gradually and use a chopstick to push filler into narrow parts for consistent shaping. βœ— Not using stitch markers during increases and decreases leads to incorrect stitch counts; place a marker at the start of each round and recount periodically to stay accurate.
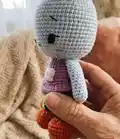
Potion Amigurumi Pattern

Create an adorable Potion amigurumi with this detailed crochet pattern. You will make a cute bottle-shaped character with tiny arms, legs, a pocket and charming facial details. The pattern is written step-by-step and includes materials, abbreviations and finishing tips to help you finish a polished toy. Perfect for gifting or decorating your craft shelf.

Intermediate 5-7 Hours

Materials Needed for Potion Amigurumi Pattern

β€” Main Fabric

  • 01
    Yarn Art Jeans color 75 (small amount)
  • 02
    Yarn Art Jeans color 72 (small amount)
  • 03
    Yarn Art Jeans color 85 (small amount)
  • 04
    Yarn Art Jeans color 19 (small amount)
  • 05
    Yarn Art Jeans color 05 (small amount)
  • 06
    Black fine yarn for eyelashes embroidery (small amount)
  • 07
    Polyester stuffing for toy filling (sufficient amount)

β€” Tools Required

  • 01
    Crochet hook size 1.75 mm
  • 02
    10-12 mm black plastic safety eyes (2 pcs)
  • 03
    Black fine yarn for eyelashes embroidery
  • 04
    Polyester toy stuffing
  • 05
    Chopstick for stuffing
  • 06
    Needle for joining pieces and embroidering
  • 07
    Scissors
  • 08
    Pins
  • 09
    Stitch marker

Progress Tracker

0% Complete

β€” Head :

Info :

BEGIN CROCHETING IN GREY

Round 1 :

1RND: 6SC INTO MR

Round 2 :

2RND: 6INC (12)

Round 3 :

3RND: (1SC, INC)*6 (18)

Info :

WORK INTO BACK LOOPS ONLY

Round 4 :

4RND: 18SC

Round 5-7 :

5-7RNDS: 18SC

Info :

SWITCH TO BLUE YARN AND WORK INTO BACK LOOPS ONLY

Round 8 :

8RND: (2SC, INC)*6 (24)

Round 9-12 :

9-12RNDS: 24SC

Round 13 :

13RND: (3SC, INC)*6 (30)

Round 14-15 :

14-15RNDS: 30SC

Round 16 :

16RND: (4SC, INC)*6 (36)

Round 17 :

17RND: (5SC, INC)*6 (42)

Round 18 :

18RND: 42SC

Round 19 :

19RND: (6SC, INC)*6 (48)

Round 20-21 :

20-21RNDS: 48SC

Round 22 :

22RND: (7SC, INC)*6 (54)

Round 23-34 :

23-34RNDS: 54SC

Round 35 :

35RND: (7SC, DEC)*6 (48)

Round 36 :

36RND: BLO (6SC, DEC)*6 (42)

Round 37 :

37RND: (5SC, DEC)*6 (36)

Round 38 :

38RND: (4SC, DEC)*6 (30)

Round 39 :

39RND: (3SC, DEC)*6 (24)

Info :

RETURN TO ROUND 8, WORK ACROSS THE FRONT LOOPS

Info :

INSTALL EYES BETWEEN ROUNDS 30-31, 13SC APART

β€” Legs and Body :

Round 1 :

1RND: CHAIN 7, STARTING TO THE 2ND ST FROM HOOK WORK 5SC, 4SC TO 1 ST, 4SC, INC (13)

Round 2 :

2RND: INC, 4SC, 4INC, 4SC, 2INC (22)

Round 3 :

3RND: 1SC, INC, 4SC, (1SC, INC)*4, 4SC, (1SC, INC)*2 (29)

Round 4 :

4RND: 2SC, INC, 4SC, (2SC, INC)*4, 4SC, (2SC, INC)*2 (36)

Round 5-7 :

5-7RNDS: 36SC

Round 8 :

8RND: 12SC, 6DEC HDC, 12SC (30)

Round 9 :

9RND: (3SC, DEC)*6 (24)

Round 10 :

10RND: 3SC, DEC, (1SC, DEC)*5, 4SC (18)

Round 11 :

11RND: 2SC, DEC, (4SC, DEC)*2, 2SC (15)

Info :

CHANGE YARN COLOR

Round 12 :

12RND: 15SC

Info :

WORK INTO BACK LOOPS ONLY

Round 13 :

13RND: 15SC

Round 14-17 :

14-17RNDS: 15SC

Info :

RETURN TO ROUND 13 AND WORK 15DC

Info :

WORK 5SC ADDITIONALLY ACROSS THE SECOND LEG

Info :

CUT YARN ON THE SECOND LEG, BUT DO NOT BREAK YARN ON THE SECOND ONE, GO ON WORKING ACROSS LEG #1: 15SC AND THEN ACROSS LEG #2: 15SC

Round 19 :

19RND: (4SC, INC)*6 (36)

Round 20 :

20RND: 36SC

Info :

CHANGE YARN COLOR

Round 21 :

21RND: 36SC

Info :

WORK INTO BACK LOOPS ONLY

Round 22 :

22RND: 36SC

Round 23-25 :

23-25RNDS: 36SC

Round 26 :

26RND: (4SC, DEC)*6 (30)

Round 27 :

27RND: 30SC

Round 28 :

28RND: (3SC, DEC)*6 (24)

Round 29-31 :

29-31RNDS: 24SC

Info :

RETURN TO ROUND 22, WORK 36DC

β€” Arms :

Round 1 :

1RND: 6SC INTO MR

Round 2 :

2RND: 6INC (12)

Round 3 :

3RND: 12SC

Round 4 :

4RND: 10SC, DEC (11)

Round 5 :

5RND: 9SC, DEC (10)

Round 6-14 :

6-14RNDS: 10SC

Info :

A ROW THROUGH BOTH EDGES WORK

β€” Veins on the boots :

Info :

10CH, TURN AND STARTING TO THE 2ND ST FROM HOOK WORK 9 SL ST

β€” Pocket :

Row 1 :

1ROW: 5CH, TURN YOUR WORK

Row 2 :

2ROW: INC, 2SC, INC (6SC) TURN YOUR WORK

Row 3 :

3ROW: 6SC

Info :

SEW IT ON THE BELLY

β€” Face and Finishing :

Info :

MAKE FACE NEEDLE SCULPTING, SEND YOUR NEEDLE FROM BELOW THE NECK TO THE PLACE UNDER ONE OF THE EYES, AND GO BACK DOWN 1 ST AWAY, PULL. REPEAT THE STEPS ABOVE FOR THE SECOND EYE. PULL AND TIE KNOTS

Info :

EMBROIDER BROWS AND A SMILE.

Assembly Instructions

  • Install safety eyes between rounds 30-31 and space them 13 single crochet stitches apart before continuing with stuffing and closing the head.
  • Sew the pocket piece to the front belly area where indicated by the pattern using a yarn needle and matching yarn color, securing all edges.
  • Perform face needle-sculpting by sending the needle from below the neck to the place under one eye and back down one stitch away, pull tight, repeat for second eye and knot to secure.
  • Embroider the brows and smile using black fine yarn or embroidery thread, making small, neat stitches to preserve the toy's facial expression.
  • When finishing, stuff the head and body firmly but evenly using a chopstick to reach narrow parts, then close openings and weave in ends securely.

Important Notes

  • πŸ’‘This pattern does not contain crocheting lessons; it is written for crocheters who have mastered basic stitches and terms.
  • πŸ’‘The finished toy size with the materials recommended above is about 19 cm; size depends on tension and yarn weight.
  • πŸ’‘Use stitch markers to keep track of the start of each round, especially during increases and decreases.
  • πŸ’‘Stuff gradually and evenly; overstuffing can distort the shape while under-stuffing will make the toy floppy.
  • πŸ’‘Pin parts in place before sewing to ensure correct positioning and symmetry when joining pieces.

This cute Potion amigurumi is a fun, whimsical project that adds charm to any collection. 🧢 Make one for gifts, decor, or to practice finishing techniques with needle sculpting. ✨ The pattern balances simple shaping with delightful details for a satisfying crochet experience. 🧡

You ask,

we answer.

FAQs

What size will the finished piece be?

The finished amigurumi measures approximately 19 cm tall when using the recommended yarn and 1.75 mm hook; size may vary with different yarn or tension.

Can I use different yarn weights for this pattern?

Yes, you can use different yarn weights, but the final size will change; use an appropriate hook for your chosen yarn and adjust safety eye size accordingly.

Do I need prior crochet experience for this pattern?

This pattern is rated intermediate, so basic amigurumi experience and familiarity with increases, decreases, BLO/FLO and finishing techniques is recommended.

How long does this project typically take to complete?

Most crocheters complete this project in 5-7 hours, though time may vary depending on experience level and assembly complexity.