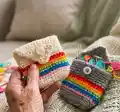
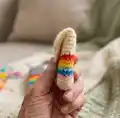
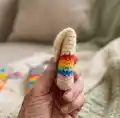
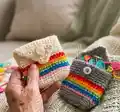
About This Pixie pocket Pouch Pattern
This pattern creates a small, striped fingerling pouch with a neat cover flap and button fastening. It is worked from the bottom up in joined rounds, then switched to a continuous spiral for the body before finishing the flap in rows. The design is ideal for using up fingering-weight yarn scraps and makes a quick, adorable gift or practical notions pouch.
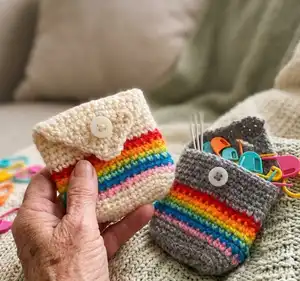
You will work simple single crochet stitches and basic decreases, plus back-loop-only rounds for the stripe texture. The pattern includes exact stitch counts, colour-change guidance, and clear finishing notes.
Why You'll Love This Pixie pocket Pouch Pattern
I absolutely love this pattern because it turns small scraps of yarn into something both practical and beautiful. The colourful stripe rounds are playful and let you be creative with colour sequencing. It is such a fast make that you get immediate satisfaction from start to finish, which I find incredibly rewarding. I also enjoy how the flap shaping gives the pouch a polished, finished look while remaining simple to stitch.
Switch Things Up
I love to change the colour order to suit different seasons; try pastels for spring or jewel tones for a richer look.
I often swap fingering weight yarn for sport or DK yarn with a slightly larger hook to make a chunkier pouch that holds more.
I like to add a narrow strap by chaining extra stitches and sewing it to opposite sides to convert the pouch into a tiny wristlet.
Try adding a small lining cut from fabric to protect delicate contents and hide carried yarn tails.
I sometimes replace the button with a snap or a small magnetic closure for a cleaner finish and easier fastening.
For a playful look, embroider tiny motifs on the front before attaching the button and flap.
If I want a flatter pouch, I decrease one fewer stitch in the base shaping rounds to change the curve slightly.
Add a tiny tassel or pompom to the flap tip to personalize each pouch and make it easier to open.
I also make matching sets in different sizes by adjusting the number of initial chains and following the same shaping proportions.
Use novelty or speckled yarn for a single-colour striped effect, or incorporate metallic thread in one stripe for a subtle shimmer.
Common Mistakes & How to Fix Them
✗ Skipping the stitch count after the base rounds leads to incorrect shaping; always count your stitches at the end of rounds 1 and 2 to ensure you have 20 and 30 sc respectively.
✗ Forgetting that the chain 1 does not count as a stitch can cause an accidental increase in stitch count; ignore the chain at the start of rounds and only work into the actual stitches.
✗ Changing colours without securing ends neatly can result in loose tails and messy joins; weave in ends or carry colours up the inside to tidy the transitions between stripe rounds.
✗ Stopping the body at the wrong point will place the flap on the wrong side; end your continuous spiral on the corner BEFORE the side you want to be the front so the flap is worked on the correct back side.