🧢 Beautiful ✨ Detailed πŸ’ Adorable

Pillow- panda Amigurumi Pattern

Pillow- panda Amigurumi Pattern
4.8β˜… Rating
5-7 Hours Time Needed
3.0K Made This
βœ‚οΈ

Beginner Friendly Level

Perfect for those just starting their crochet journey, with clear instructions and simple techniques

⏱️

Weekend Treat

Takes 5-7 hours, making it an enjoyable project to finish over a couple of days.

🧸

Cute Companion

An adorable friend to cherish, handcrafted with love to bring comfort and joy for years to come.

About This Pillow- panda Amigurumi Pattern

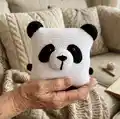
This pattern creates a soft panda-themed square pillow worked in plush yarn with separate crocheted ears, nose, eye spots, arms and legs. It uses simple stitches and round-by-round instructions to shape each detail. The finished pillow measures about 29x29 cm depending on yarn and hook choice.

Pillow- panda Amigurumi Pattern crochet pattern - detailed view of completed project

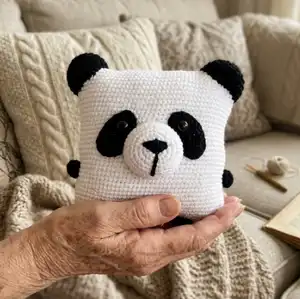
Perfect for gifting or nursery decor, this pattern focuses on easy assembly and adorable facial details. Photos guide placement so finishing is straightforward and satisfying.

Why You'll Love This Pillow- panda Amigurumi Pattern

I absolutely love this pattern because it turns simple stitches into a lovable character that brightens any room. I enjoy how fast the pillow body works up in continuous single crochet, and how the plush yarn gives a soft, squishy result. The separate small pieces let me personalize the expression and placement of features for a unique look every time. I also appreciate that the pattern is beginner-friendly but still yields a charming, professional finish that I am proud to give as a handmade gift.

Pillow- panda Amigurumi Pattern step 1 - construction progress Pillow- panda Amigurumi Pattern step 2 - assembly progress Pillow- panda Amigurumi Pattern step 3 - details and accessories Pillow- panda Amigurumi Pattern step 4 - final assembly and finishing

Switch Things Up

I love how easy it is to customize this panda pillow by changing yarn colors β€” try soft pastels for a nursery version or gray tones for a modern look.

I often swap the plush yarn for a bulky chenille to get an even squishier, larger pillow; increase hook size accordingly to maintain stitch definition.

I sometimes make mini versions with thinner velvet yarn and a smaller hook to create keychain or small gift versions.

For a washable option, use acrylic plush yarn and sew on plastic safety eyes instead of buttons; always follow safety guidelines for children.

I like embroidering different expressions β€” move the eye spots or change the mouth length to give each pillow a personality.

Try adding a little crocheted bow or scarf around one ear for a playful accessory that can be removed or changed.

I also experiment with textured stitch panels for the pillow front, such as adding bobbles or surface slip stitches to create a more stylized face.

To make the pillow more stable, insert a small cardboard square or plastic canvas inside the stuffing near the base before closing; it helps the pillow sit upright.

If you want a more realistic panda look, adjust the size of the black spots and place the beads slightly into the spots rather than on top for deeper-set eyes.

I recommend trying contrasting yarn for the inside of the ears to create a subtle accent β€” a different color yarn can make the ears pop without changing the whole design.

Common Mistakes & How to Fix Them

βœ— Starting rounds without fixing the beginning can cause shifting in joined rounds; always secure the start of each new circle with a pin or a short thread tail. βœ— Overstuffing the pillow makes shaping and sewing the angles difficult; fill tightly but gradually and shape the corners carefully for a square finish. βœ— Forgetting to leave long tails for sewing small details creates extra work later; leave long threads on ears, nose, legs and arms for easy attachment. βœ— Skipping stitch counts during increases leads to mismatched pieces; count after each increase round to ensure the correct stitch total is maintained.

Pillow- panda Amigurumi Pattern

Create an irresistibly soft panda pillow you can cuddle or display. This cozy crochet pattern guides you through making a 29x29 cm plush pillow with detachable ears, nose, spots, arms and legs. Clear rounds and photos make assembly easy so you can enjoy making a charming handmade gift for kids and adults.

Beginner Friendly 5-7 Hours

Materials Needed for Pillow- panda Amigurumi Pattern

β€” Main Fabric

  • 01
    YarnArt Dolce plush yarn (120 m / 100 g) - White (2 skeins)
  • 02
    YarnArt Dolce plush yarn (120 m / 100 g) - Black (1 skein)
  • 03
    Alternative plush yarn suggestions: Himalaya Dolphin Baby or YarnArt Dolce
  • 04
    Hollofayber filler (polyester stuffing) - quantity to fill a 29x29 cm pillow

β€” Tools Required

  • 01
    Crochet hook size 3.5 mm (I used 3.5 mm; package may recommend 3.5-5 mm)
  • 02
    Black beads or buttons for eyes (22 mm)
  • 03
    Needle for sewing and embroidery
  • 04
    Pins or thread to fix the beginning of each circle
  • 05
    Scissors
  • 06
    Yarn needle for sewing pieces and weaving ends
  • 07
    Polyester stuffing (hollofayber)

Progress Tracker

0% Complete

β€” Pillow :

Round 1 :

90 ch, connect with the first loop

Round 2 – 37 :

90 sc

Info :

Leave a long thread and sew the top of the pillow. We fasten the thread and hide inside the pillow.

Info :

Fill tightly and evenly. Fill the angle of the pillow well. Sew and fasten the thread and hide inside the pillow.

β€” Ear (2 details) :

Round 1 :

6 sc in magic Ring {6}

Round 2 :

(inc) – repeat 6 times {12}

Round 3 :

(1 sc, inc) – repeat 6 times {18}

Round 4 :

(2 sc, inc) – repeat 6 times {24}

Round 5 :

(3 sc, inc) – repeat 6 times {30}

Round 6 :

(4 sc, inc) – repeat 6 times {36}

Round 7 :

(5 sc, inc) – repeat 6 times {42}

Round 8 :

42 sc

Round 9 :

(19 sc, dec) – repeat 2 times {40}

Info :

Leave a long thread for sewing

β€” Nose :

Round 1 :

6 sc in magic Ring {6}

Round 2 :

(inc) – repeat 6 times {12}

Round 3 :

(1 sc, inc) – repeat 6 times {18}

Round 4 :

(2 sc, inc) – repeat 6 times {24}

Round 5 :

(3 sc, inc) – repeat 6 times {30}

Round 6 :

(4 sc, inc) – repeat 6 times {36}

Round 7 :

(5 sc, inc) – repeat 6 times {42}

Round 8 – 9 :

42 sc

Info :

Leave a long thread for sewing

β€” Leg (2 details) :

Round 1 :

6 sc in magic Ring {6}

Round 2 :

(inc) – repeat 6 times {12}

Round 3 :

(1 sc, inc) – repeat 6 times {18}

Round 4 :

18 sc

Info :

Leave a long thread for sewing

β€” Arm (2 details) :

Round 1 :

6 sc in magic Ring {6}

Round 2 :

(inc) – repeat 6 times {12}

Round 3 :

12 sc

Info :

Leave a long thread for sewing

β€” Spot (2 details) :

Round 1 :

12 ch

Round 2 :

We begin to work from the second loop from the hook: 10 sc, 3 sc in 1 loop. On the other side of the chain: 10 sc, sl st

Round 3 :

1 ch, we begin to work from the second loop from the hook: inc, 9 sc, inc, 1 sc, inc, 11 sc, sl st

Round 4 :

1 ch, we begin to work from the second loop from the hook: 1 sc, inc, 4 sc, hdc, 5 dc, hdc, 1 sc, sl st

Info :

We fasten the thread and leave a long thread for sewing

β€” Assembly :

Info :

Sew ears: we put ears on the angles of the pillow. Sew and fill. Fasten the thread and hide inside the pillow.

Info :

Sew nose between 13 and 21 rounds. Do not sew up to the end. Fill and leave a small hole. We will embroider the nose.

Info :

Use black plush yarn and needle. Embroider the nose. We start from the center and embroider downward to form the nose and mouth line.

Info :

We fasten the thread and hide inside the nose, fill and sew a hole.

Info :

Sew spots and fasten the thread and hide inside the pillow.

Info :

Sew eyes on spots and sew arms and legs. Fasten the thread and hide inside the pillow.

Assembly Instructions

  • Sew ears to the four corners (angles) of the pillow, fill the ear if needed, then fasten and hide the thread inside the pillow.
  • Sew nose between rounds 13 and 21 on the front of the pillow, do not close the nose completelyβ€”fill lightly and leave a small opening, fasten and hide ends inside.
  • Embroider the nose using black plush yarn and a needle starting from the nose center downward to form the nose and mouth line, then fasten and hide the thread inside.
  • Position and sew the black eye spots onto the face, then sew beads or buttons for the eyes onto the spots and fasten threads inside the pillow.
  • Sew arms and legs to the sides and bottom of the pillow respectively, secure with tight stitches and hide all thread tails inside the pillow.

Important Notes

  • πŸ’‘Do not forget to fix the beginning of each new circle with a pin or thread to keep rounds aligned and stable.
  • πŸ’‘Leave long thread tails on small details (ears, nose, arms, legs and spots) to make sewing and shaping easier.
  • πŸ’‘Work with consistent tension and stuff the pillow gradually so corners form neatly and the pillow keeps a square shape.

This adorable panda pillow pattern makes a soft, huggable accent for any room and a perfect handmade gift. It combines plush yarn with simple techniques for a quick, rewarding project. Enjoy stitching the cute face and details β€” you will love the charming results! 🧢 🐼

You ask,

we answer.

FAQs

What size will the finished piece be?

The finished pillow is approximately 29x29 centimeters when using YarnArt Dolce and the recommended hook size, though final size may vary with yarn and tension.

Can I use different yarn weights for this pattern?

Yes, you can use different plush yarns like Himalaya Dolphin Baby or other similar plush yarns, but the finished size and density will change; adjust hook size accordingly.

Do I need prior crochet experience for this pattern?

This pattern is beginner friendly and uses basic stitches like single crochet and increases; basic knowledge of magic ring and working in rounds helps but detailed photos and rounds are included.

How long does this project typically take to complete?

Most crocheters complete this project in 5-7 hours, depending on experience, yarn choice, and time spent on assembly and embroidery.