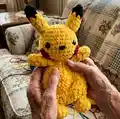
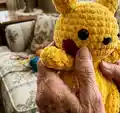
Create an adorable Pika the Electric Mouse with this friendly amigurumi pattern. You will work with bulky yarn and a large hook to make a soft, squishy toy with big ears, rosy cheeks, and a sweet personality. Clear, photo-referenced steps guide you through head, body, ears, arms, legs, tail, and finishing touches so you can make a charming handmade gift or keepsake. Perfect for crafters who enjoy a quick, tactile project with satisfying shaping.
Progress Tracker
0% Complete
— Materials & Stitch Notes :
Infos :
Yarn Used: Bulky Weight 6 Bernat Blanket Brights - Yellow Bernat Blanket - Black Bernat Blanket - Cranberry
Infos :
Stitch Abbreviations: Sc Single Crochet. Inc Single Crochet Increase. Dec Single Crochet Decrease. Hdc Half Double Crochet. Hdc Inc Half Double Crochet Increase. Hdc Dec Half Double Crochet Decrease. Sl St Slip Stitch. Ch Chain.
Info :
Special Stitches: Invisible Colour Change Sc - Performed on the stitch before the colour change: Begin Sc (insert hook into stitch and pull up a loop). There are 2 loops on the hook. Using new colour, pull through both loops to complete the stitch. Tie off both yarn tails to secure stitch.
— Head :
Round 1 :
8 Sc into Magic Ring (8)
Round 3 :
(Sc 1, Inc) x 8 (24)
Round 4-6 :
Sc around (24) (3 Rounds x 24 Sc = 72 Sc)
Round 7 :
(Sc 3, Inc) x 6 (30)
Round 8-9 :
Sc around (30) (2 Rounds x 30 Sc = 60 Sc)
Round 10 :
(Sc 3, Dec) x 6 (24)
Round 11 :
(Sc 2, Dec) x 6 (18)
Round 12 :
(Sc 1, Dec) x 6 (12)
Info :
Place safety eyes between rounds 7 & 8, 5 stitches apart. (PHOTO A)
Info :
If embroidering eyes, loop yarn through repeatedly until you have a full, round eye. Tie ends off and leave the tails inside the head.
Info :
Nose can be added at this time, or at the end. Refer to Page 6 for instructions. Stuff the head until the desired firmness is achieved.
Info :
Tie off, leaving a 6" tail. Using a tapestry needle, finish off the head by picking up the front loops of the final 6 stitches. Pull tight to close and then hide the yarn tail through the piece and trim the excess. (PHOTO B)
— Arms :
Round 1 :
1.5 Hdc into Magic Ring (5)
Round 2-4 :
Hdc around (5) (3 Rounds x 5 Hdc = 15 Hdc)
Round 5 :
Hdc 3, Hdc Dec (4)
Info :
Fasten off and leave a long tail for sewing onto the body. (PHOTO C) Set aside for sewing later.
— Ears :
Round 1 :
5 Sc into Magic Ring (5)
Info :
Invisible colour change to Yellow:
Round 3 :
Sl st, Sc 5 (6) (The sl st reduces the appearance of the colour change).
Round 4 :
(Sc 2, Inc) x 2 (8)
Info :
Fasten off and leave a long tail for sewing onto the head. (PHOTO D)
— Body :
Info :
In Yellow: Begin by holding the head upside down and face pointing away from you. Note: You will be placing 6 sc into the bottom of the head (using Round 13 as a guide for stitch placement). You will start the row at the back of the head.
Round 1 :
6 sc into head (6) (PHOTO E)
Round 2 :
Hdc Inc x 6 (12)
Round 3 :
(Hdc 1, Hdc Inc) x 6 (18)
Round 4 :
(Hdc 2, Hdc Inc) x 6 (24)
Round 6 :
(Hdc 3, Hdc Inc) x 6 (30)
Round 7-8 :
Hdc around (30) (2 Rounds x 30 Hdc = 30 Hdc)
Round 9 :
(Hdc 3, Hdc Dec) x 6 (24)
Round 10 :
(Hdc 2, Hdc Dec) x 6 (18)
Info :
Add extra Hdc to get to the centre of the back. Do not fasten off yet, you will go directly to the leg instructions.
— Legs :
Info :
Lay the body flat to figure out how to place the legs (There will be 5 stitches designated for each leg, that will leave 8 stitches unworked). Recall that on the previous page that you added extra Hdc to get to the centre of the back. Using stitch markers, mark 5 stitches for each leg, with a 4 stitch gap in between on each side. (PHOTO F). Add extra Hdc to get to the first st marker, if needed.
Round 1 :
Sc Inc x 5 (10) (PHOTO G)
Round 2 :
(Sc 4, Inc) x 2 (12)
Round 3 :
(Sc 2, Dec) x 3 (9)
Round 4 :
(Sc 1, Dec) x 3 (6)
Info :
Fasten off and weave in tail. (PHOTO H)
Info :
Second Leg: Add Yellow yarn to Round 10 of body, leaving a 10" yarn tail. The second leg will be worked the same way as the first leg. (PHOTO I)
Info :
Use the 10" yarn tail to sew closed the gap between the legs. (PHOTO J)
— Assembly :
Info :
Sew the arms onto Round 2 of the body, 4 stitches apart, at the front. (PHOTO K)
Info :
Sew the ears onto either side of the head, between Rounds 3 & 4. (PHOTO L)
— Nose :
Info :
In Black: Sew a strand of black yarn around the the centre stitch the Rounds 8 & 9, between the eyes. Secure the ends inside the head. (PHOTO M)
— Cheeks :
Info :
Make 2 In Cranberry:
Round 1 :
5 Sc into Magic Ring (5) Sl st.
Info :
Fasten off and sew between Rounds 9 & 11, slightly behind the eyes. (PHOTO N)
— Tail :
Info :
* Leave a long tail at the beginning to sew onto body. In Yellow:
Round 2 :
Starting 2nd Ch from the hook: Sc 5 (5) Ch 1 & turn
Round 3 :
Sc 5 (5) Ch 1 & turn
Round 4 :
Sc 2 (2) Ch 1 & turn
Round 5 :
Sc 2, Ch 4 (6) turn
Round 6 :
Starting 2nd Ch from the hook: Sc 5 (5) Ch 1 & turn
Round 7 :
Sc 5 (5) Ch 1 & turn
Info :
Fasten off and sew between Rounds 7 & 8, at a slight angle. (PHOTO O & P)
This Pika the Electric Mouse pattern is designed to be a quick, squishy, and joyful amigurumi that you can make with bulky yarn and big stitches. Whether you make one as a special gift or a cozy desk companion, it will bring smiles with its soft texture and cheerful cheeks. Have fun customizing the colours and details — happy crocheting! 🧶😊