🧢 Beautiful ✨ Detailed πŸ’ Adorable

Piggy Bank Amigurumi Pattern

Piggy Bank Amigurumi Pattern
4.2β˜… Rating
5-7 Hours Time Needed
1.5K Made This
βœ‚οΈ

Intermediate Level

Ideal for those with basic crochet experience, featuring slightly more advanced stitches and techniques to expand your skills.

⏱️

Weekend Treat

Takes 5-7 hours, making it an enjoyable project to finish over a couple of days.

🧸

Cute Companion

An adorable friend to cherish, handcrafted with love to bring comfort and joy for years to come.

About This Piggy Bank Amigurumi Pattern

This pattern makes a sweet piggy bank amigurumi with a removable coin capacity and a secure cover. It includes detailed rounds for head, body, legs, snout and small decorative spots. You will work mainly in single crochet using fine 4-ply yarn and a small hook for tight stitches.

Piggy Bank Amigurumi Pattern crochet pattern - detailed view of completed project

The pattern is photo-supported and explains how to insert eyes, sew parts together and attach a removable cover with Velcro. Ideal as a gift or playful home accessory.

Why You'll Love This Piggy Bank Amigurumi Pattern

I absolutely love this pattern because it combines functional design with adorable amigurumi styling, making a toy that also stores coins. I enjoy the way shaping rounds create a smooth body and how the removable capacity is neatly hidden inside. The small details β€” like embroidered eyelids, bright pink cheeks and tiny spots β€” make each pig unique and expressive. Sewing the parts together and finishing with Velcro gives a satisfying, professional result I am proud to gift.

Piggy Bank Amigurumi Pattern step 1 - construction progress Piggy Bank Amigurumi Pattern step 2 - assembly progress Piggy Bank Amigurumi Pattern step 3 - details and accessories Piggy Bank Amigurumi Pattern step 4 - final assembly and finishing

Switch Things Up

I love how easy it is to customize the piggy bank with different color schemes; try pastels for a nursery or bold colors for a playful vibe.

I sometimes switch yarn weight and hook size to make a tiny keychain-sized pig or a larger plush bank; just remember to adjust stuffing and the plastic insert accordingly.

I encourage adding tiny accessories like a crocheted bow, scarf or a little hat to personalize each pig β€” they make great gifts.

I also change eye types: plastic safety eyes for durability or embroidered eyes for a baby-safe version.

To make the pig more posable, I add a short piece of wire inside the legs, but keep it optional for child-safe toys.

If you want a sturdier coin holder, use interfacing or a small piece of laminated cardboard inside the capacity instead of plastic.

Try sewing on felt shapes, beads or sequins as alternative spots and decorations to change the style quickly.

I sometimes embroider a name or small heart on the underside for a personalized keepsake that’s perfect for birthdays.

For a different texture, use a boucle or cotton blend yarn for the body and keep tight tension so the stuffing doesn’t show.

I like to experiment with placement of the slot and cover: move the slot slightly forward or back to change the appearance and balance of the pig.

Common Mistakes & How to Fix Them

βœ— Skipping the row marker when working continuous rounds leads to lost stitch counts; place a marker at the start of each round and move it up after finishing each round. βœ— Not using small hook and tight tension can make the stuffing show through; use the recommended 1.5 mm hook and maintain consistently tight single crochet stitches. βœ— Failing to stuff the head firmly before closing causes a floppy shape; stuff gradually and firmly the head before final decreases, shaping as you go for a nice rounded finish. βœ— Forgetting to secure yarn tails at the cover hole makes the slot untidy; knot and fix tails when making the slot and weave ends neatly or glue Velcro as instructed.

Piggy Bank Amigurumi Pattern

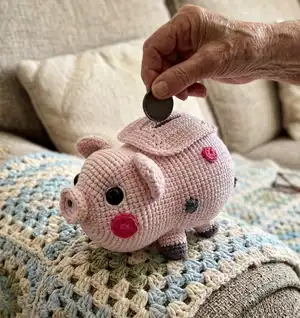
Create a charming crochet piggy bank that doubles as a playful amigurumi and a functional coin holder. This pattern guides you through shaping the head, body, removable capacity and cute details like cheeks, ears and spots. With step-by-step rounds and clear assembly instructions, you will make a delightful handmade gift or decor piece you can proudly display.

Intermediate 5-7 Hours

Materials Needed for Piggy Bank Amigurumi Pattern

β€” Main Fabric

  • 01
    Fine 4ply yarn Yarn Art Jeans (50g /160m) - N01 White (amount as needed for details)
  • 02
    Fine 4ply yarn Yarn Art Jeans (50g /160m) - N59 Bright Pink (small amount for cheeks and spots, approx 10g)
  • 03
    Fine 4ply yarn Yarn Art Jeans (50g /160m) - N68 Gray (small amount for hooves, capacity and spots, approx 20g)
  • 04
    Fine 4ply yarn Yarn Art Jeans (50g /160m) - N74 Light Pink (main color, approximately 100g)

β€” Tools Required

  • 01
    Safety eyes 12 mm (2 pieces)
  • 02
    Crochet hook size 1.5 mm
  • 03
    Velcro strips (narrow)
  • 04
    Super glue
  • 05
    Scissors
  • 06
    Sewing pins
  • 07
    Polyester stuffing (fiberfill)
  • 08
    Needle for sewing pieces (yarn needle)
  • 09
    Plastic (oval insole from stationery folder) for legs
  • 10
    Stitch markers / row marker

Progress Tracker

0% Complete

β€” Head :

Round 1 :

6sc in a MR

Info :

Place row marker here.

Round 2 :

6inc (12)

Round 3 :

(1sc, inc) *6 (18)

Round 4 :

(2sc, inc) *6 (24)

Round 5 :

(3sc, inc) *6 (30)

Round 6 :

(4sc, inc) *6 (36)

Round 7 :

(5sc, inc) *6 (42)

Round 8 :

(6sc, inc) *6 (48)

Round 9 :

(7sc, inc) *6 (54)

Round 10 :

(8sc, inc) *6 (60)

Round 11 :

(9sc, inc) *6 (66)

Round 12 :

(10sc, inc) *6 (72)

Round 13-22 :

72sc (10 rounds) (72)

Round 23 :

(10sc, dec) *6 (66)

Round 24 :

66sc (66)

β€” Body :

Round 25 :

(10sc, inc) *6 (72)

Round 26 :

(11sc, inc) *6 (78)

Round 27 :

(12sc, inc) *6 (84)

Round 28 :

84sc (84)

Info :

Next, skip stitches for hole for the capacity. Before skipping, make ch1 and push the part inside the loop (to get a knot). Fix all yarn tails at the end.

Round 29 :

15sc, skip 10sc, 59sc (74)

Round 30-32 :

15sc, skip 10sc, 59sc (3 rounds) (74)

Round 33 :

13sc, inc, sc, skip 10sc, 2sc, inc, (13sc, inc) *4 (80)

Round 34-41 :

16sc, skip 10sc, 64sc (8 rounds) (80)

Round 42 :

16sc, ch10, 64sc (90)

Round 43 :

16sc, 10sc on the chain, 64sc (90)

Round 44 :

90sc (90)

Round 45 :

(13sc, dec) *6 (84)

Round 46 :

(12sc, dec) *6 (78)

Round 47 :

(11sc, dec) *6 (72)

Round 48 :

(10sc, dec) *6 (66)

Round 49 :

(9sc, dec) *6 (60)

Round 50 :

(8sc, dec) *6 (54)

Round 51 :

(7sc, dec) *6 (48)

Round 52 :

(6sc, dec) *6 (42)

Round 53 :

(5sc, dec) *6 (36)

Round 54 :

(4sc, dec) *6 (30)

Round 55 :

(3sc, dec) *6 (24)

Round 56 :

(2sc, dec) *6 (18)

Round 57 :

(1sc, dec) *6 (12)

Round 58 :

6dec

Info :

Fasten off, cut the yarn, weave in the ends.

Info :

Cut the threads on the hole for the capacity and fix them. Insert the eyes between rounds 11-12 at a distance of 18-20 sc.

β€” Capacity :

Info :

With Gray yarn.

Round 1 :

ch11. Start in the second chain from the hook: inc, 8sc, 3sc in the last chain, 9sc (22)

Info :

Place row marker here.

Round 2 :

2inc, 8sc, 3inc, 8sc, inc (28)

Round 3 :

2inc, 11sc, 3inc, 11sc, inc (34)

Round 4 :

2inc, 14sc, 3inc, 14sc, inc (40)

Round 5 :

(4inc, 16sc) *2 (48)

Round 6-25 :

48sc (20 rounds) (48)

Info :

Cut the yarn. Turn the part face inwards.

Info :

Stuff the piggy with fiberfill: stuff the head tightly, insert the capacity into the body, pushing the fiberfill apart on the sides.

Info :

Sew the capacity into the hole with a light pink thread.

β€” Cover (make 2) :

Info :

With Light Pink yarn. Work in rows.

Round 1 :

ch15. Start in the second chain from the hook: 14sc, turn (14)

Round 2-4 :

ch1, 14sc, turn (3 rows) (14)

Round 5 :

make a slot: ch1, 2sc, cut the yarn and fasten off, skip 10 stitches, attach the light pink yarn, 2sc, turn.

Round 6 :

ch1, 2sc, ch10, 2sc, turn (14)

Round 7 :

ch1, 2sc, 10sc on the chain, 2sc, turn (14)

Round 8-10 :

ch1, 14sc, turn (3 rows) (14)

Info :

Continue crocheting from one Light pink piece.

β€” Connect the parts :

Info :

Connect the parts. Apply the light pink part and crochet with Light Pink yarn, do not turn:

Round 1 :

inc in the corner, 12sc, inc in the corner, 10sc, inc in the corner, 12sc, inc in the corner, 10sc, sl st (52)

Round 2 :

ch1, inc the corner, 13sc, inc in the corner, 11sc, inc in the corner, 13sc, inc in the corner, 11sc, sl st (56)

Round 3 :

ch1, 56sc, sl st. Cut the yarn.

Info :

Connect the parts together along the hole: sew the parts together with a light pink thread.

β€” Hooves - Legs (make 4) :

Info :

With Gray yarn.

Round 1 :

6sc in a MR

Info :

Place row marker here.

Round 2 :

6inc (12)

Round 3 :

(1sc, inc) *6 (18)

Round 4 :

BLO 18sc (18)

Round 5 :

18sc (18)

Info :

Change color to Light Pink.

Round 6 :

BLO 18sc (18)

Round 7 :

(5sc, inc) *3 (21)

Round 8 :

(6sc, inc) *3 (24)

Round 9 :

24sc (24)

Info :

Cut out an oval insole from plastic and put inside. Stuff with fiberfill. Leave a long tail for sewing.

Info :

Place the legs on the bottom of the body, fix them with pins. Make sure that the pig is standing. Sew the legs to the body.

Info :

Tighten the cheeks following the pictures below.

β€” Eyes and Embroidery :

Info :

Embroider the whites of the eyes with white thread.

β€” Snout :

Info :

With Light Pink yarn.

Round 1 :

6sc in a MR

Info :

Place row marker here.

Round 2 :

6inc (12)

Round 3 :

(1sc, inc) *6 (18)

Round 4 :

(2sc, inc) *6 (24)

Round 5 :

BLO 24sc (24)

Round 6 :

(2sc, dec) *6 (18)

Round 7 :

18sc (18)

Info :

Leave a long tail for sewing. Do not stuff.

Info :

Fix the snout with pins to the head. Sew the snout.

Info :

Embroider the eyelids with a gray thread. Embroider the nostrils with a gray thread.

β€” Ears (make 2) :

Info :

With Light Pink yarn.

Round 1 :

6sc in a MR

Info :

Place row marker here.

Round 2 :

(1sc, inc) *3 (9)

Round 3 :

(2sc, inc) *3 (12)

Round 4 :

(1sc, inc) *6 (18)

Round 5 :

(2sc, inc) *6 (24)

Round 6-8 :

24sc (3 rounds) (24)

Info :

Do not stuff, leave a long tail for sewing.

Info :

Mark the location of the ears with pins. Sew the ears to the head.

β€” Tail :

Info :

With Light Pink yarn.

Round 1 :

Ch11. Start in the second chain from the hook: 10sl st, leave a long tail for sewing.

Info :

Sew the tail to the body.

β€” Cheeks (make 2) :

Info :

With Bright Pink yarn.

Round 1 :

6sc in a MR

Round 2 :

6inc, sl st, leave a long tail for sewing.

Info :

Mark the location of the cheeks with pins. Sew the cheeks to the head.

β€” Velcro & Finishing :

Info :

Cut off 4 narrow strips of Velcro. Glue the hard part of the Velcro around the opening on the body; glue the soft part of the Velcro to the cover. Dry the glue well. Attach the cover to the body.

β€” Spots (make 6) :

Info :

Crochet 2 pieces in Bright Pink color and 4 pieces in Gray color. 6sc in a MR, sl st, leave a long tail for sewing.

Info :

Fix the spots evenly over the body with pins. Sew the spots to the body.

Assembly Instructions

  • Sew the capacity into the hole from inside with a light pink thread, aligning the edges and making sure the removable part fits snugly.
  • Attach the cover pieces together and crochet around per instructions, then glue narrow Velcro strips: glue hard Velcro to the body opening and soft Velcro to the cover, allow glue to dry before attaching.
  • Position and sew the four legs (hooves) to the bottom of the body, using plastic oval insoles inside each leg for stability and pins to align placement.
  • Pin and sew the snout to the front center of the head, then place safety eyes between rounds 11-12 at a distance of about 18-20 sc before tightening cheeks and embroidering details.
  • Mark ear and cheek placement with pins, then sew ears and bright pink cheeks to the head securely with long tails for sewing.
  • Sew tail to rear of body and stitch spots evenly all over the piggy’s body, using pins to check layout before sewing.

Important Notes

  • πŸ’‘Use a stitch marker to mark the beginning of each round and move it up after each completed round to maintain accurate stitch counts.
  • πŸ’‘Stuff the head firmly and evenly to maintain the piggy shape, but avoid overstuffing which can distort the stitches and shape.
  • πŸ’‘Insert safety eyes before final stuffing and closing (between rounds 11-12) and secure backs firmly; use embroidery to add whites and eyelids afterwards.

This sweet piggy bank amigurumi combines function and charm with a removable capacity and cute embroidered details. Make it as a gift or a playful addition to your home decor, perfect for kids and collectors alike. Enjoy the crafting process and show off your handmade piggy with pride! 🐷🧢

You ask,

we answer.

FAQs

What size will the finished piece be?

The finished amigurumi measures approximately 10-12 cm in height and 12-14 cm in length using the recommended fine 4-ply yarn and 1.5 mm hook.

Can I use different yarn weights for this pattern?

Yes, you can use different yarn weights, but the final size and density will change; switch to an appropriate hook and expect larger or smaller finished dimensions.

Do I need special tools for the removable capacity?

You will need a small piece of plastic (such as from a stationery folder) to use as an insole for the legs and narrow Velcro strips to secure the cover; also super glue to fix Velcro if desired.

How long does this project typically take to complete?

Most crocheters complete this project in 5-7 hours, depending on experience, finishing details and assembly time.