🧢 Beautiful ✨ Detailed πŸ’ Adorable

Pig in a Granny Square Blanket Amigurumi Pattern

Pig in a Granny Square Blanket Amigurumi Pattern
4.0β˜… Rating
2-4 Hours Time Needed
2.9K Made This
βœ‚οΈ

Beginner Friendly Level

Perfect for those just starting their crochet journey, with clear instructions and simple techniques

⏱️

Bite-Sized Project

Finishes in 2-4 hoursβ€”perfect for an afternoon of creative relaxation.

🧸

Cute Companion

An adorable friend to cherish, handcrafted with love to bring comfort and joy for years to come.

About This Pig in a Granny Square Blanket Amigurumi Pattern

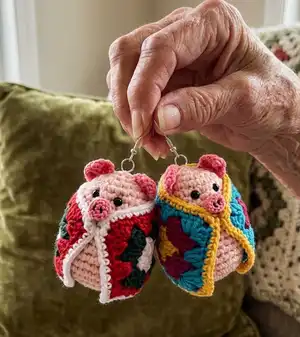
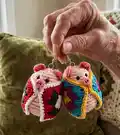
This pattern creates a small amigurumi pig wrapped in a tiny granny-square style blanket, finished as an ornament or pocket-sized toy. The design uses simple rounds for the body, worked top-down, and a tiny triangle ear and snout for sweet facial details. The blanket is worked flat as a small rectangular granny cluster border that wraps and stitches around the pig.

Pig in a Granny Square Blanket Amigurumi Pattern crochet pattern - detailed view of completed project

Clear rounds and stitch counts are provided for every step so you can follow easily. Suitable for stitchers who know basic single crochet, decreases and double crochet clusters.

Why You'll Love This Pig in a Granny Square Blanket Amigurumi Pattern

I absolutely love this pattern because it turns basic crochet stitches into a charming little character that is quick to make and endlessly giftable. I enjoy how the granny-square blanket gives each pig its own personality through color choices and edging. The construction is satisfying β€” the body is simple and neat, and the tiny snout and ears bring so much character with minimal work. It is a great pattern to use leftover yarn for colorful blankets and to practice consistent tension while creating a lovable finished piece.

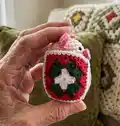
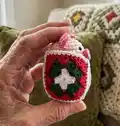
Pig in a Granny Square Blanket Amigurumi Pattern step 1 - construction progress Pig in a Granny Square Blanket Amigurumi Pattern step 2 - assembly progress Pig in a Granny Square Blanket Amigurumi Pattern step 3 - details and accessories Pig in a Granny Square Blanket Amigurumi Pattern step 4 - final assembly and finishing

Switch Things Up

I love customizing the colours for this pig β€” try pastel shades for a soft nursery look or high-contrast brights for a playful ornament.

You can change the finished size by switching yarn weight and hook size; bulky yarn with larger hooks makes a chunky pig, while 2ply and a smaller hook makes a mini keychain version.

I often swap the safety eyes for embroidered french knots or beads to create different expressions and a handmade look.

Try adding a loop at the top of the head before finishing to turn this into a hanging ornament for a tree or bag charm.

Make a set of pigs with coordinating blankets by alternating colour placement on the granny clusters for a cute collection.

Experiment with a different border on the blanket β€” a picot or reverse single crochet edge gives lovely definition and texture.

For a more secure hold on the blanket, sew a small snap or hidden button at the top under the edge instead of only stitching the corners.

I sometimes add tiny embroidered details like a heart on the blanket or freckles on the pig’s face for extra personality.

If you want posable ears, add a short piece of wire inside the fold before stitching and secure ends well when sewing in place.

You can combine leftover yarn scraps to make the blanket multi-coloured without buying new skeins β€” it’s a great scrap-busting project.

When making as gifts, I personalise with a small embroidered initial on the blanket or a tiny crocheted scarf around the pig’s neck.

Common Mistakes & How to Fix Them

βœ— Skipping the stitch marker can make it hard to track rounds and cause misplaced increases or decreases; use a marker and move it at the start of every round to stay aligned. βœ— Not stuffing gradually causes lumpy shaping and a misshapen body; stuff small amounts as you go, especially before closing decreases, to maintain a smooth silhouette. βœ— Pulling yarn too tightly when finishing the blanket seam can pucker the edge and distort the shape; use gentle tension and test placement before sewing permanently. βœ— Forgetting to place eyes at the correct row will change the facial proportions; place the eyes between rows 6 and 7 and check spacing of 2 to 3 stitches apart before securing. βœ— Cutting yarn ends too short means you cannot sew pieces neatly together; leave long tails for sewing the ears and snout and weave in ends after assembly.

Pig in a Granny Square Blanket Amigurumi Pattern

Make a tiny, squishy pig wrapped in a colorful granny-square blanket β€” perfect as a handmade gift or festive ornament. This pattern walks you through the body, ears, snout and a small granny-square blanket with clear rounds and finishing steps. You will love how quickly the pig comes together and how the little blanket adds personality to the finished piece.

Beginner Friendly 2-4 Hours

Materials Needed for Pig in a Granny Square Blanket Amigurumi Pattern

β€” Main Fabric

  • 01
    Double knitting (Size 3) yarn approx 22 metres for the body (approx 8 grams of chosen yarn) - Scheepjes Softfun in Peach (used)
  • 02
    4 ply yarn (Size 1) small amounts for blanket in 3 colours - Drops Safran in Strong Yellow, Turquoise and Dark Heather (used)
  • 03
    2 ply cotton (Size 0) small amounts for snout and ears - Scheepjes Sweet Treat in Light Coral (used)

β€” Tools Required

  • 01
    Crochet hook 3 mm (US D/3)
  • 02
    Crochet hook 2.5 mm (US B/1)
  • 03
    Crochet hook 1.5 mm (US size 8 steel)
  • 04
    Small amount black/dark brown thread for nostrils
  • 05
    Stitch marker or scrap of yarn for marking ends of rounds
  • 06
    2 x 5 mm safety eyes or small amount black/dark brown thread for eyes
  • 07
    Small amounts polyester stuffing
  • 08
    Sewing up needle
  • 09
    Scissors
  • 10
    Pins for positioning blanket (optional)

Progress Tracker

0% Complete

β€” Body :

Round 1 :

Using 3mm hook and MC EITHER, ch 2 and then work 6 sc into 2nd ch from hook OR work 6 sc into a magic ring and then tighten

Round 2 :

2sc in each stitch around (12)

Round 3 :

*1sc in next stitch, 2sc in next stitch* repeat from *to* , around (18)

Round 4 :

*1 sc in next 2 stitches, 2sc in next stitch* repeat from * to* around (24)

Round 5 :

Sc in every stitch (24)

Round 6 :

Sc in every stitch (24)

Round 7 :

Sc in every stitch (24)

Round 8 :

Sc in every stitch (24)

Round 9 :

*Sc in next 3 stitches, 2sc in next stitch* repeat from * to* around (30)

Round 10 :

Sc in every stitch (30)

Round 11 :

Sc in every stitch (30)

Round 12 :

Sc in every stitch (30)

Info :

Place eyes, (either safety eyes or french knots) now, between rows 6 and 7, positioning them 2 to 3 stitches apart

Round 13 :

Sc in every stitch (30)

Round 14 :

Sc in every stitch (30)

Round 15 :

Sc in every stitch (30)

Round 16 :

Sc in every stitch (30)

Round 17 :

Sc in every stitch (30)

Round 18 :

*Sc in next 3 stitches,sc2tog* , repeat from * to * (24)

Round 19 :

*Sc in next 2 stitches, sc2tog* repeat from *to* (18)

Info :

Stuff most of the body at this point, topping up as needed after the next row.

Round 20 :

* Sc in next stitch, sc2tog* repeat from * to * (12)

Round 21 :

*Sc2tog*, repeat from * to * (6)

Round 22 :

Fasten off and pass yarn tail through remaining stitches, pull up tightly and sew in end.

β€” Ears :

Round 1 :

Using 1.5mm hook and SCL and leaving a long tail for sewing up. Chain 10, turn

Round 2 :

Skip first stitch, sc in next 9 chains, ch 1, turn

Round 3 :

Skip first stitch, sc in next 8 stitches, ch 1, turn

Round 4 :

Skip first stitch, sc in next 7 stitches, ch 1, turn

Round 5 :

Skip first stitch, sc in next 6 stitches, ch 1, turn.

Round 6 :

Skip first stitch, sc in next 5 stitches, ch 1, turn

Round 7 :

Skip first stitch, sc in next 4 stitches, ch 1, turn

Round 8 :

Skip first stitch, sc in next 3 stitches, ch 1, turn

Round 9 :

Skip first stitch, sc in next 2 stitches, ch 1, turn

Round 10 :

Skip first stitch, sc in next stitch, cut yarn (leaving a long end for sewing up and pull through loop to finish off and create point of triangle

β€” Snout :

Round 1 :

Using 1.5mm hook and SCL , Work 6 sc into a magic ring, tighten ring

Round 2 :

2 sc in each stitch around (12)

Round 3 :

Working in back loops, sc in each stitch (12)

Round 4 :

Sc in each stitch (12)

Info :

Fasten off but leave ends for sewing up With black/dark brown yarn make 2 small stitches at either side of the front of the snout to create nostrils

β€” Blanket :

Round 1 :

Using 2.5mm hook and C1, chain 25 Round1. 2 dc in 4th ch from hook, *skip 2chains, in next chain work 3 dc* repeat from * to * until there are 3 ch left (6 dc3 clusters) skip 2 chains, in last chain work 3dc, ch2, 3dc, ch 2, 3dc. Continue working along opposite side of the initial chain *skip 2chains, dc 3 in next chain* repeat from * to * last 2 unworked chains. Skip these 2 chains and in final chain work 3 dc, ch 2, 3dc, ch2. Join with a slip stitch to initial chain to close the round.

Round 2 :

With right side facing, join C2 between any 2 3dc clusters on long side. Ch3 (counts as 1st dc), 2dc in same space. Work 3dc in every space between clusters. In each corner chain 2 space, work 3dc ch 2 3dc. Slip stitch to top of chain 3 to close the round

Round 3 :

In C3 repeat round 2.

Round 4 :

With right side facing, join C1 in any stitch along either long side, ch1 and then work 1sc in each stitch around. In each corner ch 2 space, work 1sc, ch 2 1sc.

Info :

Fasten off and neaten ends.

β€” TO MAKE UP :

Item Name (P1) :

1)Fold point of ear down to either corner and secure with a stitch, this makes the fold in the pigs ear. . Repeat with the other ear but fold to the opposite corner. You should have 2 symmetrical folded ears. Stitch the ears to either side of the top of the head positioning them between rows 2 and 5 (approx)

Item Name (P2) :

2) Add a tiny bit of stuffing if desired and stitch the snout to the front of the head in between and one row down from the eyes.

Item Name (P3) :

3) wrap the blanket around your pig securing with pins if necessary and once you’re happy with the position stitch in place along the top edge and the 2 top corners. (as photo). I find invisible sewing thread ideal for this.

Assembly Instructions

  • Fold the point of each ear down to form the pig ear shape and secure with a stitch; stitch the ears to either side of the head between rows 2 and 5 (approx).
  • Stitch the snout to the front of the head, positioned between and one row down from the eyes; add a tiny bit of stuffing to the snout if desired before sewing.
  • Wrap the blanket around the pig and pin to find the best position, then stitch along the top edge and at the two top corners to secure the blanket in place.
  • Use invisible sewing thread or a matching yarn to sew pieces neatly; weave in ends and neaten seams for a tidy finish.

Important Notes

  • πŸ’‘This pattern is written in US terms; if you use UK terms consult a conversion chart at EasyCrochet.com.
  • πŸ’‘Gauge is not important for this pattern but you may need to adjust hook size for your tension.
  • πŸ’‘All pieces are worked without turning unless otherwise stated; use a stitch marker to mark the beginning of rounds.
  • πŸ’‘Where useful, stitch counts for each row/round are shown in brackets; count stitches regularly to avoid mistakes.

This little pig in a granny-square blanket is a joyful and colorful handmade gift for any occasion. It is quick to make, uses small yarn amounts, and is perfect for scrap-busting. Wrap it up as a cute ornament or surprise for a friend 🐷🧢

You ask,

we answer.

FAQs

What size will the finished piece be?

The finished pig measures approximately 6-8 cm tall as an ornament when using the recommended yarns and hook sizes; exact size will vary with tension and yarn choice.

Can I use different yarn weights for this pattern?

Yes, you can change yarn weight, but this will affect the final size; if using thicker yarn, use a larger hook and expect a chunkier pig, or thinner yarn and smaller hook for a tiny version.

Do I need prior crochet experience for this pattern?

This pattern is rated Beginner Friendly, so basic knowledge of magic ring, single crochet, decreases and double crochet clusters is recommended for best results.

How long does this project typically take to complete?

Most crocheters complete this project in 2-4 hours, depending on experience and whether you make the blanket in multiple colors or add extra embellishments.