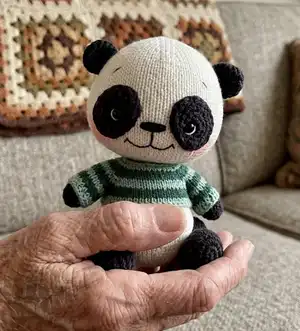
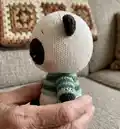
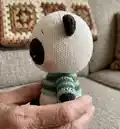
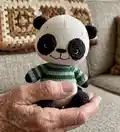
Make a charming handmade panda amigurumi with this detailed, photo-assisted crochet pattern. You will work with soft velvet and cotton blends to create a cuddly 16 cm toy with movable joints and a striped sweater. The pattern includes step-by-step rounds, assembly guidance, and finishing tips so you can follow along with confidence and create a polished, gift-ready toy.
Progress Tracker
0% Complete
— Head :
Info :
Work with cream yarn. Stuff as you go.
Round 3 :
(1sc, inc)*6 (18)
Round 4 :
1sc, inc, (2sc, inc)*5, 1sc (24)
Round 5 :
(3sc, inc)*6 (30)
Round 6 :
2sc, inc, (4sc, inc)*5, 2sc (36)
Round 7 :
(5sc, inc)*6 (42)
Round 8 :
3sc, inc, (6sc, inc)*5, 3sc (48)
Round 9 :
(7sc, inc)*6 (54)
Round 10 :
4sc, inc, (8sc, inc)*5, 4sc (60)
Round 11 :
(9sc, inc)*6 (66)
Round 12-13 :
66sc (2 rounds)
Round 14 :
(21sc, inc)*3 (69)
Round 15-16 :
69sc (2 rounds)
Round 17 :
11sc, inc, (22sc, inc)*2, 11sc (72)
Round 18-19 :
72sc (2 rounds)
Round 20 :
(23sc, inc)*3 (75)
Round 22 :
12sc, inc, (24sc, inc)*2, 12sc (78)
Round 23-27 :
78sc (5 rounds)
Round 28 :
(11sc, dec)*6 (72)
Round 29 :
5sc, dec, (10sc, dec)*5, 5sc (66)
Round 30 :
(9sc, dec)*6 (60)
Round 31 :
4sc, dec, (8sc, dec)*5, 4sc (54)
Round 32 :
(7sc, dec)*6 (48)
Round 33 :
2sc, dec, (4sc, dec)*7, 2sc (40)
Round 34 :
(3sc, dec)*8 (32)
Round 35 :
(2sc, dec)*8 (24)
Round 36 :
(1sc, dec)*8 (16)
Info :
Cut the yarn, fasten off, leaving the end for sewing pieces.
— Eye Spots (make 2) :
Info :
Work with black yarn. Ch6, start on the second chain from the hook.
Round 1 :
4sc, 3sc in the last chain, on the other side of the chain: 3sc, inc (12)
Round 2 :
inc, 3sc, 3inc, 3sc, 2inc (18)
Round 3 :
1sc, inc, 3sc, (1sc, inc)*3, 3sc, (1sc, inc)*2 (24)
Round 4 :
2sc, inc, 3sc, (2sc, inc)*3, 3sc, (2sc, inc)*2 (30)
Info :
Cut the yarn, fasten off, leaving the end for sewing pieces.
— Eye Attachment and Embroidery :
Infos :
Attach the eye spots to the head with sewing pins and sew. Using an embroidering floss (2 strands), embroider the eyebrows and mouth. Using an embroidering floss (full thread), embroider the nose (4-5 stitches). With sewing pins mark the place of sewing on the eyes.
Info :
Take the eye D6-7mm and thread the thread into the loop. Pass both threads into the needle and insert it into the points marked with sewing pins and exit it through the back of the head. Repeat the same with the second eye (NOTE! Exit the threads of the first and second eyes at one point behind). Lightly pull the threads and tie together in a knot. Hide the ends inside the head.
Info :
Using a white embroidering floss (full thread), embroider the whites of the eyes. Tint the cheeks with blush or peach-colored pastel.
— Ears (make 2) :
Info :
Work with black yarn. Do not stuff.
Round 3 :
(2sc, inc)*4 (16)
Round 4-7 :
16sc (4 rounds)
Info :
Fold in half and crochet 8sc through both sides. Cut the yarn, fasten off, leaving the end for sewing pieces. Attach the ears to the head with sewing pins (in an arc, not a straight line) and sew.
— Forelegs (make 2) :
Info :
Work with black yarn. The marker of the beginning of the round passes behind the leg in the middle. If necessary, crochet extra stitches.
Round 2 :
(1sc, inc)*3 (9)
Round 3 :
(2sc, inc)*3 (12)
Round 4-6 :
12sc (3 rounds)
Round 7 :
6sc, inc, 5sc (13)
Round 9 :
6sc, inc, 6sc (14)
Round 11 :
7sc, inc, 6sc (15)
Round 12 :
7sc, inc, 7sc (16)
Info :
Begin to gradually stuff the leg with fiberfill. Stuff tightly only the lower part. At this stage, you need to make sure that the marker is located at the back of the leg in the middle.
Info :
Left foreleg - For plastic joints: Round 14: 11sc, ch2, skip 2sc, 3sc (16). Round 15: 11sc, 2sc on the chain, 3sc (16). For cotter pins: Rounds 14-15: 16sc (2 rounds).
Info :
Right foreleg - For plastic joints: Round 14: 3sc, ch2, skip 2sc, 11sc (16). Round 15: 3sc, 2sc on the chain, 11sc (16). For cotter pins: Rounds 14-15: 16sc (2 rounds).
Info :
Select the diameter of the fastening: fold the leg in half and select a disk / joint that occupies the entire internal space of the leg (the disk / joint D15mm suits me). When using a cotter pin, move 2 rounds down and from the marker: 4sc to the left (for the right foreleg) and 4sc to the right (for the left foreleg). Insert a disk with a cotter pin at the marked point/joint in the hole that was done. Continue to gradually stuff the leg with fiberfill. Stuff the upper part of the leg slightly.
Round 16 :
(2sc, dec)*4 (12)
Info :
Cut the yarn. Pull off the hole and hide the ends.
— Hind Legs (make 2) :
Info :
Work with black yarn. Ch5, start on the second chain from the hook.
Round 1 :
3sc, 4sc in the last chain, on the other side of the chain: 2sc, inc (11)
Round 2 :
inc, 2sc, 3sc inc, 2sc, 3sc inc, 2sc, 2inc (18)
Round 3 :
1sc, inc, 3sc, 3sc inc, 4sc, 3sc inc, 3sc, (1sc, inc)*2 (25)
Round 5 :
24sc - short round (you may have a different number of stitches). Move the marker. It should go behind the leg, in the center of the heel. Guideline - a straight line of the foundation chain. In the process align the marker by crocheting extra stitches.
Round 6 :
8sl st, 9sc, 8sl st (25)
Round 7 :
5sc, (1sc, dec)*5, 5sc (20)
Round 8 :
5sc, 5dec, 5sc (15)
Round 9 :
6sc, sc3tog, 6sc (13)
Round 10 :
6sc, inc, 6sc (14)
Round 12 :
7sc, inc, 6sc (15)
Round 14 :
7sc, inc, 7sc (16)
Round 15 :
(7sc, inc)*2 (18)
Round 16 :
(8sc, inc)*2 (20)
Info :
Begin to gradually stuff the leg with fiberfill. Stuff tightly only the lower part (foot). At this stage, you need to make sure that the marker is located at the back of the leg in the middle.
Info :
Left hind leg - Plastic joints: Round 18: 12sc, ch2, skip 2sc, 6sc (20). Round 19: 12sc, 2sc on the chain, 6sc (20). Cotter pins: Rounds 18-19: 20sc (2 rounds).
Info :
Right hind leg - Plastic joints: Round 18: 6sc, ch2, skip 2sc, 12sc (20). Round 19: 6sc, 2sc on the chain, 12sc (20). Cotter pins: Rounds 18-19: 20sc (2 rounds).
Info :
Select the diameter of the fastening: fold the leg in half and select a disk / joint that occupies the entire internal space of the leg (the disk / joint D25mm suits me). When using a cotter pin, move 2 rounds down and from the marker: 7sc to the left (for the right hind leg) and 7sc to the right (for the left hind leg). Insert a disk with a cotter pin at the marked point/joint in the hole that was done. Continue to gradually stuff the leg with fiberfill. Stuff the upper part of the leg slightly.
Round 20-21 :
20sc (2 rounds)
Round 22 :
(8sc, dec)*2 (18)
Round 23 :
(1sc, dec)*6 (12)
Info :
Cut the yarn. Pull off the hole and hide the ends.
— Body :
Info :
Start crocheting with cream yarn. The marker of the beginning of the round will be placed at the back in the middle. If necessary, crochet extra stitches.
Round 3 :
(1sc, inc)*7 (21)
Round 4 :
1sc, inc, (2sc, inc)*6, 1sc (28)
Round 5 :
(3sc, inc)*7 (35)
Round 6 :
2sc, inc, (4sc, inc)*6, 2sc (42)
Round 7 :
(5sc, inc)*7 (49)
Round 8 :
3sc, inc, (6sc, inc)*6, 3sc (56)
Round 9-10 :
56sc (2 rounds)
Info :
In round 11 crochet the holes for the hind legs with plastic joints and determine the place of attachment of the cotter pins.
Info :
For plastic joints: Round 11: 12sc, ch2, skip 2sc, 28sc, ch2, skip 2sc, 12sc (56). Round 12: 12sc, 2sc on the chain, 28sc, 2sc on the chain, 12sc (56).
Info :
For cotter pins: Round 11: 56sc (mark the space between stitches 13 and 14 and the space between stitches 43 and 44 with a thread in a contrasting color for convenience) (56). Round 12: 56sc (56).
Round 13-16 :
56sc (4 rounds)
Round 17 :
13sc, dec, 26sc, dec, 13sc (54)
Info :
Insert the cotter pins / joints of the hind legs into the marked points / crocheted holes of ch2 in the body and secure/snap.
Round 19 :
18sc, dec, 3sc, dec, 4sc, dec, 3sc, dec, 18sc (50)
Round 21 :
22sc, dec, 2sc, dec, 22sc (48)
Round 22 :
7sc, dec, (14sc, dec)*2, 7sc (45)
Info :
Change color to black, cut the cream yarn. In round 23 crochet the holes for the forelegs with plastic joints and determine the place of fastening of the cotter pins.
Info :
For plastic joints: Round 23: 10sc, ch2, skip 2sc, 21sc, ch2, skip 2sc, 10sc (45). Round 24: 10sc, 2sc on the chain, 1sc, dec, 13sc, dec, 3sc, 2sc on the chain, 8sc, dec (42).
Info :
For cotter pins: Round 23: 45sc (45)(mark the space between stitches 11 and 12 and the space between stitches 34 and 35 with a thread in a contrasting color). Round 24: (13sc, dec)*3 (42).
Round 25-26 :
42sc (2 rounds)
Round 27 :
6sc, dec, (12sc, dec)*2, 6sc (39)
Round 28 :
(11sc, dec)*2 (36)
Info :
Insert the cotter pins / joints of the forelegs into the marked points / crocheted holes of ch2 in the body and secure/snap.
Info :
Stuff the body gradually with fiberfill.
Round 29 :
2sc, dec, (4sc, dec)*5, 2sc (30)
Round 30 :
(3sc, dec)*6 (24)
Round 31 :
(2sc, dec)*6 (18)
Round 32 :
(7sc, dec)*2 (16)
Info :
Cut the yarn, fasten off and hide the ends inside. If desired, you can make a wire frame. Take a D1mm wire and fold it in half, as shown in the photo. Wrap the junction of the two ends with insulating tape and insert the frame with one half into the body, and the other half to the head. Sew the head to the body.
— Tail :
Info :
Crochet with cream yarn.
Round 4 :
(1sc, dec)*4 (8)
Info :
Cut the yarn, fasten off, leaving the end for sewing pieces. Attach the tail to the back with sewing pins (see photo) and sew. In the process slightly stuff the tail with fiberfill.
— Sweater :
Info :
Start crocheting with mint green yarn in rows. Try on the sweater in the process. If it is large or small, change the hook to a size smaller or larger. Ch37, from the second chain on the hook.
Row 1 :
36sc (36), t-ch, turn
Row 2 :
4sc, inc, (8sc, inc)*3, 4sc (40), t-ch, turn
Info :
Change color to dark green.
Row 3 :
BLO: (6sc, 3sc inc)*2, 6sc, inc, 5sc, (3sc inc, 6sc)*2 (49) t-ch, turn
Row 4 :
3sc, inc, 41sc, inc, 3sc (51), t-ch, turn
Info :
Change color to mint green.
Row 5 :
BLO: (8sc, 3sc inc)*2, 15sc, (3sc inc, 8sc)*2 (59), t-ch, turn
Row 6 :
3sc, inc, 51sc, inc, 3sc (61)
Info :
Change color to dark green.
Row 7 :
BLO: (10sc, 3sc inc)*2, 17sc, (3sc inc, 10sc)*2 (69), t-ch, turn
Row 8 :
11sc, ch6, skip 14sc, 9sc, inc, 9sc, ch6, skip 14sc, 11sc (54), t-ch, turn
Info :
Change color to mint green.
Row 9 :
BLO: 11sc, (3sc, inc, 2sc) on the chain, 20sc, (2sc, inc, 3sc) on the chain, 11sc (56), t-ch, turn
Info :
Do not cut the yarn. Make an edging on the side of the sweater and crochet buttons loops. Work with mint green yarn: 1sc, ch4 (button loop), 1sc, dark green yarn - 2sc, etc. repeat to the neckline (see photo). Cut the yarn and hide the ends. Sew buttons on the opposite side of the sweater.
— Sleeves :
Info :
Crochet the sleeves (you can adjust the length of the sleeve by crocheting more or less rounds). Attach the dark green yarn to the first unused front loop of row 7 (hold the sweater with the front side towards you) and work:
Sleeve Row 1 :
14sc, 6sc on the chain of row 8 (20)
Sleeve Row 2 :
Change color to mint green. BLO: 20sc (20)
Sleeve Row 4 :
Change color to dark green. BLO: 20sc (20)
Sleeve Row 6 :
Change color to mint green. BLO: 20sc (20)
Info :
Cut the yarn, fasten off and weave in the ends. Crochet the second sleeve in the same way.
Info :
Put the sweater on the panda and, moving from it 0.5-1 cm down, embroider the navel with a cross stitch with a black embroidering floss (2 strands).
This adorable panda amigurumi is designed to be both huggable and poseable with movable joints and a tiny striped sweater. It combines soft velvet yarn and baby cotton for a cozy texture and charming finish. Enjoy the step-by-step photos and clear rounds as you bring this little friend to life. 🧶 Sew with love and smile as your panda takes shape! 😊