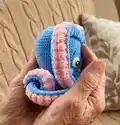
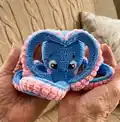
๐Ÿงถ Beautiful โœจ Detailed ๐Ÿ’ Adorable

Ostin The Octopus Amigurumi Pattern

Ostin The Octopus Amigurumi Pattern
4.4โ˜… Rating
5-7 Hours Time Needed
2.1K Made This
โœ‚๏ธ

Intermediate Level

Ideal for those with basic crochet experience, featuring slightly more advanced stitches and techniques to expand your skills.

โฑ๏ธ

Weekend Treat

Takes 5-7 hours, making it an enjoyable project to finish over a couple of days.

๐Ÿงธ

Cute Companion

An adorable friend to cherish, handcrafted with love to bring comfort and joy for years to come.

About This Ostin The Octopus Amigurumi Pattern

This pattern creates a soft, plush octopus with removable-looking two-part tentacles and embroidered facial features. It uses plush yarn for the body and contrasting plush for tentacle suckers, plus semi-cotton for eyes and details. The design includes step-by-step rounds, tentacle inner and outer parts, and a clear assembly section so you can attach tentacles as you crochet.
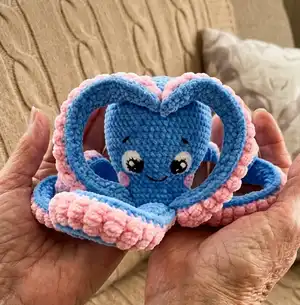
Ostin The Octopus Amigurumi Pattern crochet pattern - detailed view of completed project

The toy measures approximately 18 cm without tentacles and about 42 cm with tentacles using the suggested yarn and hooks. The pattern uses US terminology and includes abbreviations and helpful tips for finishing.

Why You'll Love This Ostin The Octopus Amigurumi Pattern

I absolutely love this pattern because it combines plush yarn softness with playful texture on the tentacles for a tactile, huggable finished toy. I enjoy how the two-part tentacle construction gives realistic movement while remaining easy to sew together during assembly. I appreciate that the eyes and blushes are crocheted and embroidered for durable, safe detailing. I also love how this pattern lets me customize colors and sizes easily, making every octopus unique and gift-ready.

Ostin The Octopus Amigurumi Pattern step 1 - construction progress Ostin The Octopus Amigurumi Pattern step 2 - assembly progress Ostin The Octopus Amigurumi Pattern step 3 - details and accessories Ostin The Octopus Amigurumi Pattern step 4 - final assembly and finishing

Switch Things Up

I love how easy it is to customize this octopus by changing yarn colors; try mint with cream suckers for a vintage look or bold rainbow tentacles for a playful version.

If you want a mini keychain, use thin yarn and a smaller hook and shorten the tentacle rows accordingly to keep the proportions.

I often experiment with different puff stitch sizes for the suckers to create denser or more open textures on the tentacles.

You can replace the embroidered eyes with safety eyes if the toy is for decoration only, but I prefer crocheted eyes for a softer, child-safe finish.

To make the tentacles poseable, I sometimes insert a thin wire inside before finishing; make sure ends are well hidden and secured.

I also add tiny crocheted accessories like a hat or bow to give each octopus personality and make great themed gifts.

Try using variegated plush yarn for a subtle, blended color change along the tentacle edges to add depth without extra sewing.

If you like a firmer body, use slightly tighter tension or denser stuffing, but be careful not to overstuff as it changes the tentacle join shape.

For a bath-friendly toy, choose yarns specified as washable and sew all parts securely, testing seams before use.

I recommend practicing the puff stitch on a small swatch first so you can match the texture and spacing used in the tentacle instructions.

Common Mistakes & How to Fix Them

โœ— Skipping stitch markers during rounds can make it hard to track the start of the round; use a marker at the beginning of every round to avoid confusion. โœ— Overstuffing the head or tentacles will distort the shape and make assembly difficult; stuff gradually and gently to keep natural curves. โœ— Not counting stitches after increases or decreases leads to uneven shaping; count stitches regularly, especially after shaping rounds. โœ— Attaching tentacles without matching side loops will create gaps; insert the hook through both body and side loops and work stitches together to ensure a neat join.
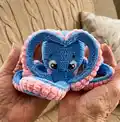
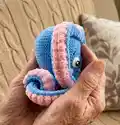
Ostin The Octopus Amigurumi Pattern

Make a cuddly, plush octopus with soft tentacles using this detailed crochet pattern. You will learn how to crochet the head-body, create two-part tentacles with textured suckers, and assemble the toy with embroidered facial features. Clear step-by-step rounds and helpful assembly notes guide you through from start to finish. Perfect for gifting or a charming nursery companion.

Intermediate 5-7 Hours

Materials Needed for Ostin The Octopus Amigurumi Pattern

โ€” Main Fabric

  • 01
    Plush yarn (120 m/100 gr) - YarnArt Dolce or Himalaya Dolphin Baby - Blue (main color) - 1.5-2 balls
  • 02
    Plush yarn (120 m/100 gr) - YarnArt Dolce or Himalaya Dolphin Baby - Pink (tentacles and blushes) - 1.5-2 balls
  • 03
    Semi-cotton yarn (~330 m/100 gr) - Gazzal Jeans/YarnArt Jeans/Alize Cotton Gold - Black (eyes, eyebrows) - small amount
  • 04
    Semi-cotton yarn (~330 m/100 gr) - White (eye highlights) - small amount

โ€” Tools Required

  • 01
    Crochet hook size 3.5 mm (for plush yarn/body and plush tentacle parts)
  • 02
    Crochet hook size 2-2.5 mm (for eyes with semi-cotton yarn)
  • 03
    Needles for sewing eyes and blushes
  • 04
    Stitch markers
  • 05
    Scissors
  • 06
    Fiber filling / polyester stuffing
  • 07
    Yarn needle for sewing parts and weaving ends
  • 08
    Pins for positioning facial features and tentacles
  • 09
    Thin pink cotton thread for sewing blushes (optional)

Progress Tracker

0% Complete

โ€” Tentacles :

Info :

Tentacles: make 8 details (each tentacle consists of inner pink part and outer blue part). Work with 3.5 mm hook for plush yarn. Make a turn and work a turning CH at the end of each row.

โ€” Inner Part :

Round 0 :

Chain 9;

Round 1 :

start in the 2nd chain from the hook: 8 SC;

Round 2 :

2 SC, 4 PS, 2 SC (8);

Round 3 :

FLO: skip the St, 7 SC (7);

Round 4 :

skip the St, SC, 4 PS, SC (6);

Round 5 :

FLO: skip the St, 5 SC (5);

Round 6 :

SC, 3 PS, SC (5);

Round 7 :

FLO: 5 SC (5);

Round 8 :

SC, 3 PS, SC (5);

Info :

then repeat the combination of Rows 7 and 8 12 more times up to Row 32;

Round 33 :

FLO: skip the St, 4 SC (4);

Round 34 :

skip the St, SC, PS, SC (3);

Round 35 :

FLO: skip the St, 2 SC (2);

Info :

fix and cut the thread; fix thread ends between the loops on the wrong side.

โ€” Outer Part :

Info :

Outer part: make 8 details with blue plush yarn and 3.5 mm hook. Make a turn and work a turning CH at the end of each row.

Round 0 :

Chain 9;

Round 1 :

start in the 2nd chain from the hook: 8 SC;

Round 2 :

8 SC;

Round 3 :

skip the St, 7 SC (7);

Round 4 :

skip the St, 6 SC (6);

Round 5 :

skip the St, 5 SC (5);

Round 6 - 32 :

27 rounds 5 SC;

Round 33 :

skip the St, 4 SC (4);

Round 34 :

skip the St, 3 SC (3);

Round 35 :

skip the St, 2 SC (2);

Info :

fix and cut the thread; fix thread ends between the loops on the wrong side.

โ€” Tentacle Assembly :

Info :

Attach two details (inner pink and outer blue) and crochet them around together with SC. At the end of the tentacle work 2 SC in each 2 stitches on the top. Stuff in process of assembling not tight so that the tentacles bend and twist. Do not work in the upper edge stitches of the tentacle. Tie the ends of the threads together and hide inside so that they do not come out.

โ€” Head-Body :

Info :

Use blue plush yarn and 3.5 mm hook. Stuff in process, not tight. If the magic ring of plush yarn cannot be tightened, use 2 CH and work first 6 SC in the second chain from the hook.

Round 1 :

8 SC in MR;

Round 2 :

8 INC (16);

Round 3 :

(SC, INC)*8 (24);

Round 4 :

(2 SC, INC)*8 (32);

Round 5 :

(3 SC, INC)*8 (40);

Round 6 :

(4 SC, INC)*8 (48);

Round 7 :

(5 SC, INC)*8 (56);

Round 8 :

(6 SC, INC)*8 (64);

Round 9 - 20 :

12 rounds 64 SC;

Round 21 :

(14 SC, DEC)*4 (60);

Round 22 :

(13 SC, DEC)*4 (56);

Round 23 :

(12 SC, DEC)*4 (52);

Round 24 :

(11 SC, DEC)*4 (48);

Round 25 :

(10 SC, DEC)*4 (44);

Round 26 :

(9 SC, DEC)*4 (40);

Round 27 :

(8 SC, DEC)*4 (36);

Round 28 :

(7 SC, DEC)*4 (32);

Round 29 :

(3 SC, INC)*8 (40);

Round 30 :

(4 SC, INC)*8 (48);

Round 31 :

(5 SC, INC)*8 (56);

Round 32 :

(6 SC, INC)*8 (64);

Info :

in Round 33 we are going to attach the tentacles; work SC inserting the hook simultaneously into both sides of the tentacle and the body; also, work into side loops of the tentacle; if there are missed loops on the sides and gaps, then work the side loops of the first and second tentacles with the body together.

Round 33 :

(8 SC together with tentacle)*8 (64);

Info :

Change thread color to pink for tentacle inner/top detail and decorative rounds.

Round 34 :

(6 SC, DEC)*8 (56);

Round 35 :

(5 SC, DEC)*8 (48);

Round 36 :

(4 SC, DEC)*8 (40);

Round 37 :

(3 SC, DEC)*8 (32);

Round 38 :

(2 SC, DEC)*8 (24);

Round 39 :

(SC, DEC)*8 (16);

Round 40 :

8 DEC (8);

Info :

Tighten the hole, fix the thread and hide the end inside.

โ€” Blushes :

Info :

Make 2 details with pink plush yarn and 3.5 mm hook.

Round 1 :

6 SC in MR;

Info :

fix the thread and leave a long end for sewing.

โ€” Eyes :

Info :

Start with black semi-cotton yarn and 2 mm hook for the eye base; change threads to white for the eye contour and highlight as indicated. Leave long ends for sewing and embroider glare with white thread end.

Round 1 :

6 SC in MR;

Round 2 :

6 INC;

Round 3 :

(SC, INC)*3, change thread color to white, BLO: (SC, INC)*3 (18);

Round 4 :

BLO: SC, INC, SS, turn (4);

Round 5 :

skip SS of the previous round, 2 SC, 7 INC HDC, 2 SC (18);

Info :

Fix the thread, leave long ends of black and white threads for sewing, and embroider the glare; embroider the glare with white thread end.

โ€” Final Assembly :

Info :

Position and sew all parts following the assembly notes below. Use pins to check placement of eyes and facial features before final sewing.

Round :

Fix the eyes on the head between Rounds 20 and 25 at the distance of 5 SC in the middle of the eyes;

Round :

Sew the eyes along the contour (you may glue them with non-toxic glue);

Round :

Embroider eyebrows (you may also embroider eyelashes);

Round :

Embroider the smile, stretching the thread under the pins and fixing the curve (2 bottom points) with thread;

Round :

Sew blushes with thin pink cotton thread.

Assembly Instructions

  • Attach each tentacle by working SC through both the tentacle side loops and the corresponding stitch on the body during Round 33 so the tentacles are joined as you crochet.
  • Sew the eyes on the head between Rounds 20 and 25, spacing them with 5 SC between their middles; sew along the contour or glue with non-toxic glue and hide thread ends.
  • Position blushes at the sides of the face and sew them on with thin pink cotton thread, using the long tail left when finishing the blush pieces.
  • Embroider the eyebrows and smile using black semi-cotton yarn, stretching the thread under pins to shape the curve and securing the ends inside the head.
  • Stuff the toy gradually during assembly and avoid overstuffing so the tentacles remain bendable and the body keeps a soft shape.

Important Notes

  • ๐Ÿ’กUse stitch markers to keep track of the start of each round, especially when attaching tentacles in Round 33.
  • ๐Ÿ’กStuff parts gradually during assembly and do not stuff tightly so the tentacles can bend and twist naturally.
  • ๐Ÿ’กPin parts in place before sewing to ensure symmetrical placement of eyes, blushes, and tentacles.

This charming octopus pattern is designed to be soft, tactile, and full of personality โ€” perfect for gifting or collecting. ๐Ÿงถ The two-part tentacles add delightful texture and bendability while the embroidered face gives a hundred little expressions. ๐Ÿงต Enjoy customizing colors, and have fun bringing Ostin to life!

You ask,

we answer.

FAQs

What size will the finished piece be?

The toy height is approximately 18 cm (7") without tentacles and about 42 cm (15.5") with tentacles using the recommended yarn and hook sizes.

What yarn and hook sizes are recommended?

Use plush yarn such as YarnArt Dolce or Himalaya Dolphin Baby with a 3.5 mm hook for the body and tentacles; use semi-cotton yarn with a 2 mm hook for crocheting the eyes.

Can I make a smaller or larger version?

Yes, you can change the finished size by using different yarn weights and matching hook sizes; heavier yarn with larger hooks yields a bigger toy, while thinner yarn and smaller hooks create a mini version.

Do I need advanced crochet skills to follow this pattern?

This pattern is rated intermediate because it includes shaping, puff stitches for tentacle suckers, working in BLO/FLO, and attaching tentacles as you crochet.